Upgrade
Upgrade Overview
This document describes the steps and methods for upgrading OneCloud from v3.8.x to v3.9.x, and from v3.9.x to v3.9.y (where y is greater than x).
For cross-version upgrades, upgrade through adjacent versions. For example, to upgrade from 3.4.x to 3.8.x, follow these steps:
- Upgrade from 3.4.x to 3.6.x
- Upgrade from 3.6.x to 3.7.x
- Upgrade from 3.7.x to 3.8.x
- Version 3.5 was not released publicly; the next version after 3.4 is 3.6.
- The upgrade process upgrades both control nodes and compute nodes. Perform upgrades during off-peak hours.
Upgrade from 3.8.x to 3.9.x
Cross-version upgrades currently support command-line upgrade only. This method has no network requirements for the user environment. Mount the installation package and run the upgrade command.
Command-Line Upgrade Steps
As an administrator, use an SSH tool to log in remotely to the First Node as the root user.
Starting from version 3.7, upgrades must be performed as the root user.
Upload the higher-version DVD installation package to the First Node, mount it, and run the upgrade command.
# 将高版本的DVD安装包挂载到mnt目录
$ mount -o loop Yunion-x86_64-DVD-3.x-x.iso /mnt
# 切换到/mnt/yunion目录
$ cd /mnt/yunion
$ ./upgrade.sh
After a successful upgrade, the interface looks like the figure below.

Open the About page in the OneCloud web console to check the version information, or run the following command to verify that the product version is as expected.
$ kubectl get oc -n onecloud default -o go-template --template='{{printf "%s\n" .spec.version}}'
v4.0.4
Upgrade from 3.9.x to 3.9.y
Upgrading from 3.9.x to 3.9.y supports both command-line upgrade and UI upgrade.
Command-Line Upgrade Steps
Same as Upgrade from 3.8.x to 3.9.x - Command-Line Upgrade.
UI Upgrade Steps
UI upgrade means upgrading the platform via the Version Update feature on the About page of the OneCloud platform. This feature requires the user environment to have public network access, and UI upgrades are allowed only in the Admin view.
In the Admin view, click the
 icon, then select “About” from the dropdown menu to open the About page.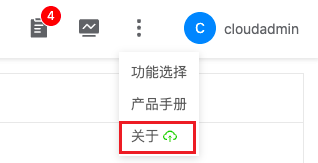
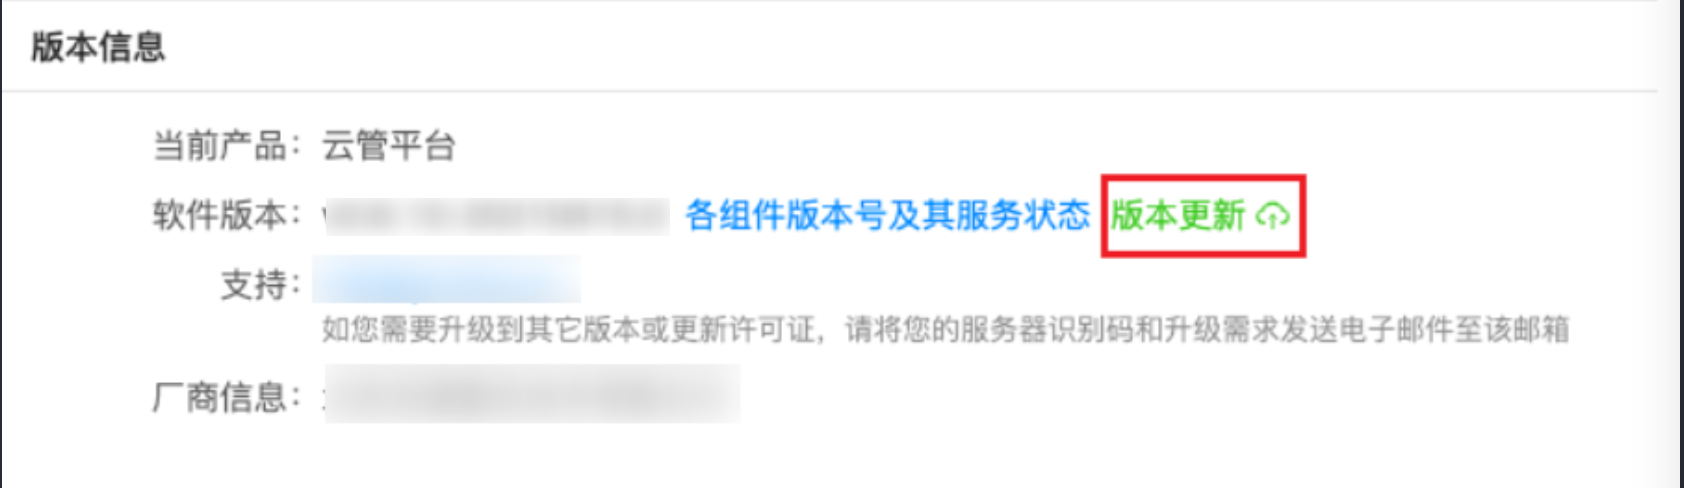
Click the “Version Update” button to open the Version Update dialog.
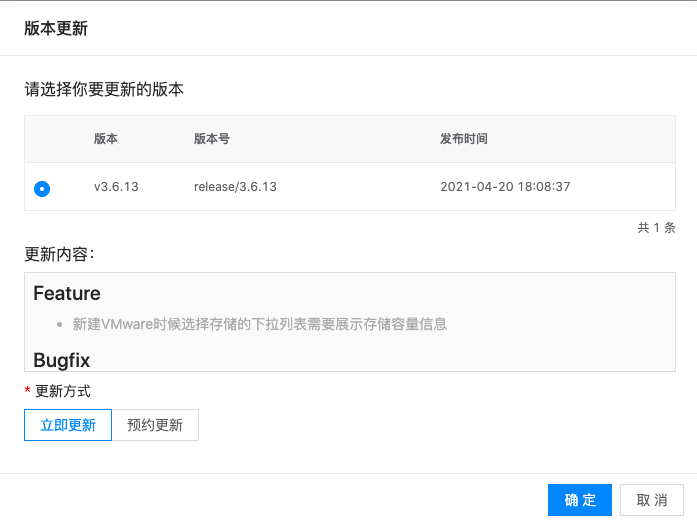
Select the version to upgrade to, and choose an update method.
- Update now: Select “Update now” as the update method, then click the “OK” button.
- Schedule update: Select “Schedule update” as the update method, set a specific time, then click the “OK” button. The product will update at the scheduled time. Before the update runs, you can cancel the scheduled update by clicking the “Cancel” button, then clicking the “OK” button in the confirmation dialog.
After upgrading from 3.0 or 3.1 to 3.2, the console frontend is inaccessible. How do I fix this?
Cause: Before version 3.2, UI migration work caused frontend URLs to include V1 and V2 version fields. In version 3.2, the UI was fully migrated to V2, and version fields were removed from frontend URLs. Environments upgraded from 3.0 or 3.1 to 3.2 still access the frontend with version fields by default, so users cannot reach the web frontend.
Solution: On the First Node, delete the web service ConfigMap and restart the web service.
# 删除default-web的configmap文件
$ kubectl delete configmap -n onecloud default-web
# 删除default-web容器
$ kubectl delete pods -n onecloud default-web-xxx
After upgrading from 3.0 or 3.1 to 3.2, the notify pod is in an abnormal state. How do I fix this?
Cause: After upgrading to version 3.2, the notify service ConfigMap changed compared with previous versions, and the old ConfigMap was not deleted during the upgrade.
Solution: On the First Node, manually delete the notify service ConfigMap and restart the notify service.
# 删除default-notify的configmap文件
$ kubectl delete configmap -n onecloud default-notify
# 删除default-notify容器
$ kubectl delete pods -n onecloud default-notify-xxx