Agent Instances
Agent instances are running AI Agent service instances created from Agent templates and images. They support multiple Agent frameworks such as OpenClaw, Hermes, Dify, and ComfyUI, and provide intelligent conversation, task execution, and other capabilities.
Entry: On the cloud management platform, click the  navigation menu in the upper left corner, then click “Resource Management/Artificial Intelligence/Agent/Agent Instances” in the left sidebar to open the Agent instances page.
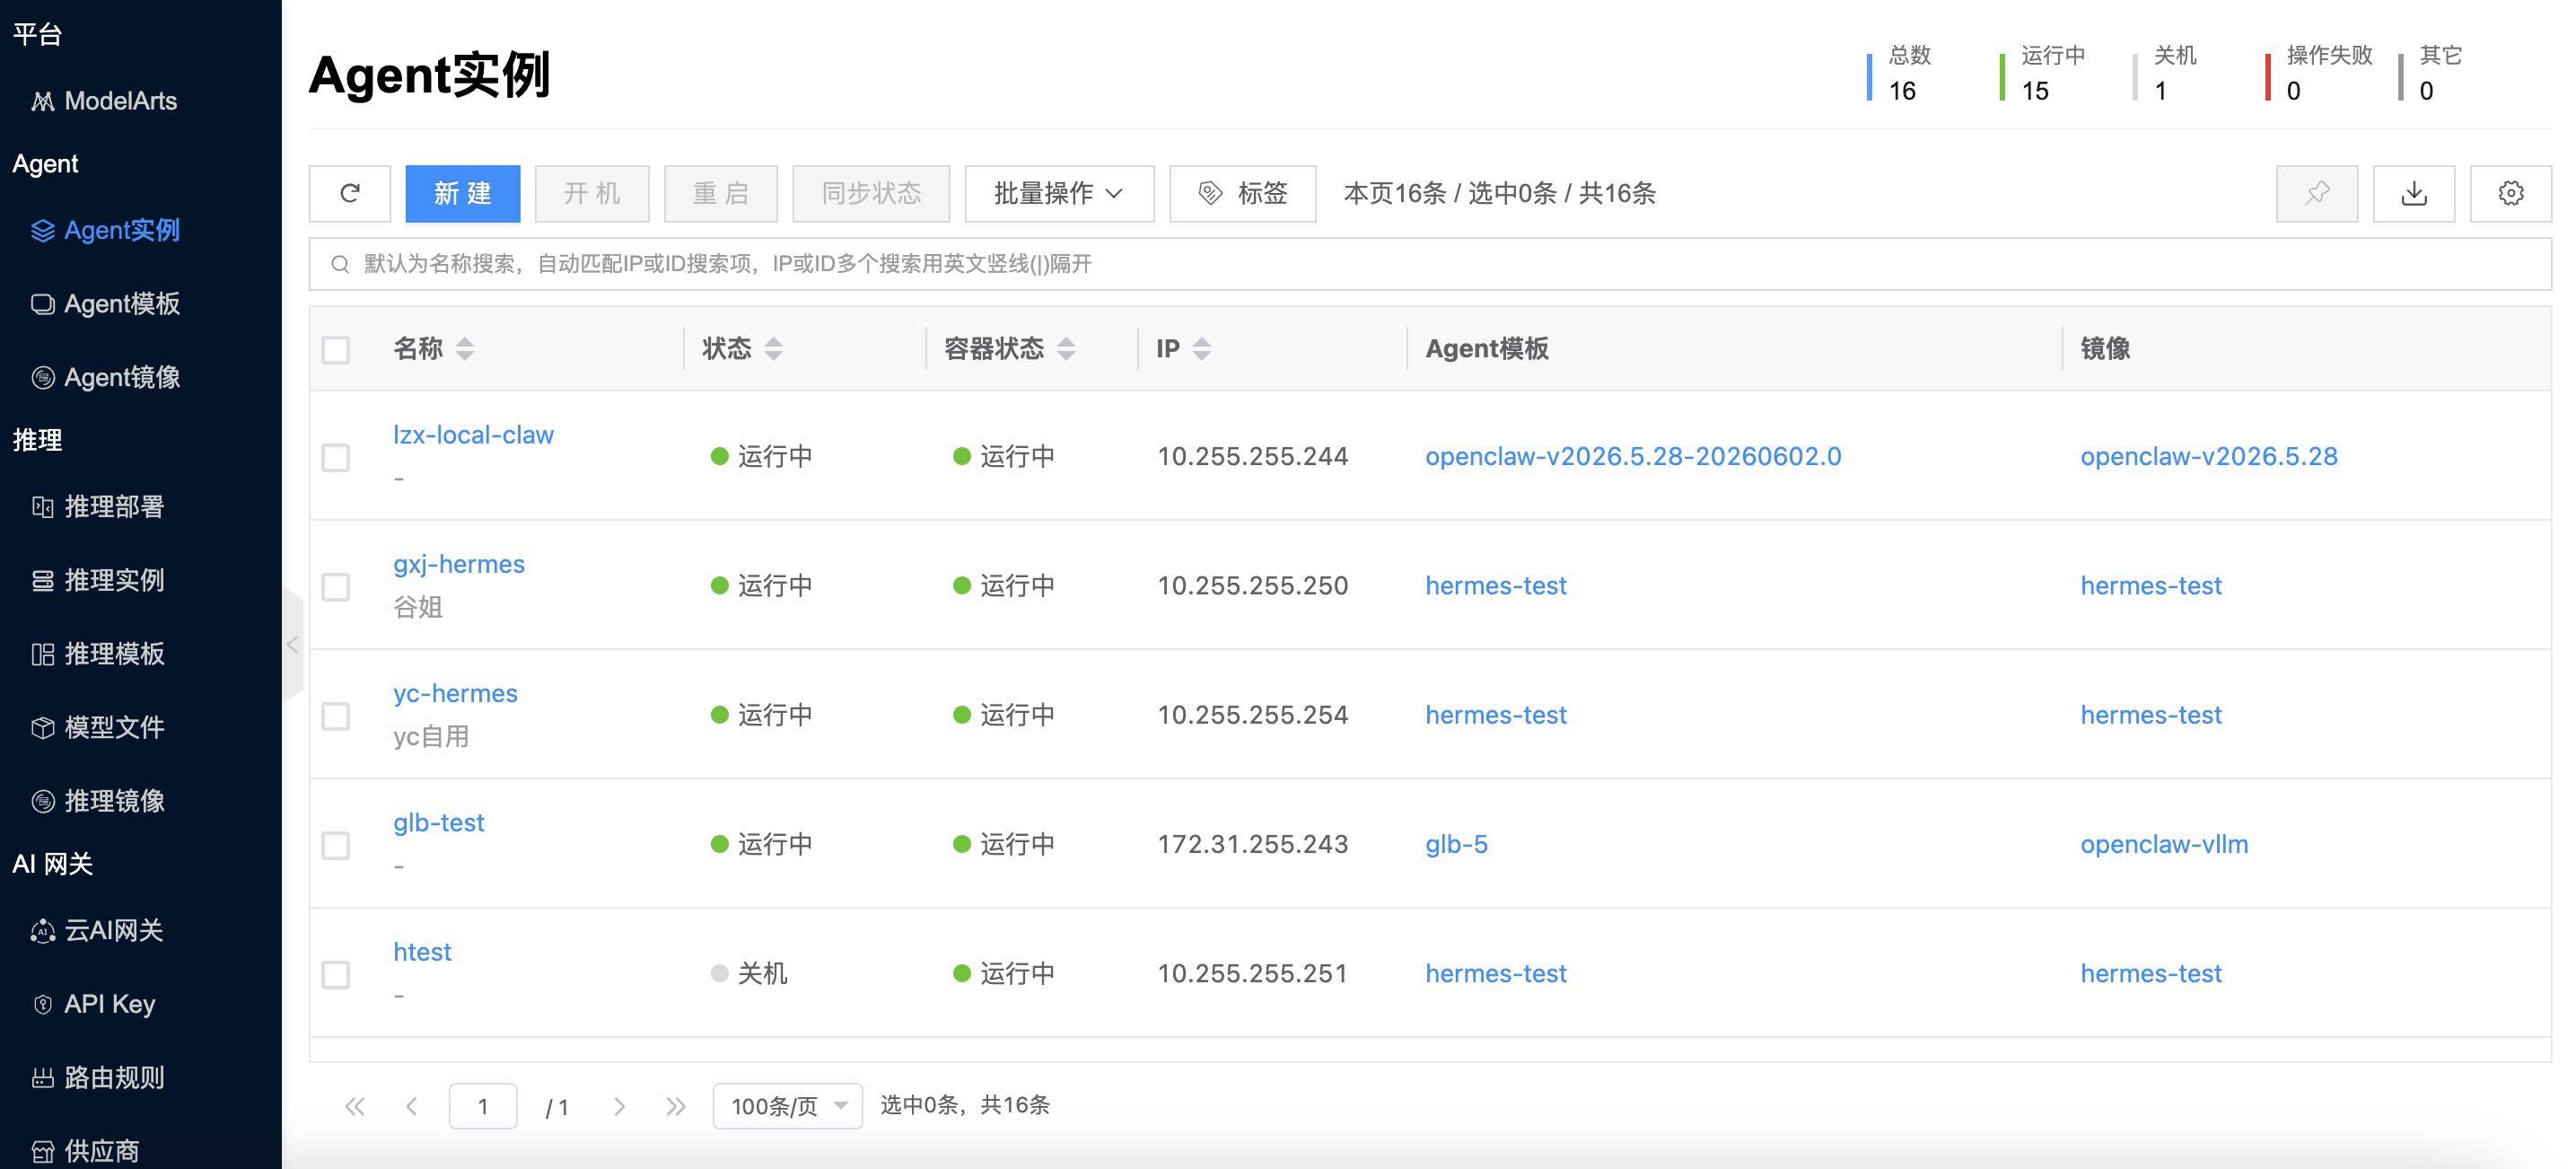
On the Agent instances list page, you can view the name, status, container status, IP, Agent template, image, application type, tag, CPU, memory, data disk, bandwidth, network type, network, project, creation time, and other information, and manage instances.
Create an Agent instance
This feature creates an Agent instance. You can select different Agent templates and images to deploy Agent services.
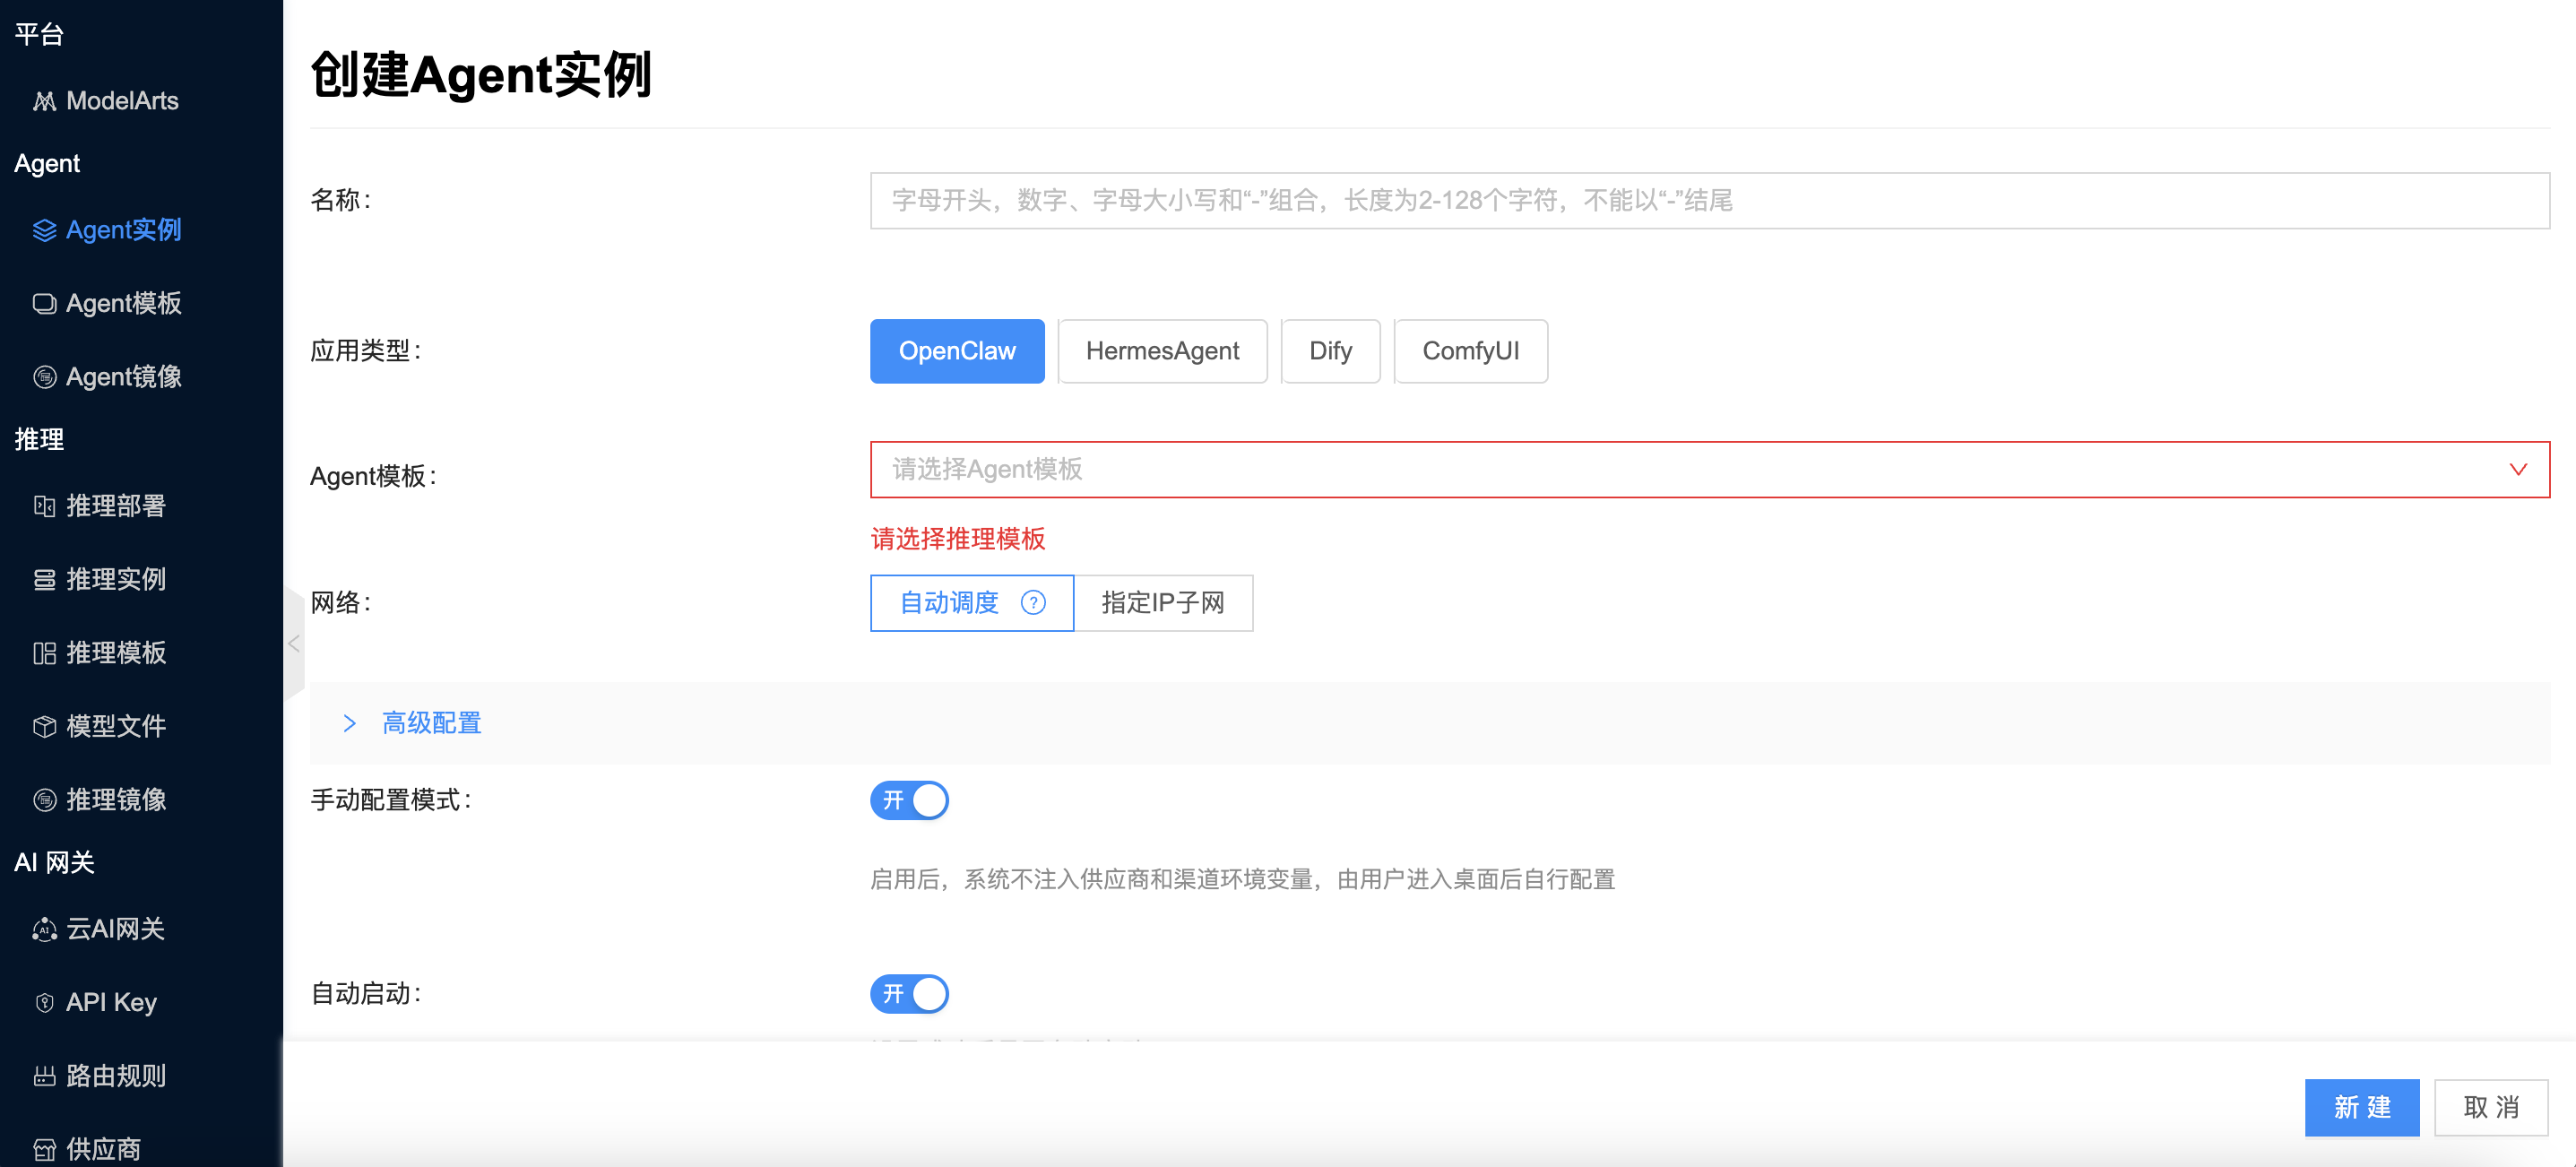
- On the Agent instances page, click “Create” to open the create page.
- Configure the following parameters:
- Specify project: Administrators and domain administrators must specify the project that the instance belongs to when creating an Agent instance.
- Name: Set the Agent instance name.
- Template: Select an Agent template. Supports Agent frameworks such as OpenClaw, Hermes, Dify, and ComfyUI.
- Image: Select an Agent image from public or custom images.
- CPU cores, memory: Set the resource specifications of the Agent instance.
- Platform: Select the platform that the instance belongs to.
- Network: Set the IP address of the Agent instance.
- Auto schedule: When auto schedule is selected, an IP address is allocated for the Agent instance from IP subnets with auto schedule enabled.
- Specify IP subnet: Select a VPC and IP subnet. To specify a static IP, click “Configure IP manually” and set the IP address.
- Tags: Support binding tags to the new Agent instance.
- After configuration, click “Create” to create the Agent instance.
If tickets are enabled, enter the application reason and click “Submit ticket” to submit a ticket for creating the Agent instance. Creation starts only after approval.
Agent instance operations
Agent instances support multiple lifecycle management operations.
Instance status
Start
This feature starts an Agent instance that is in the stopped state.
- On the Agent instances page, for an instance in the “Stopped” state, click “More” in the Actions column, then select “Instance status - Start” from the drop-down menu to start the Agent instance.
Start multiple
- In the Agent instance list, select one or more instances in the “Stopped” state, then click “Start” above the list to start multiple Agent instances in batch.
Stop
This feature stops an Agent instance that is in the running state.
- On the Agent instances page, for an instance in the “Running” state, click “More” in the Actions column, then select “Instance status - Stop” from the drop-down menu to open the confirmation dialog.
- Click “OK” to complete the operation.
Stop multiple
- In the Agent instance list, select one or more instances in the “Running” state, click “Batch actions” above the list, then select “Stop” from the drop-down menu to open the confirmation dialog.
- Click “OK” to complete the operation.
Restart
This feature restarts an Agent instance that is in the running state.
- On the Agent instances page, for an instance in the “Running” state, click “More” in the Actions column, then select “Instance status - Restart” from the drop-down menu to open the confirmation dialog.
- Click “OK”.
Restart multiple
- In the Agent instance list, select one or more instances in the “Running” state, click “Restart” above the list to open the confirmation dialog.
- Click “OK”.
Sync status
When an Agent instance status is abnormal, you can use sync status to repair the instance status.
- On the Agent instances page, click “More” in the Actions column for an instance, then select “Instance status - Sync status” from the drop-down menu to sync the Agent instance status.
Attribute settings
Modify attributes
This feature modifies attribute information of an Agent instance.
- On the Agent instances page, click “More” in the Actions column for an instance, then select “Attribute settings - Modify attributes” from the drop-down menu to open the dialog.
- Modify the name, notes, and other information, then click “OK”.
Change project
This feature changes the project that an Agent instance belongs to.
- On the Agent instances page, click “More” in the Actions column for an instance, then select “Attribute settings - Change project” from the drop-down menu to open the dialog.
- Select the domain and a project under the domain, then click “OK”.
Change project for multiple
- In the Agent instance list, select one or more instances, click “Batch actions” above the list, then select “Change project” from the drop-down menu to open the dialog.
- Select the domain and a project under the domain, then click “OK”.
Release on expiration
Release on expiration sets the usage duration of an Agent instance. When the set period is exceeded, the instance is automatically deleted and moved to the recycle bin.
- On the Agent instances page, click “More” in the Actions column for an instance, then select “Attribute settings - Release on expiration” from the drop-down menu to open the dialog.
- Choose whether to enable release on expiration. If enabled, set the release time, then click “OK”.
Remote terminal
Web SSH
This feature connects to an Agent instance remotely via Web SSH to run interactive command-line commands inside the instance.
- On the Agent instances page, click “Remote terminal” in the Actions column for an instance, then select “Web SSH” to open a new browser tab named Web Console and enter the remote terminal of the instance.
- You can enter commands directly in the terminal for interactive operations.
Delete
Set deletion protection
This feature sets deletion protection for an Agent instance. When deletion protection is enabled, the instance cannot be deleted; when it is disabled, the instance can be deleted.
- On the Agent instances page, click “More” in the Actions column for an instance, then select “Delete - Set deletion protection” from the drop-down menu to open the dialog.
- Select “Enable” or “Disable” deletion protection, then click “OK”.
Delete
This feature deletes an Agent instance.
- On the Agent instances page, click “More” in the Actions column for an instance, then select “Delete - Delete” from the drop-down menu to open the confirmation dialog.
- Click “OK” to complete the operation.
View Agent instance details
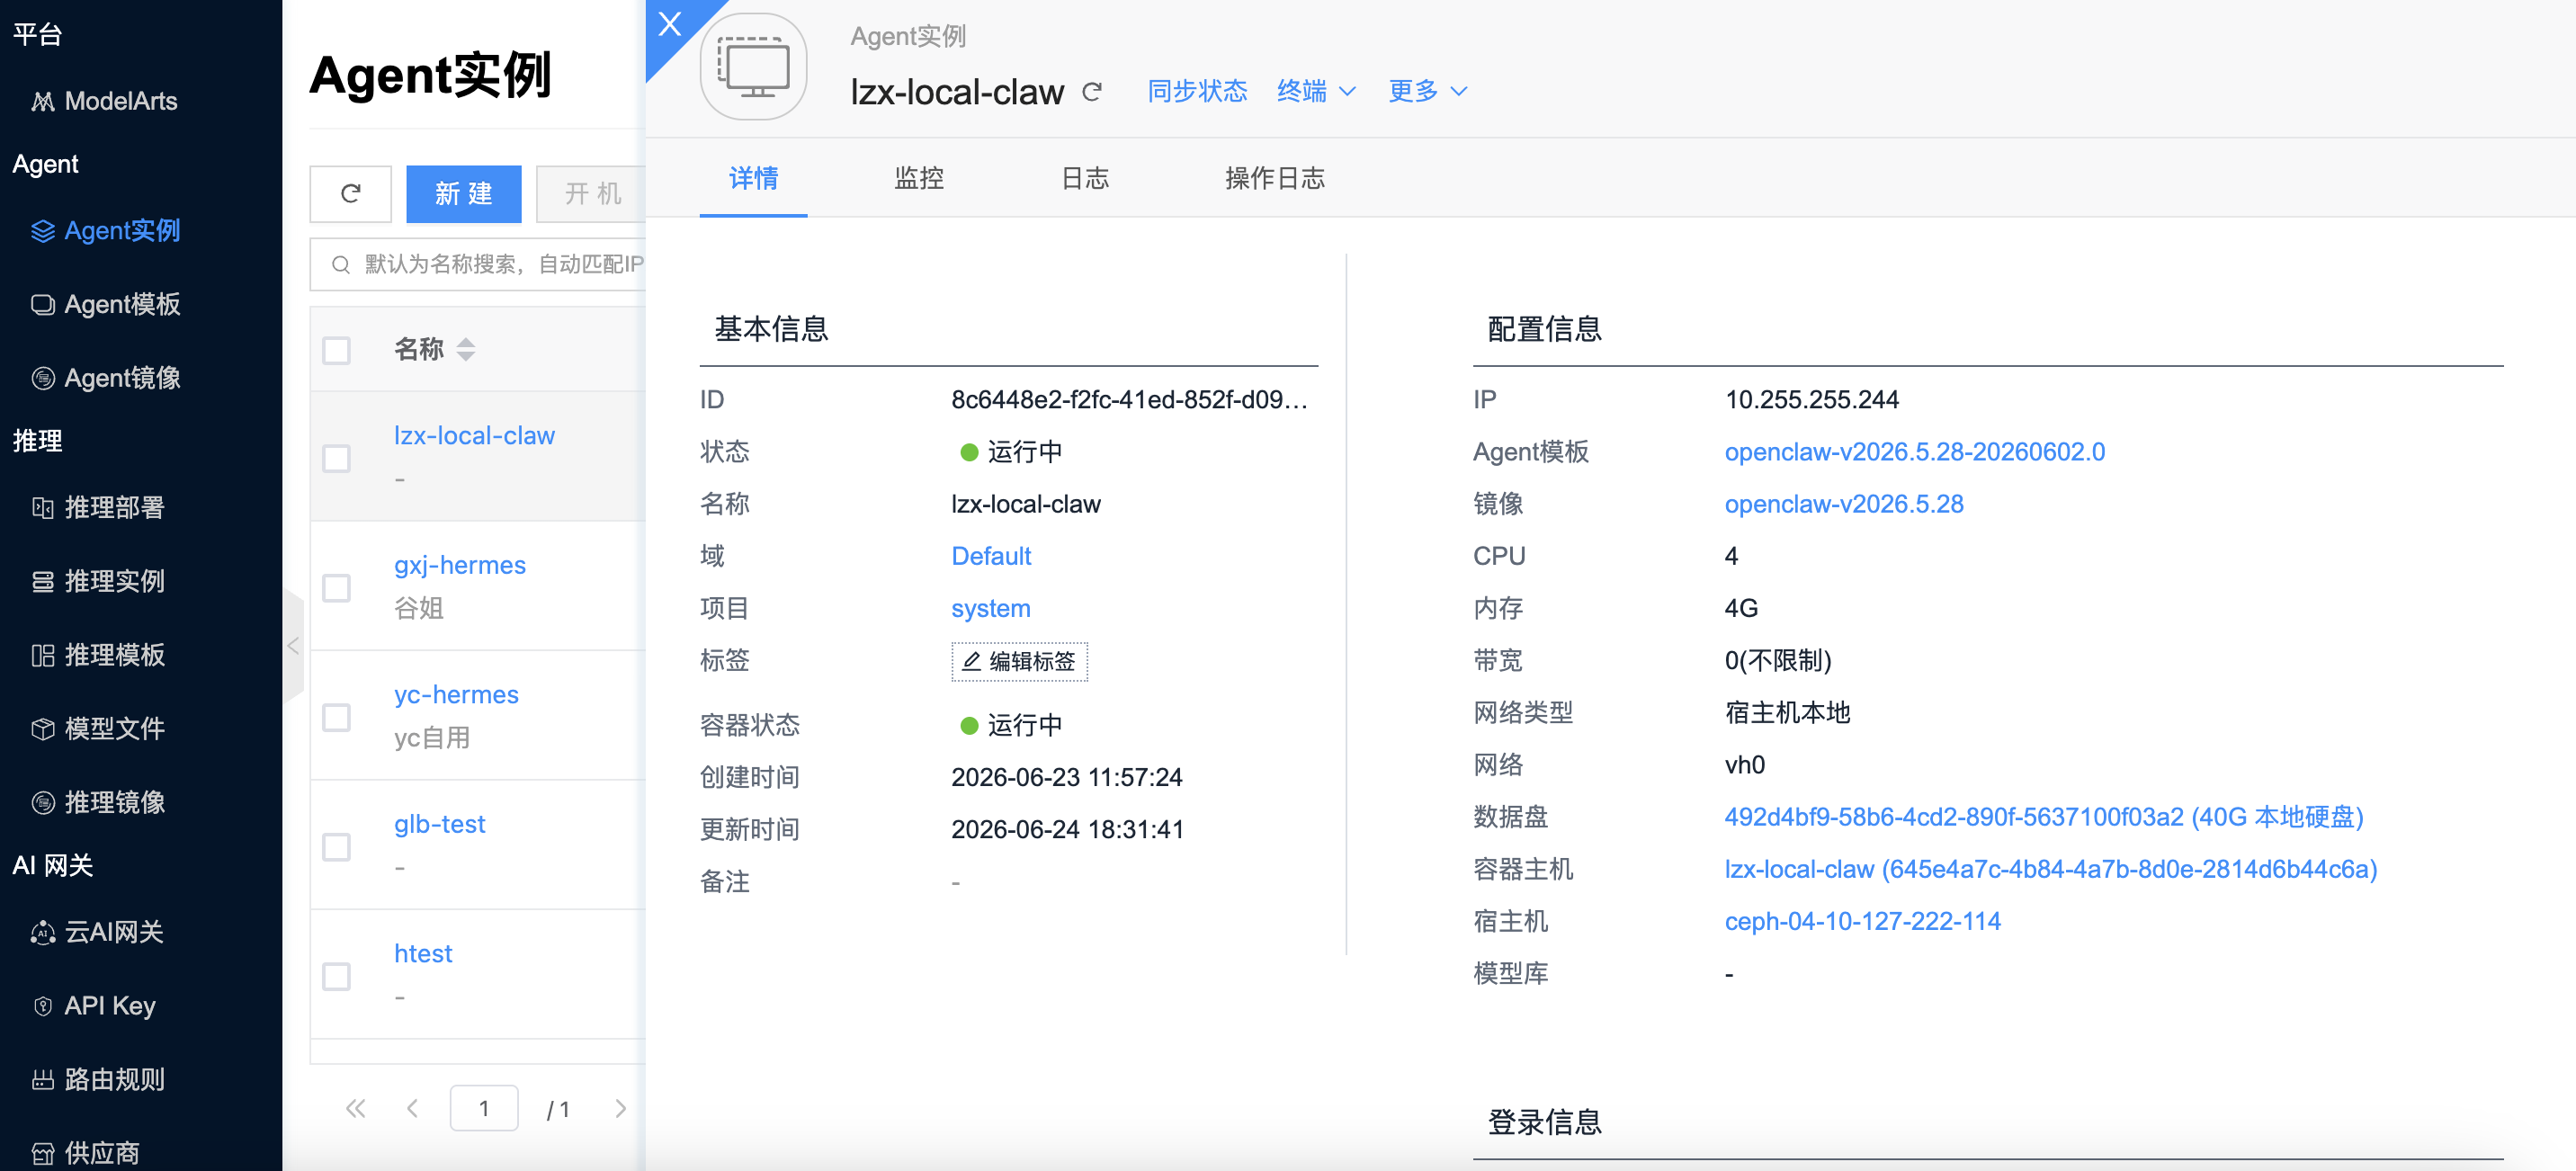
This feature is used to view detailed information about an Agent instance, as well as monitoring, logs, and operation logs.
- On the Agent instances page, click the instance name to open the details page.
- The top menu on the details page supports management operations on the instance.
- View the following information:
- Basic information: ID, name, status, domain, project, platform, region, availability zone, creation time, update time, and notes.
- Configuration: Template, image, CPU, memory, IP address, VPC, security group, and more.
View monitoring information
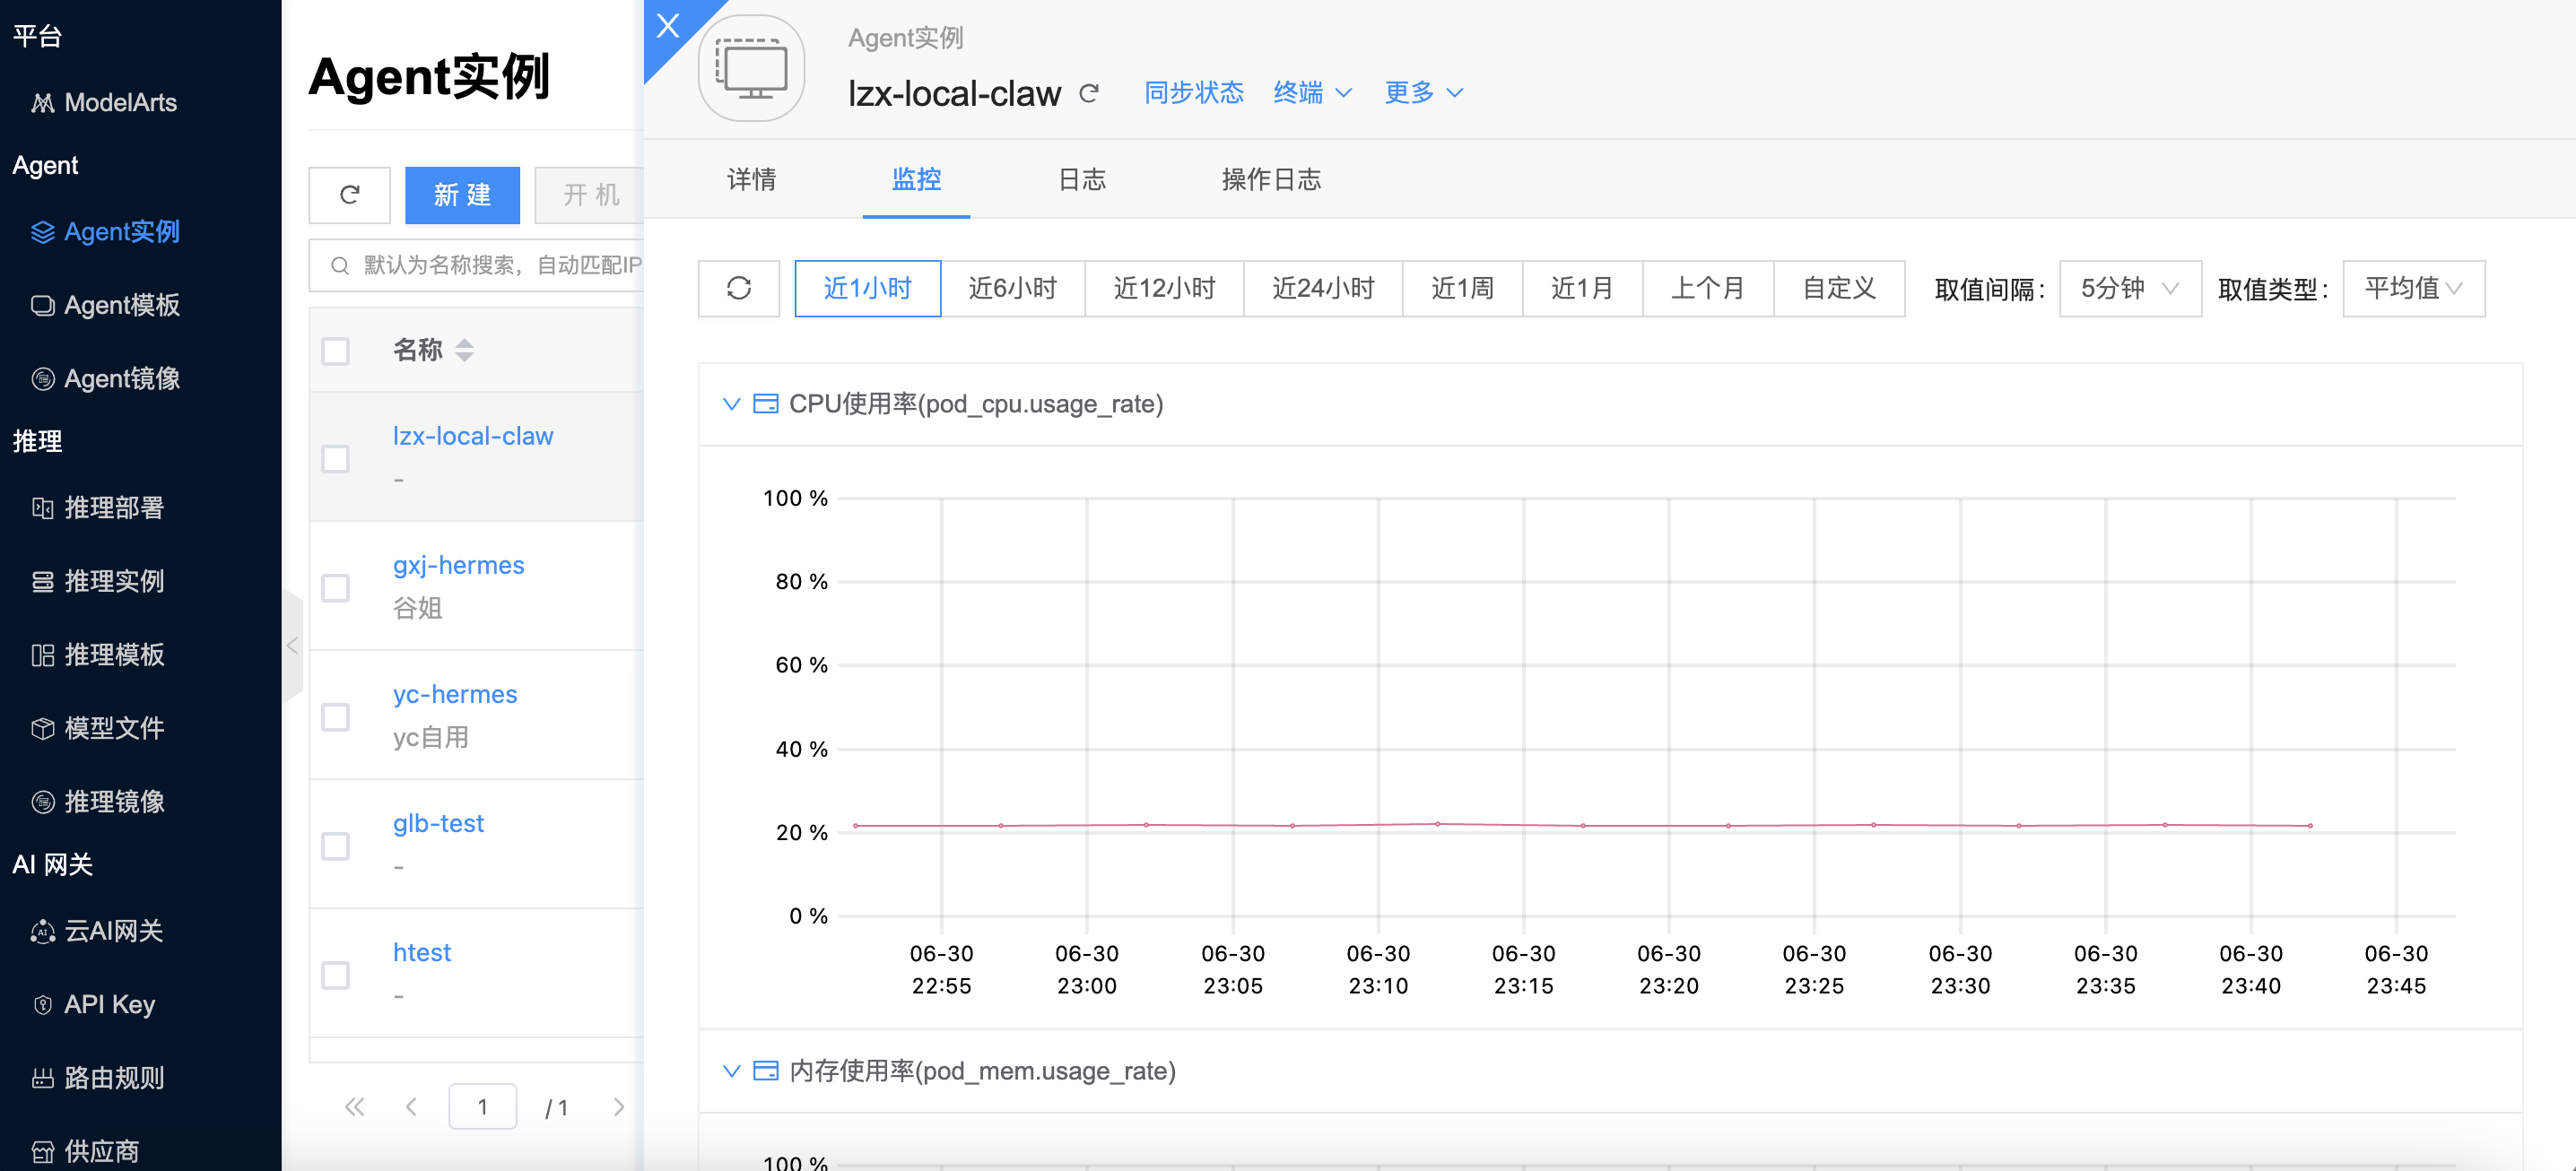
This feature is used to view monitoring information for an Agent instance, showing resource usage of the corresponding container host.
- On the Agent instances page, click the instance name to open the details page.
- Click the “Monitoring” tab to open the monitoring page.
- View the following monitoring information:
- Supports viewing performance monitoring for the last 1 hour, 6 hours, 12 hours, 1 week, and 1 month.
- Metrics include CPU usage, memory usage, inbound network traffic, outbound network traffic, disk usage, disk read rate, disk write rate, and more.
View container logs
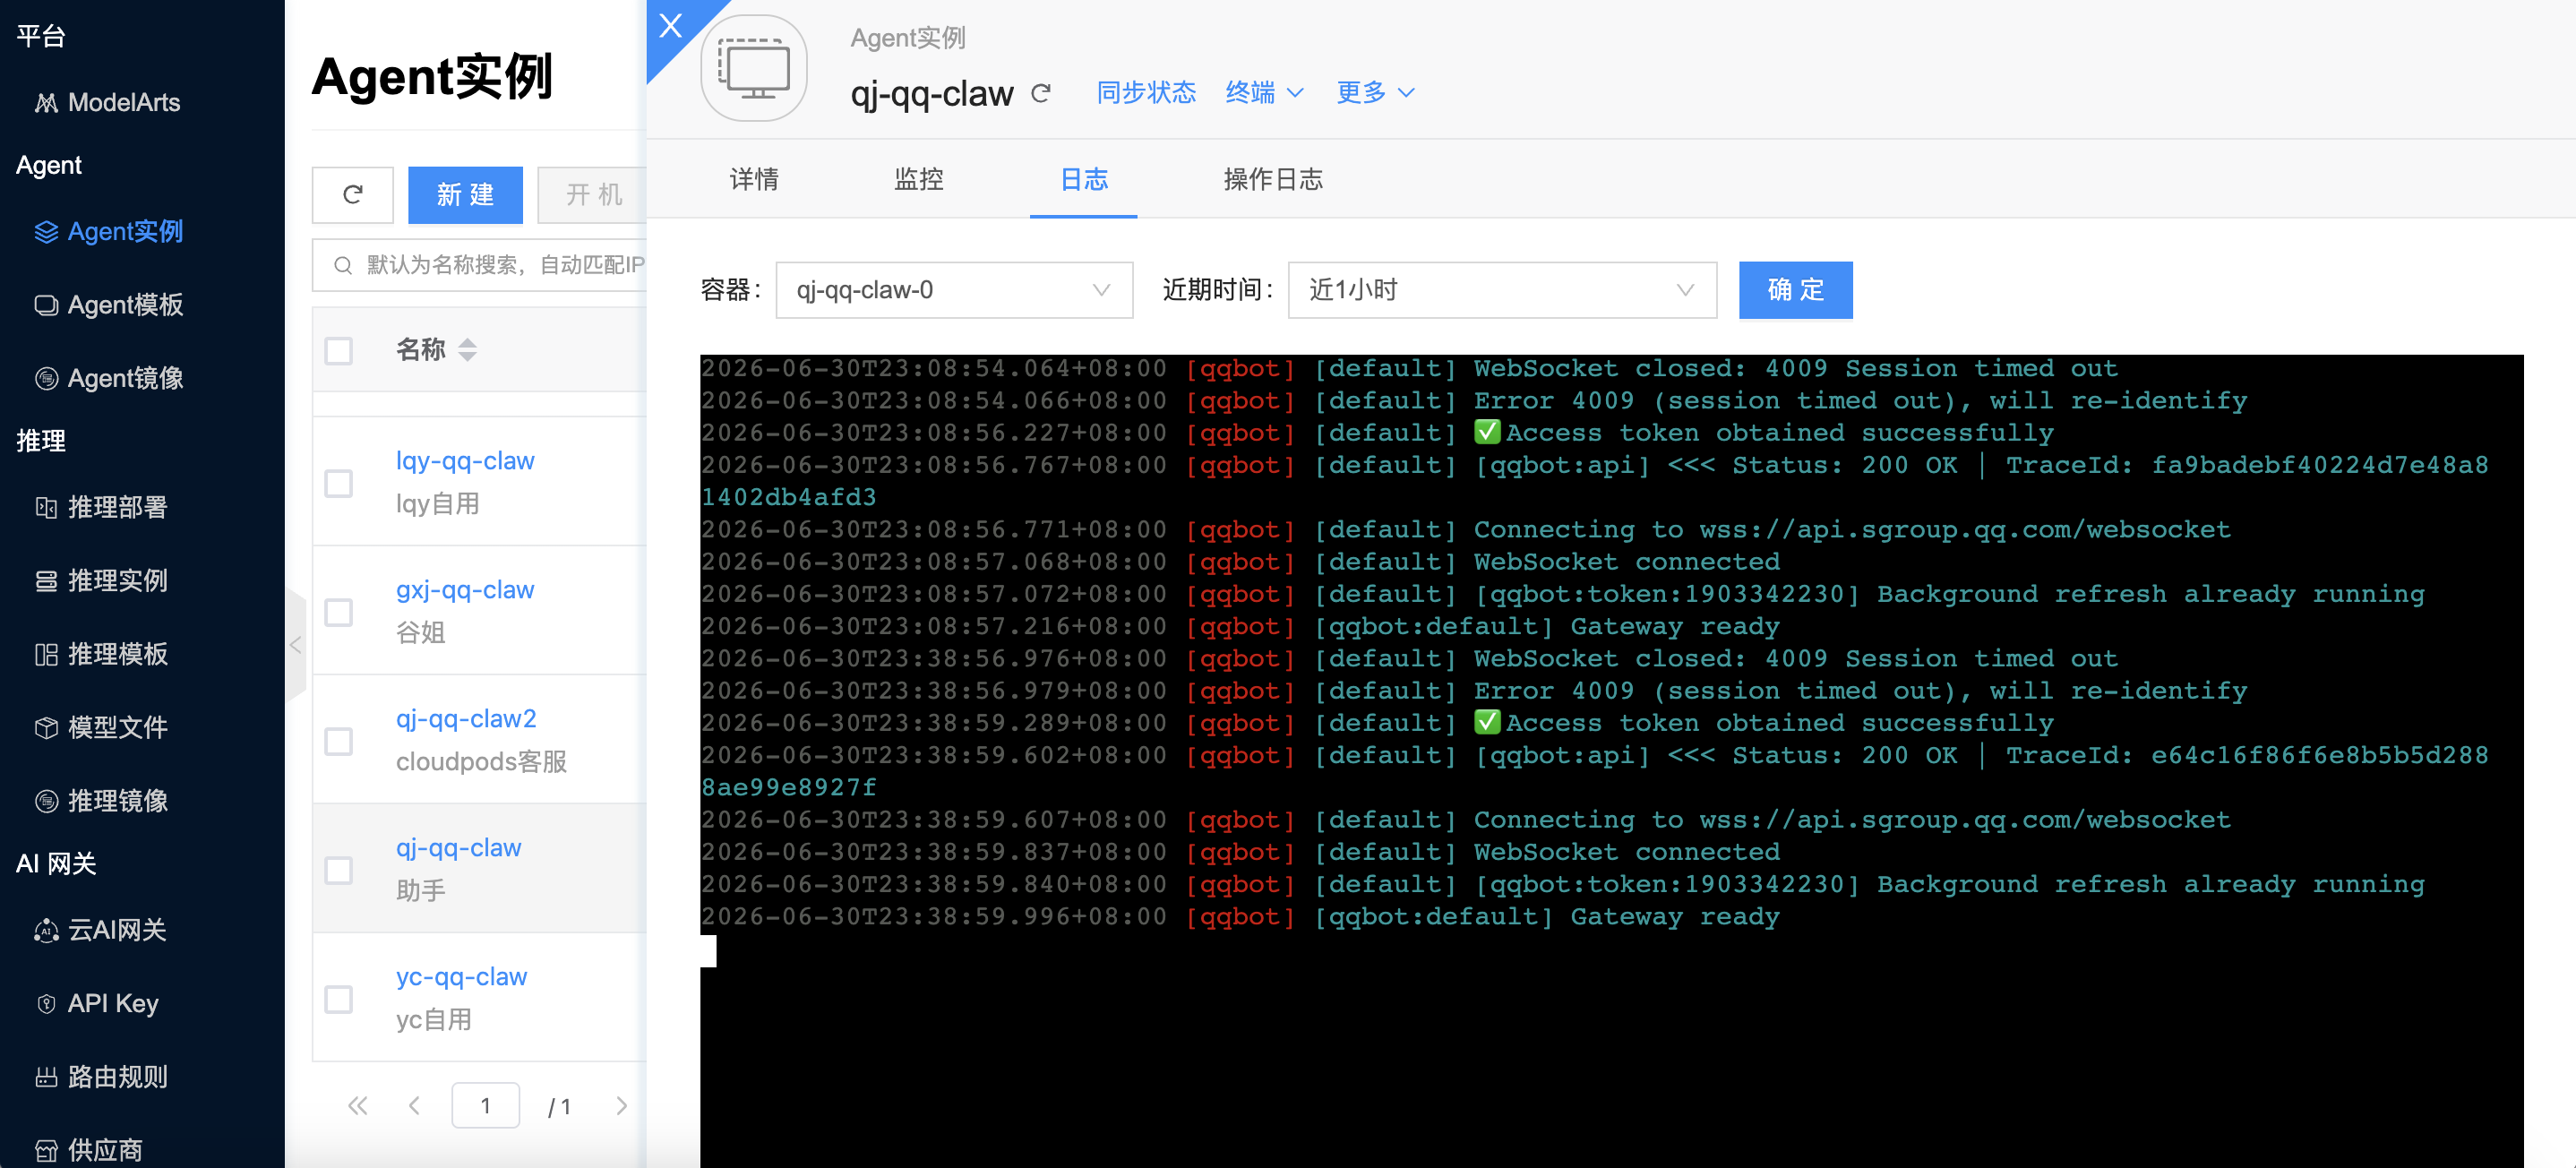
This feature is used to view runtime logs of the container host corresponding to the Agent instance.
- On the Agent instances page, click the instance name to open the details page.
- Click the “Logs” tab to open the container logs page.
- View container runtime log content. Supports refresh, search, and other operations.
View operation logs
This feature is used to view operation log information related to Agent instances.
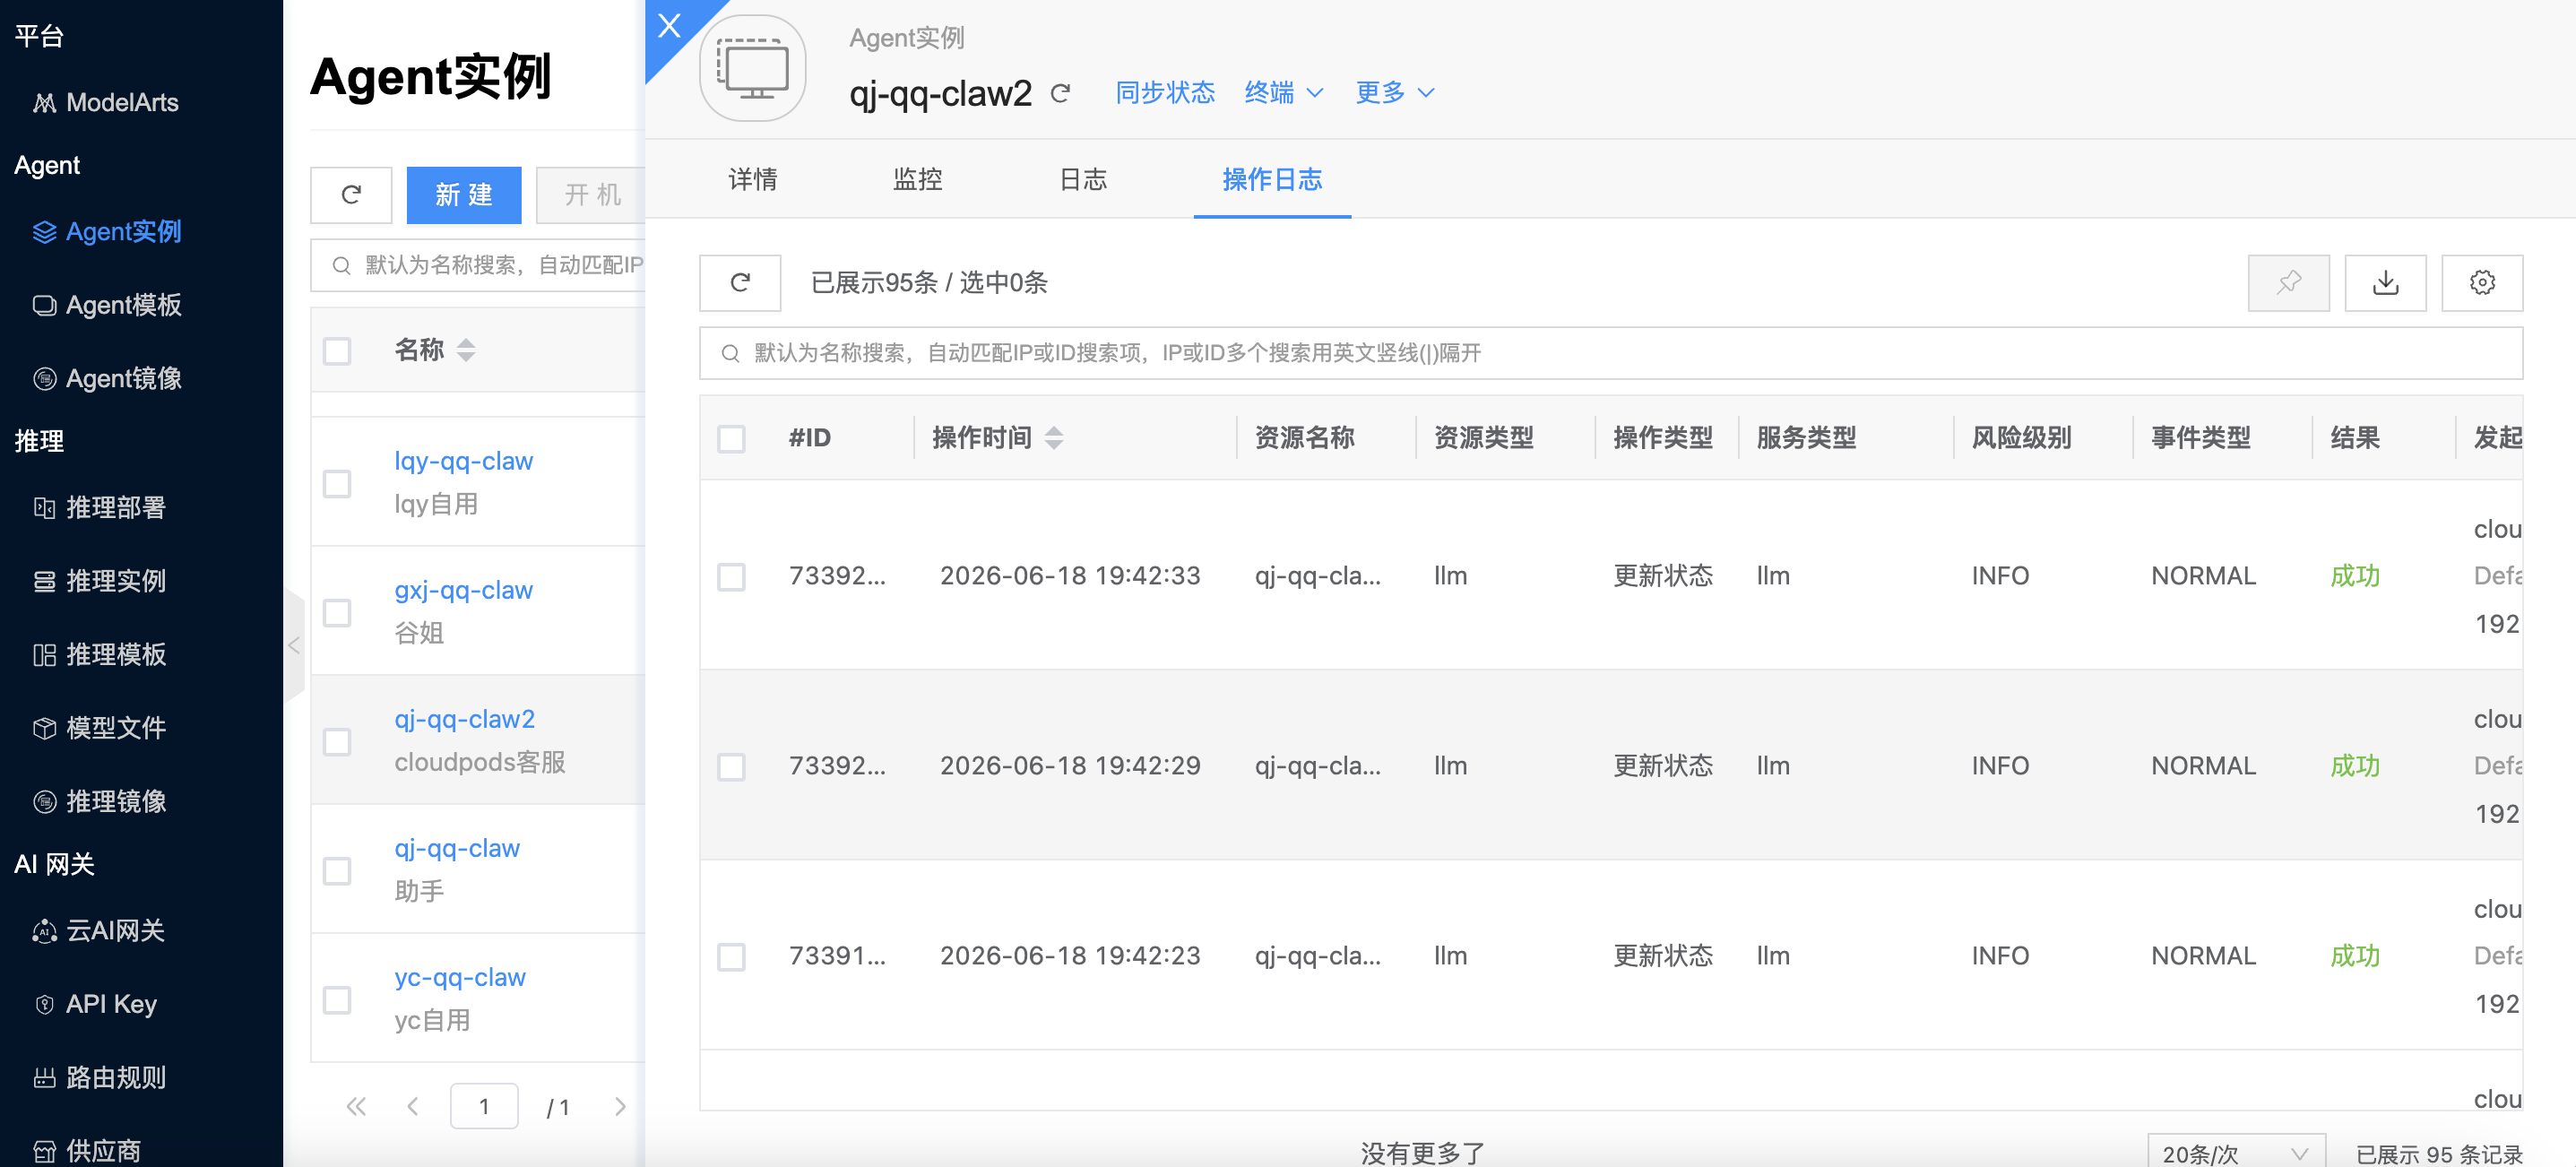
- On the Agent instance details page, click the “Operation Logs” tab to open the operation logs page.
- Load more logs: The list displays 20 operation log entries by default. To view more, click “Load more”.
- View log details: Click “View” in the Actions column to view log details. You can copy the detail content.
- View logs for a specific time range: To view operation logs for a time range, set the start and end dates in the upper right of the list and query.
- Export logs: Currently only logs displayed on the current page can be exported. Click the
 icon in the upper right corner, set the columns to export in the Export data dialog, and click “OK”.