Instance Recycle Bin
The instance recycle bin stores deleted VMs and bare metal hosts. Host files in the recycle bin are kept for 3 days by default (controlled by the backend configuration item pending_delete_expire_seconds, default value 259200 seconds). If a host is deleted by mistake, restore it within 3 days to return it to its original location. After 3 days, the file is permanently deleted automatically.
Note: The recycle bin is available only to administrator users and is not visible to regular users. This feature requires the backend
enable_pending_deleteconfiguration to be enabled (enabled by default). If it is disabled, the recycle bin menu is hidden.
Entry: On the cloud management platform, click the  navigation menu in the upper left, then in the left sidebar click “Resource Management / Compute / Recycle Bin / Servers Recycle Bin” to open the instance recycle bin list.
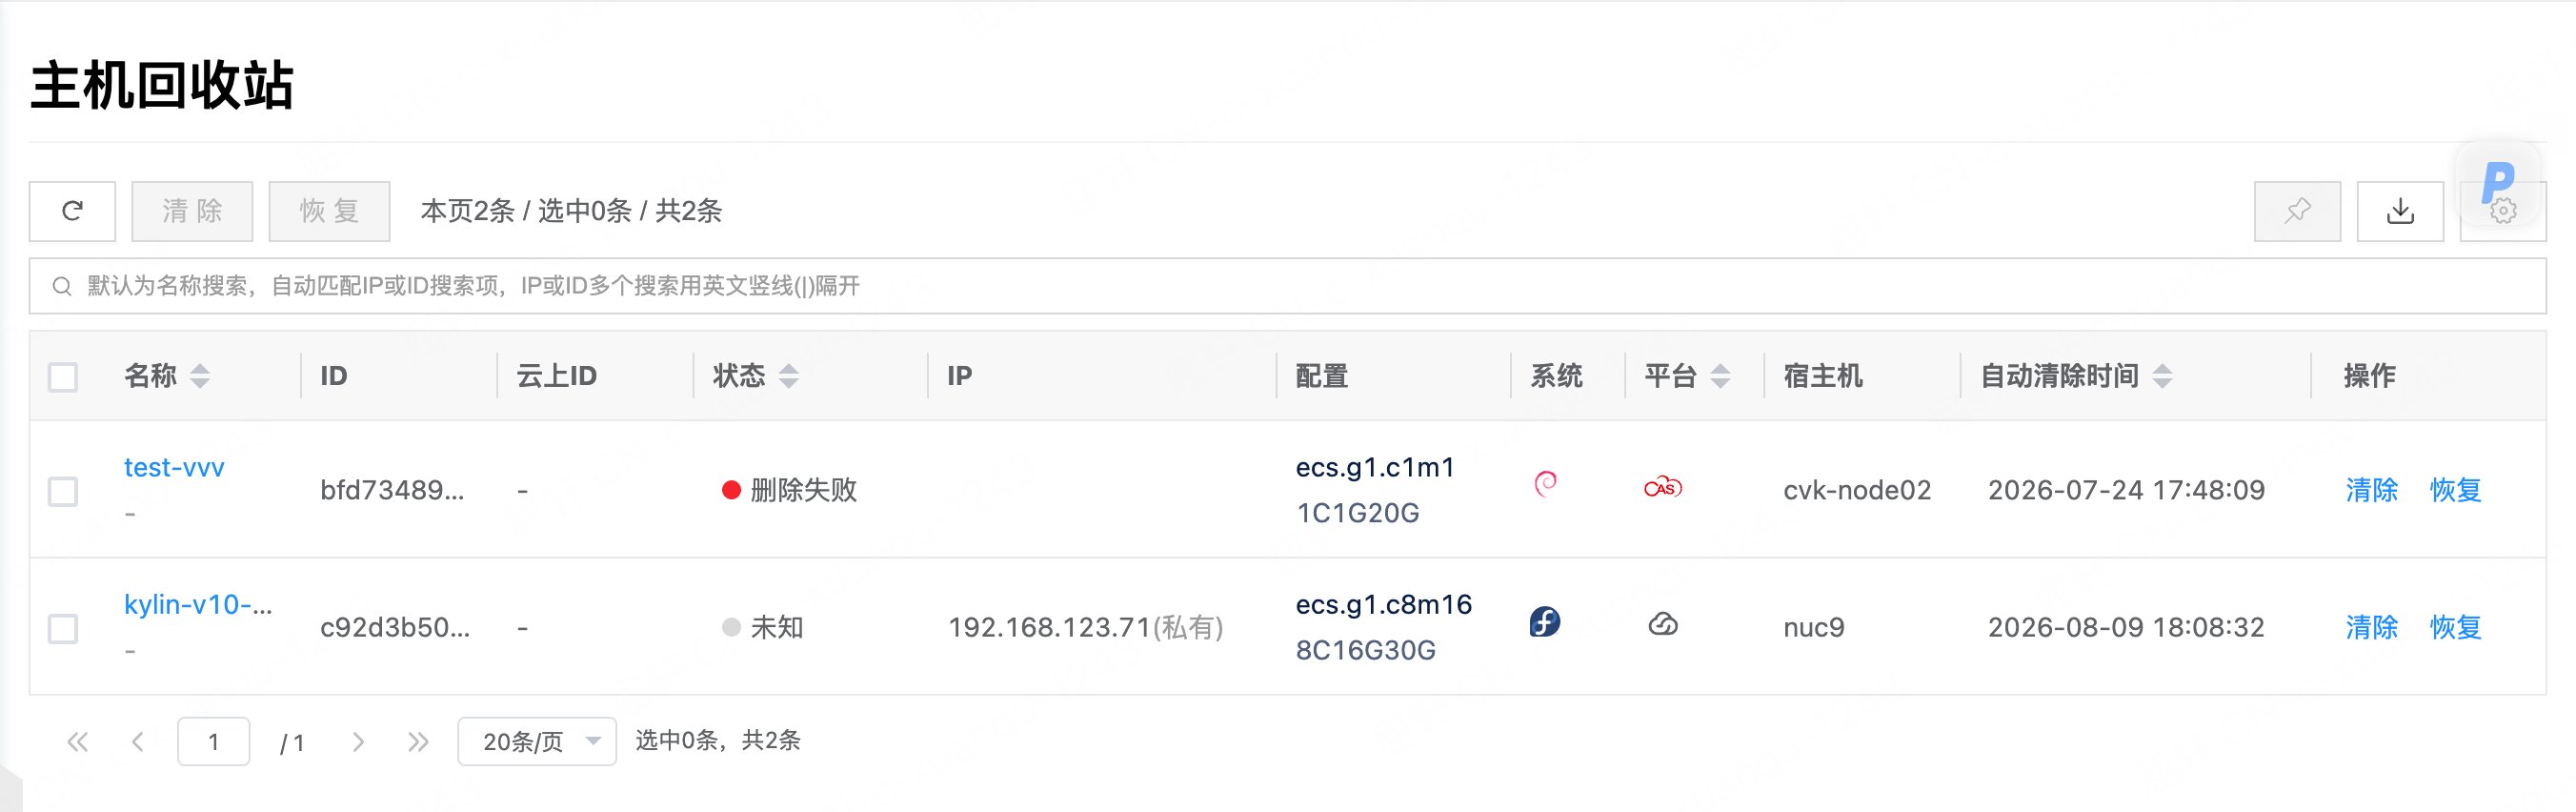
List fields
| Field | Description |
|---|---|
| Name | Host name; click the name to open the host details page |
| ID | Unique identifier of the host within the platform |
| External ID | External identifier of the host on the cloud platform |
| Status | Current host status, such as running or unknown |
| IP | IP address of the host |
| Configuration | Instance type and configuration of the host, including vCPU count, memory size, and disk size |
| Operating system | Operating system type and version of the host |
| Platform | Cloud platform brand the host belongs to |
| Hypervisor host | Name of the hypervisor host where the instance runs; public cloud platforms show “-” |
| Auto purge time | Expiration time of the host in the recycle bin; after this time the host is permanently deleted automatically |
Purge
When you confirm that a host in the recycle bin is no longer needed, use Purge to permanently delete it immediately. Purge cannot be undone.
Note: Disks mounted on VMs cannot be purged alone. Purge the corresponding VM from the instance recycle bin list.
Purge a single host
- On the instance recycle bin list page, click the “Purge” button in the Actions column of the host. An operation confirmation dialog appears.
- If any selected host is in the running state, a second confirmation prompt appears: “There are VMs in the [Running] state that may be in use. Continue deleting?”
- Click the “OK” button to complete the operation.
Batch purge
- On the instance recycle bin list page, select one or more hosts, then click the “Purge” button above the list. An operation confirmation dialog appears.
- If any selected host is in the running state, a second confirmation prompt appears: “There are VMs in the [Running] state that may be in use. Continue deleting?”
- Click the “OK” button to complete the operation.
Restore
When a host is deleted by mistake, use Restore in the recycle bin to return it to its original location. Restore the host within the retention period. After the auto purge time, the host is permanently deleted and cannot be restored.
Restore a single host
- On the instance recycle bin list page, click the “Restore” button in the Actions column of the host. An operation confirmation dialog appears.
- Click the “OK” button to complete the operation.
Batch restore
- On the instance recycle bin list page, select one or more hosts, then click the “Restore” button above the list. An operation confirmation dialog appears.
- Click the “OK” button to complete the operation.
View host details
This feature is used to view detailed information about a host in the recycle bin.
- On the instance recycle bin list page, click the host name to open the host details page.
- The details page shows basic information about the host and operation logs.
View operation logs
This feature is used to view log information for host-related operations.
- On the host details page, click the “Operation Logs” tab to open the operation logs page.
- Load more: The list shows 20 operation log entries by default. To view more logs, click the “Load more” button.
- View log details: Click the “View” button in the Actions column of an operation log to view log details. You can copy the detail content.
- View logs in a time range: To view operation logs for a specific period, set the start and end dates in the upper right of the list.
- Export logs: Currently only logs displayed on the current page can be exported. Click the
 icon in the upper right. In the export data dialog, set the columns to export, then click the “OK” button to export the logs.