Scheduling Policies
A scheduling policy selects or excludes hypervisor hosts bound to a certain type of schedule tag based on preference when specified conditions are met. The preference in a scheduling policy overrides the default preference of the schedule tag. Scheduling policies affect the final scheduling result.
Preferences in a scheduling policy fall into the following four types:
- Prefer: Prefer hypervisor hosts that have this schedule tag during scheduling. Hypervisor hosts without this schedule tag are also acceptable.
- Avoid: Prefer to avoid hypervisor hosts that have this schedule tag during scheduling. Hypervisor hosts with this schedule tag are still acceptable.
- Exclude: Must exclude hypervisor hosts that have this schedule tag during scheduling.
- Require: Must use hypervisor hosts that have this schedule tag during scheduling.
Entry: On the cloud management platform, click the  navigation menu in the upper left, then in the left sidebar click “Resource Management / Compute / Scheduling / Scheduling Policies” to open the Scheduling Policies page.
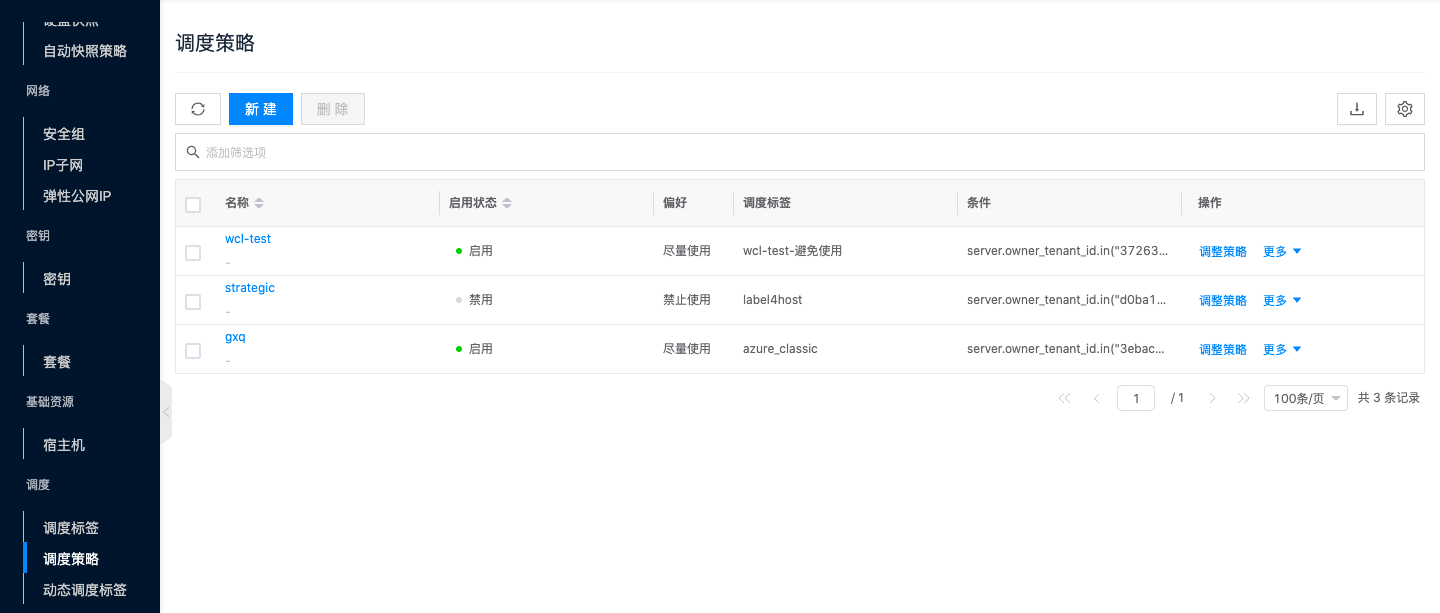
Create a scheduling policy
This feature is used to create a scheduling policy. When creating a VM, if the conditions in the scheduling policy are met, VMs are created on hypervisor hosts with the schedule tag according to the preference in the policy—either selecting or excluding them.
- On the Scheduling Policies page, click the “Create” button above the list. The Create Scheduling Policy dialog appears.
- Name: Set the name of the scheduling policy.
- Preference: Prefer, Avoid, Exclude, or Require.
- Prefer: Prefer hypervisor hosts that have this schedule tag during scheduling. Hypervisor hosts without this schedule tag are also acceptable.
- Avoid: Prefer to avoid hypervisor hosts that have this schedule tag during scheduling. Hypervisor hosts with this schedule tag are still acceptable.
- Exclude: Must exclude hypervisor hosts that have this schedule tag during scheduling.
- Require: Must use hypervisor hosts that have this schedule tag during scheduling.
- Conditions: Currently only projects are supported. That is, when creating a VM in a project specified in the conditions, hypervisor hosts are filtered according to the scheduling policy.
- Click the “OK” button.
Enable a scheduling policy
This feature is used to enable a scheduling policy that is in the “Disabled” state.
- On the Scheduling Policies page, click the “Enable” button in the Actions column of a scheduling policy that is in the “Disabled” state.
Disable a scheduling policy
This feature is used to disable a scheduling policy that is in the “Enabled” state.
- On the Scheduling Policies page, click the “Disable” button in the Actions column of a scheduling policy that is in the “Enabled” state.
Adjust policy
This feature is used to modify a scheduling policy.
- On the Scheduling Policies page, click the “More” button in the Actions column of the scheduling policy, then choose “Modify” from the drop-down menu. The Modify dialog appears.
- Set the preference, select a schedule tag, set the conditions, then click the “OK” button.
Delete a scheduling policy
This feature is used to delete scheduling policies. Single and batch delete are supported.
Delete a single policy
- On the Scheduling Policies page, click the “More” button in the Actions column of the scheduling policy, then choose “Delete” from the drop-down menu. An operation confirmation dialog appears.
- Click the “OK” button to complete the operation.
Batch delete
- In the scheduling policy list, select one or more scheduling policies, then click the “Delete” button above the page. An operation confirmation dialog appears.
- Click the “OK” button to complete the operation.
View scheduling policy details
This feature is used to view detailed information about a scheduling policy.
- On the Scheduling Policies page, click the scheduling policy name to open the details page.
- View the cloud ID, ID, name, status, domain, project, enable status, resource type, tag (schedule tag), preference, conditions, creation time, update time, and notes.
View operation logs
This feature is used to view log information for scheduling policy-related operations.
- On the Scheduling Policies page, click the scheduling policy name to open the details page.
- Click the “Operation Logs” tab to open the operation logs page.
- Load more logs: The list shows 20 operation log entries by default. To view more operation logs, click the “Load more” button.
- View log details: Click the “View” button in the Actions column of an operation log to view log details. You can copy the detail content.
- View logs in a time range: To view operation logs for a specific period, set the start and end dates in the upper right of the list.
- Export logs: Currently only logs displayed on the current page can be exported. Click the
 icon in the upper right. In the export data dialog, set the columns to export, then click the “OK” button to export the logs.