Namespaces
Namespaces logically isolate resources in a Kubernetes cluster. Namespaces are suitable when there are many users across multiple teams or projects. For clusters with only a few to a few dozen users, you generally do not need to create or consider namespaces. Object names within a namespace must be unique. After a Kubernetes cluster is created, the kube-public, kube-system, kube-node-lease, and default namespaces are created by default.
For a detailed introduction to namespaces, see the Kubernetes official documentation – Namespaces.
Entry: On the cloud management platform, click the  navigation menu in the upper left corner, then click “Resource Management/Kubernetes/Clusters/Namespaces” in the left sidebar to open the Namespaces page.
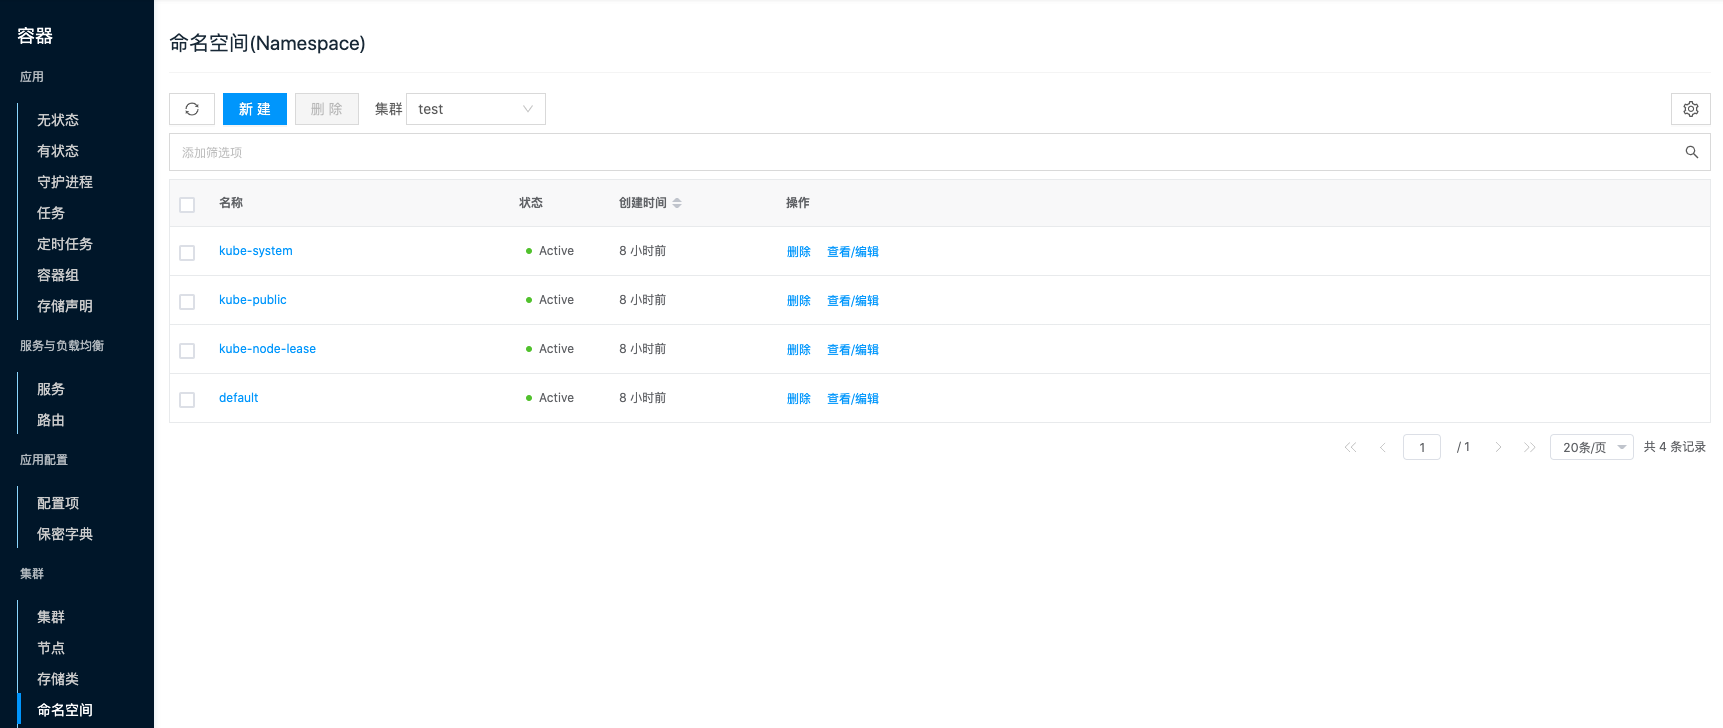
View namespaces
This feature views namespace information under different clusters.
On the Namespaces page, namespace information under one cluster is shown by default.
When multiple clusters exist in the environment, click the input box to the right of Cluster above the list, select another cluster, and view namespace information under that cluster.
Create a namespace
This feature creates a namespace under a specified cluster.
- On the Namespaces page, click “Create” above the list to open the create namespace page.
- Enter the namespace name, select a cluster, and click “Deploy” to create the namespace in the specified cluster.
Delete a namespace
This feature deletes a namespace under a specified cluster.
Delete one
- On the Namespaces page, click “Delete” in the Actions column for the namespace to open the confirmation dialog.
- Click “OK” to delete the namespace and related resources.
Delete multiple
- In the namespace list, select one or more namespaces, then click “Delete” above the list to open the confirmation dialog.
- Click “OK” to delete the namespaces and related resources.
View/Edit
This feature views or edits the YAML file of a namespace.
- On the Namespaces page, click “View/Edit” in the Actions column for the namespace to open the view/update dialog.
- You can view and edit the YAML file information of the namespace.
- After editing the YAML file, click “OK” for the changes to take effect.
View namespace details
This feature views information related to a namespace.
- On the Namespaces page, click the namespace name to open the namespace details page.
- View the following information: external ID, ID, name, domain, project, cluster, status, creation time, update time, notes, and more.
View events
This feature records events that occur on a resource object, including content, source, reason, and creation time, for troubleshooting.
- On the Namespaces page, click the namespace name to open the namespace details page.
- Click the “Events” tab to open the events page.
- View the event content, source, reason, creation time, and more.
View source
This feature views and edits the YAML information of a namespace.
- On the Namespaces page, click the namespace name to open the namespace details page.
- Click the “Source” tab to open the source page.
- Click “Copy content” to copy the YAML file information of the node.
- After updating the YAML file, click “Update”.
View operation logs
This feature views operation logs related to a namespace.
- On the Namespaces page, click the namespace name to open the namespace details page.
- Click the “Operation Logs” tab to open the operation logs page.
- Load more logs: The list displays 20 operation log entries by default. To view more, click “Load more”.
- View log details: Click “View” in the Actions column to view log details. You can copy the detail content.
- View logs for a specific time range: To view operation logs for a time range, set the start and end dates in the upper right of the list and query.
- Export logs: Currently only logs displayed on the current page can be exported. Click the
 icon in the upper right corner, set the columns to export in the Export data dialog, and click “OK”.