Create Volcano Engine Account
Procedure
- On the Cloud Accounts page, click “Create” above the list.
- Select Volcano Engine, then click “Next: Configure cloud account”.
- Configure:
- Name: Volcano Engine account name.
- Key ID / Password: connect with Access Key (Access Key ID and Access Key Secret). See How to get Volcano Engine parameters.
- Common parameters: see Common configuration parameters.
- Click “Connection test” to verify parameters.
- After a successful test, click “Next: Configure sync regions” (default: all regions).
- Click “Next: Bill file access (optional)” to configure billing parameters.
- Configure scheduled sync (optional), then click “OK” to create the Volcano Engine account.
If the Volcano Engine account is new, enable TOS on Volcano Engine first.
How to get Volcano Engine parameters
How to get a Volcano Engine API key
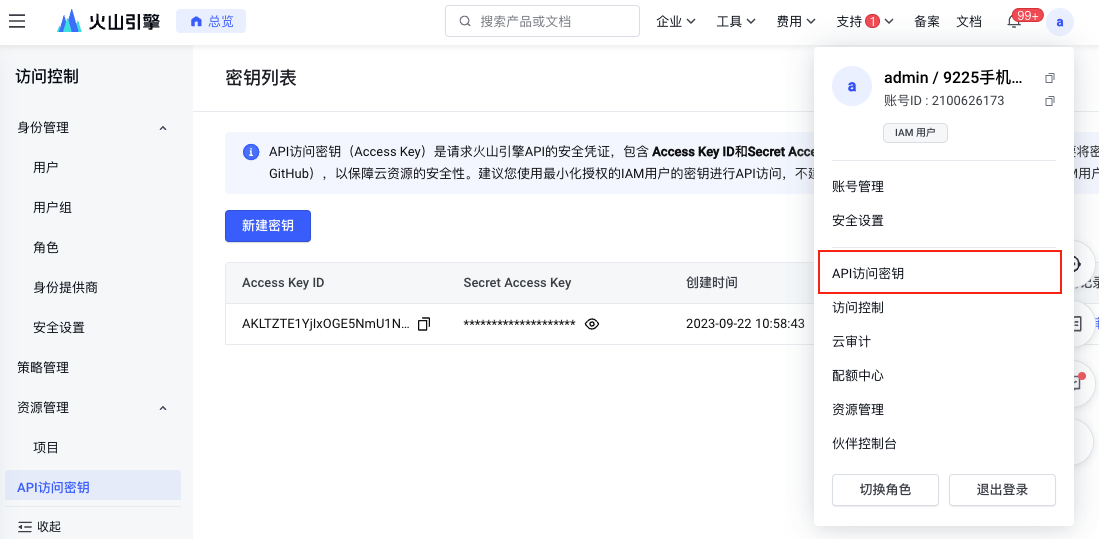
Log in to the Volcano Engine console, open personal info in the upper right, then click “API access keys”.
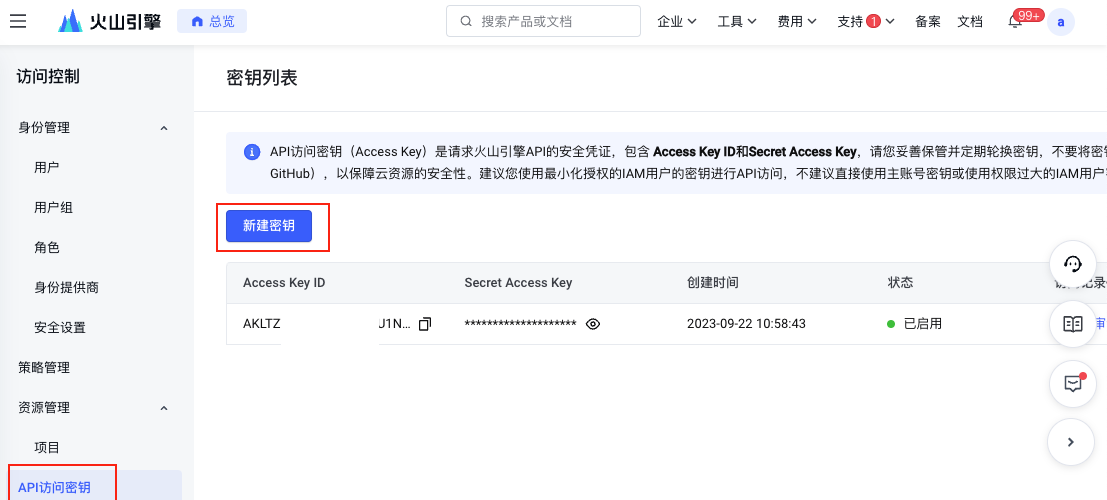
On the key list page, view existing AccessKeys or click “Create key”.
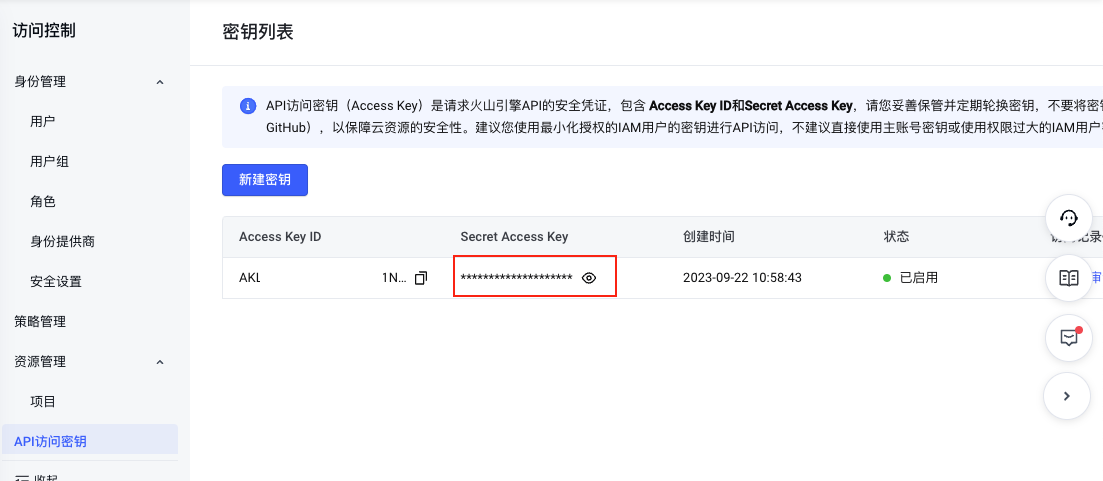
Access Key Secret is hidden by default. Click “Show”; Volcano Engine sends a verification code to the account contact. After verification, the Secret is shown.
Permission configuration
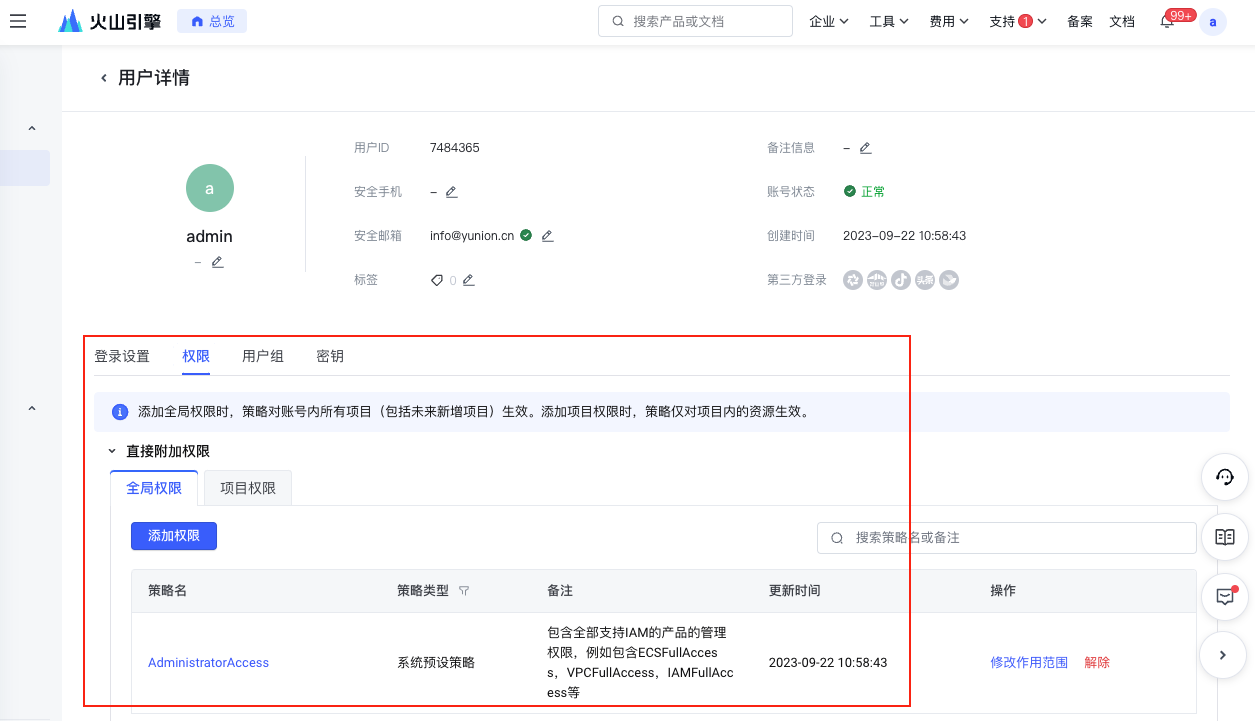
Permissions required to manage Volcano Engine resources:
| Permission note | Read-only | Read/write |
|---|---|---|
| Manage all Volcano Engine resources | ReadOnlyAccess | AdministratorAccess |
How to authorize a sub-account
Log in with the primary account, open personal info in the upper right, then click “Access control”.
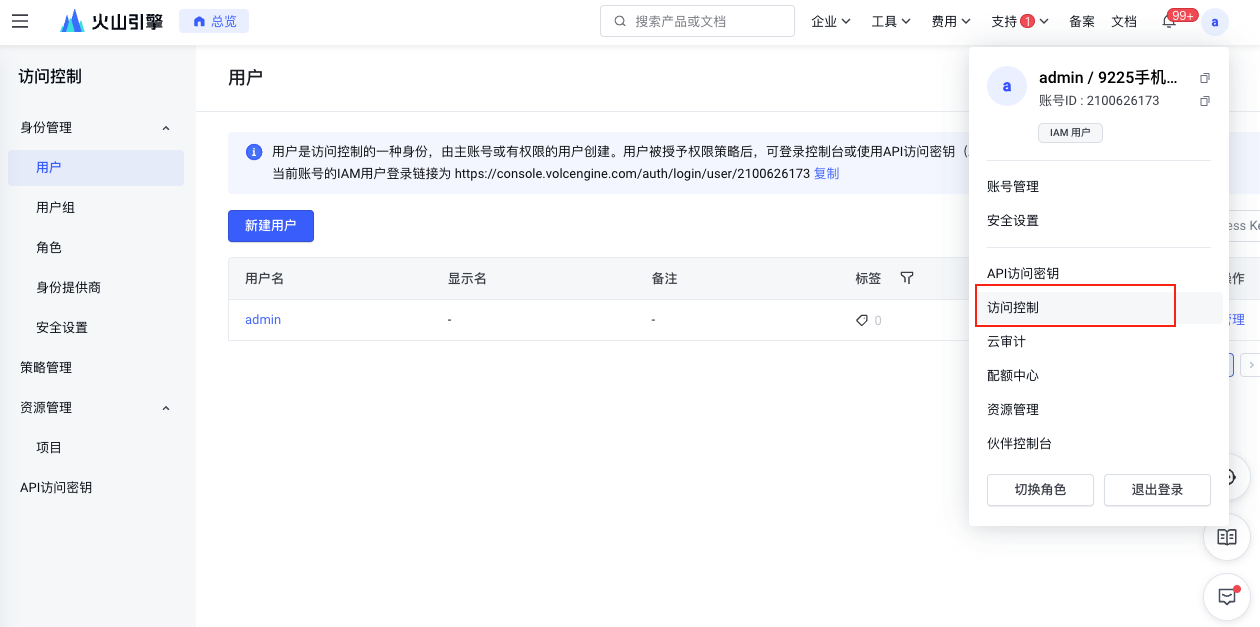
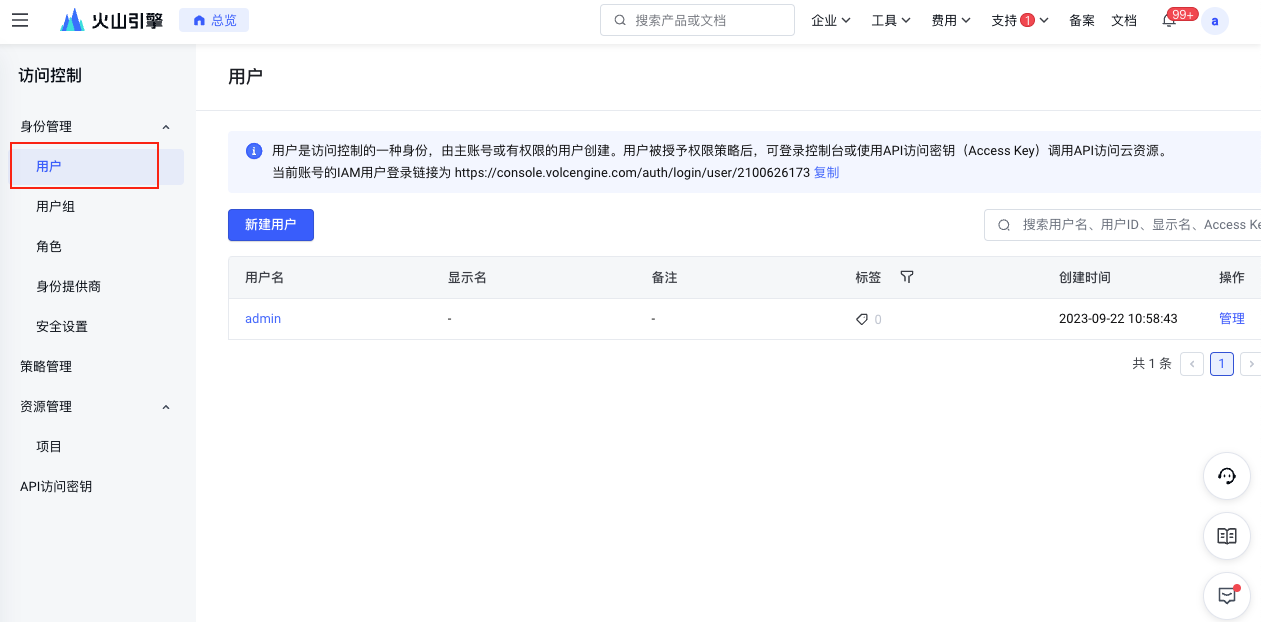
Click “Users” on the left.
Click “Manage” for the user and grant permissions.
Billing configuration
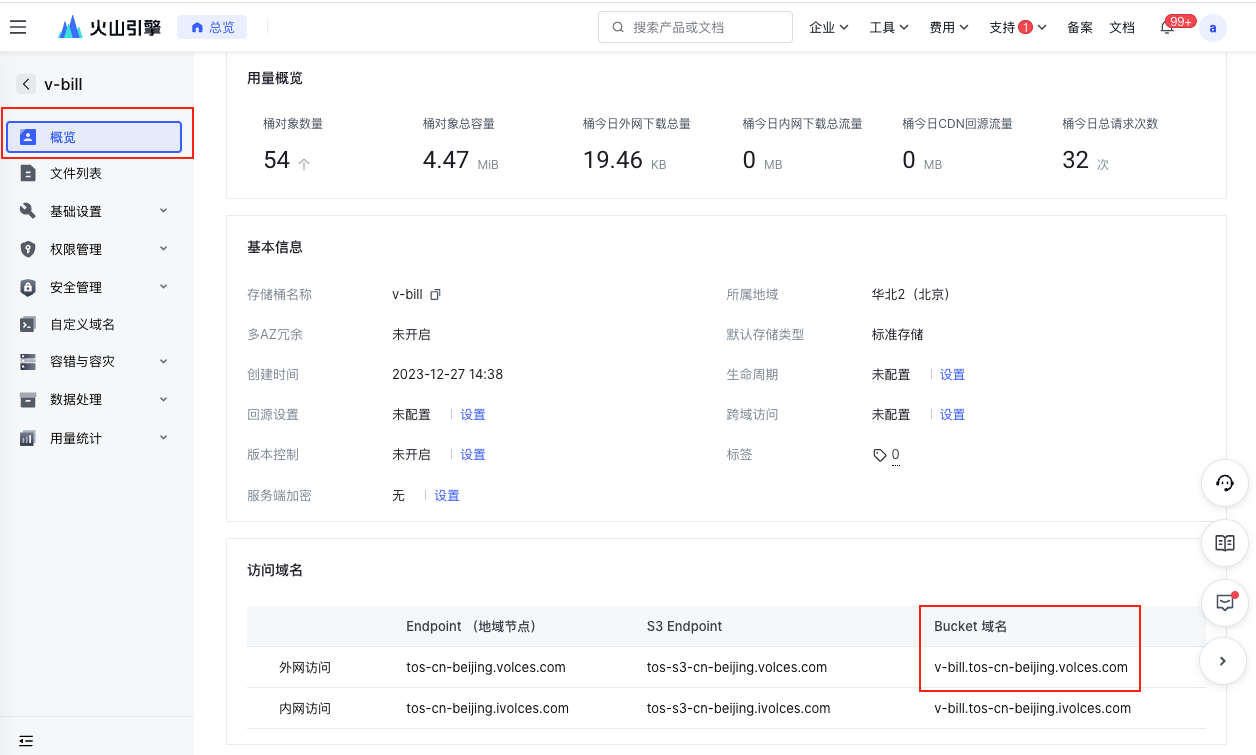
How to get the bill bucket URL
Log in to the Volcano Engine console, open “Billing” → “Account overview”.
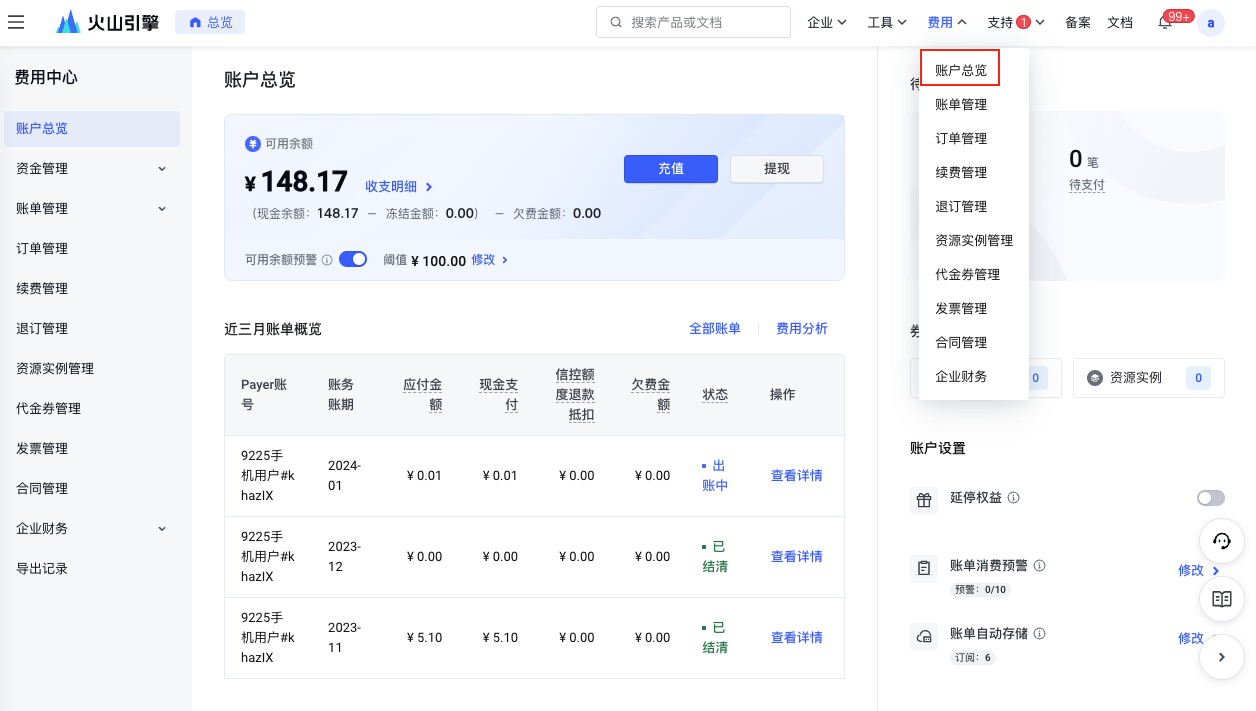
Click “Set automatic storage”.
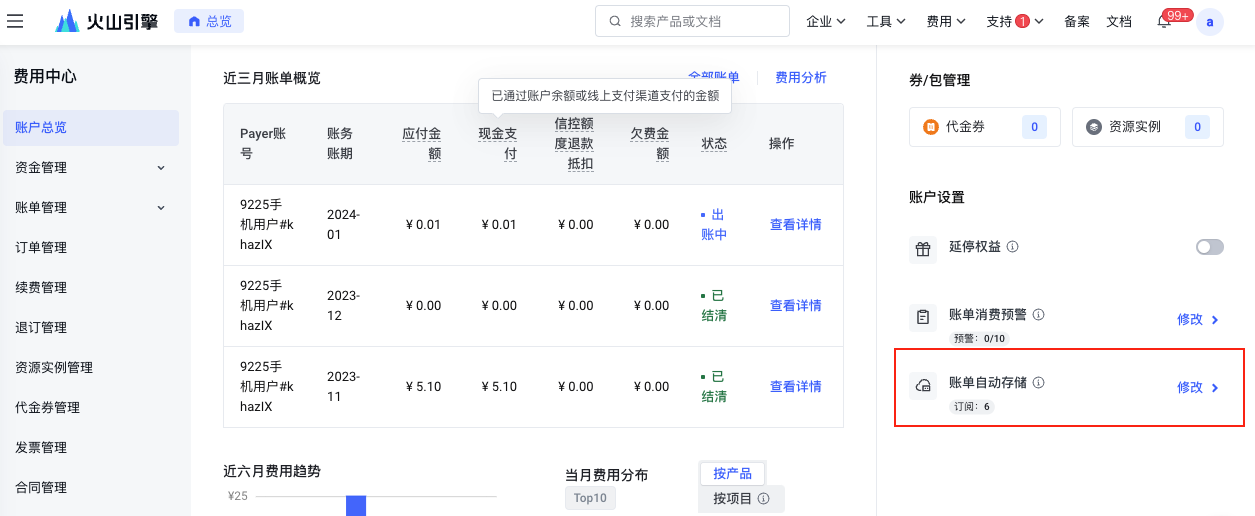
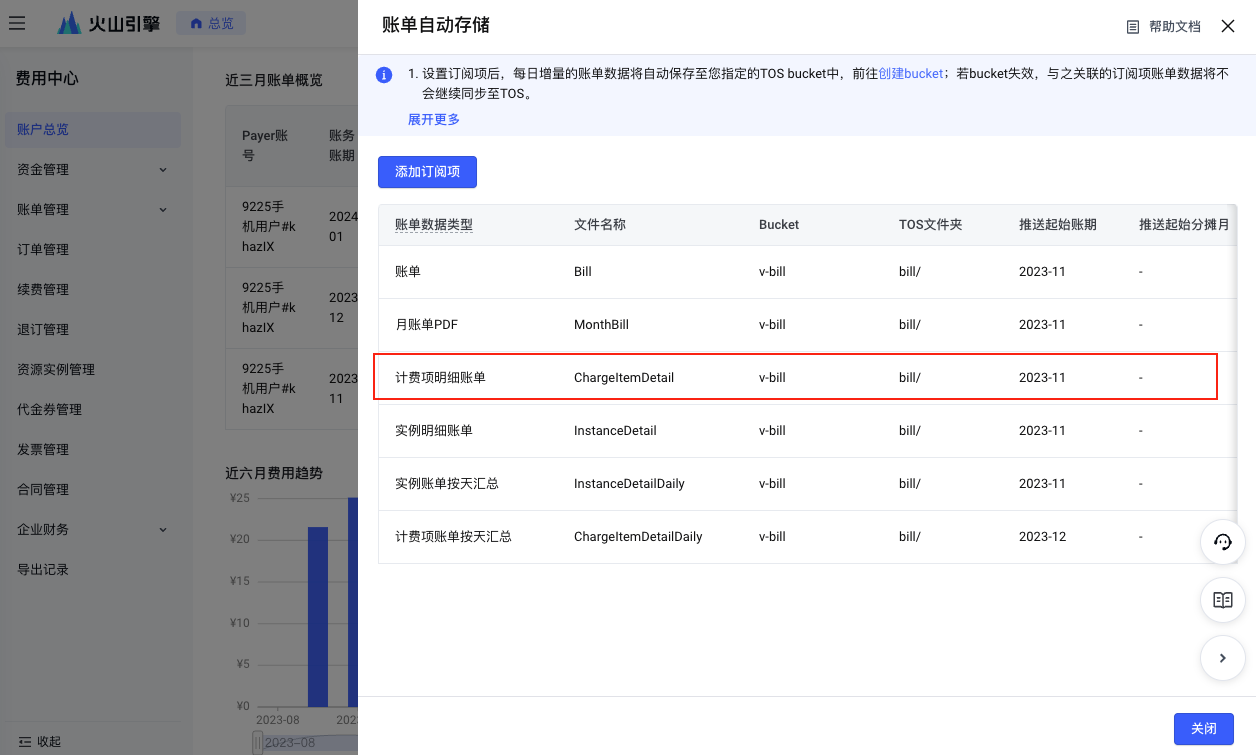
Note the ChargeItemDetail bill bucket name. If unset, subscribe to a bucket on this page; daily incremental bill data syncs to TOS. Prefer a bucket used only for bill files.
In Object Storage, open the bucket overview; the bucket domain is the bucket URL.