VPC
A Virtual Private Cloud (VPC) is a logically isolated network space.
- VPC network: A VPC is a logically isolated network space. Within a VPC, users can freely define CIDR blocks and IP addresses. Different VPCs can use the same private IPs.
- Classic network: All users share a network resource pool. Hosts, physical machines, and virtual machines share the network resource pool. The same private IP cannot be allocated to different users.
Entry: On the cloud management platform, click the  navigation menu in the upper-left corner, then in the left menu that appears click “Resource Management / Network / Network / VPC” to open the VPC page.
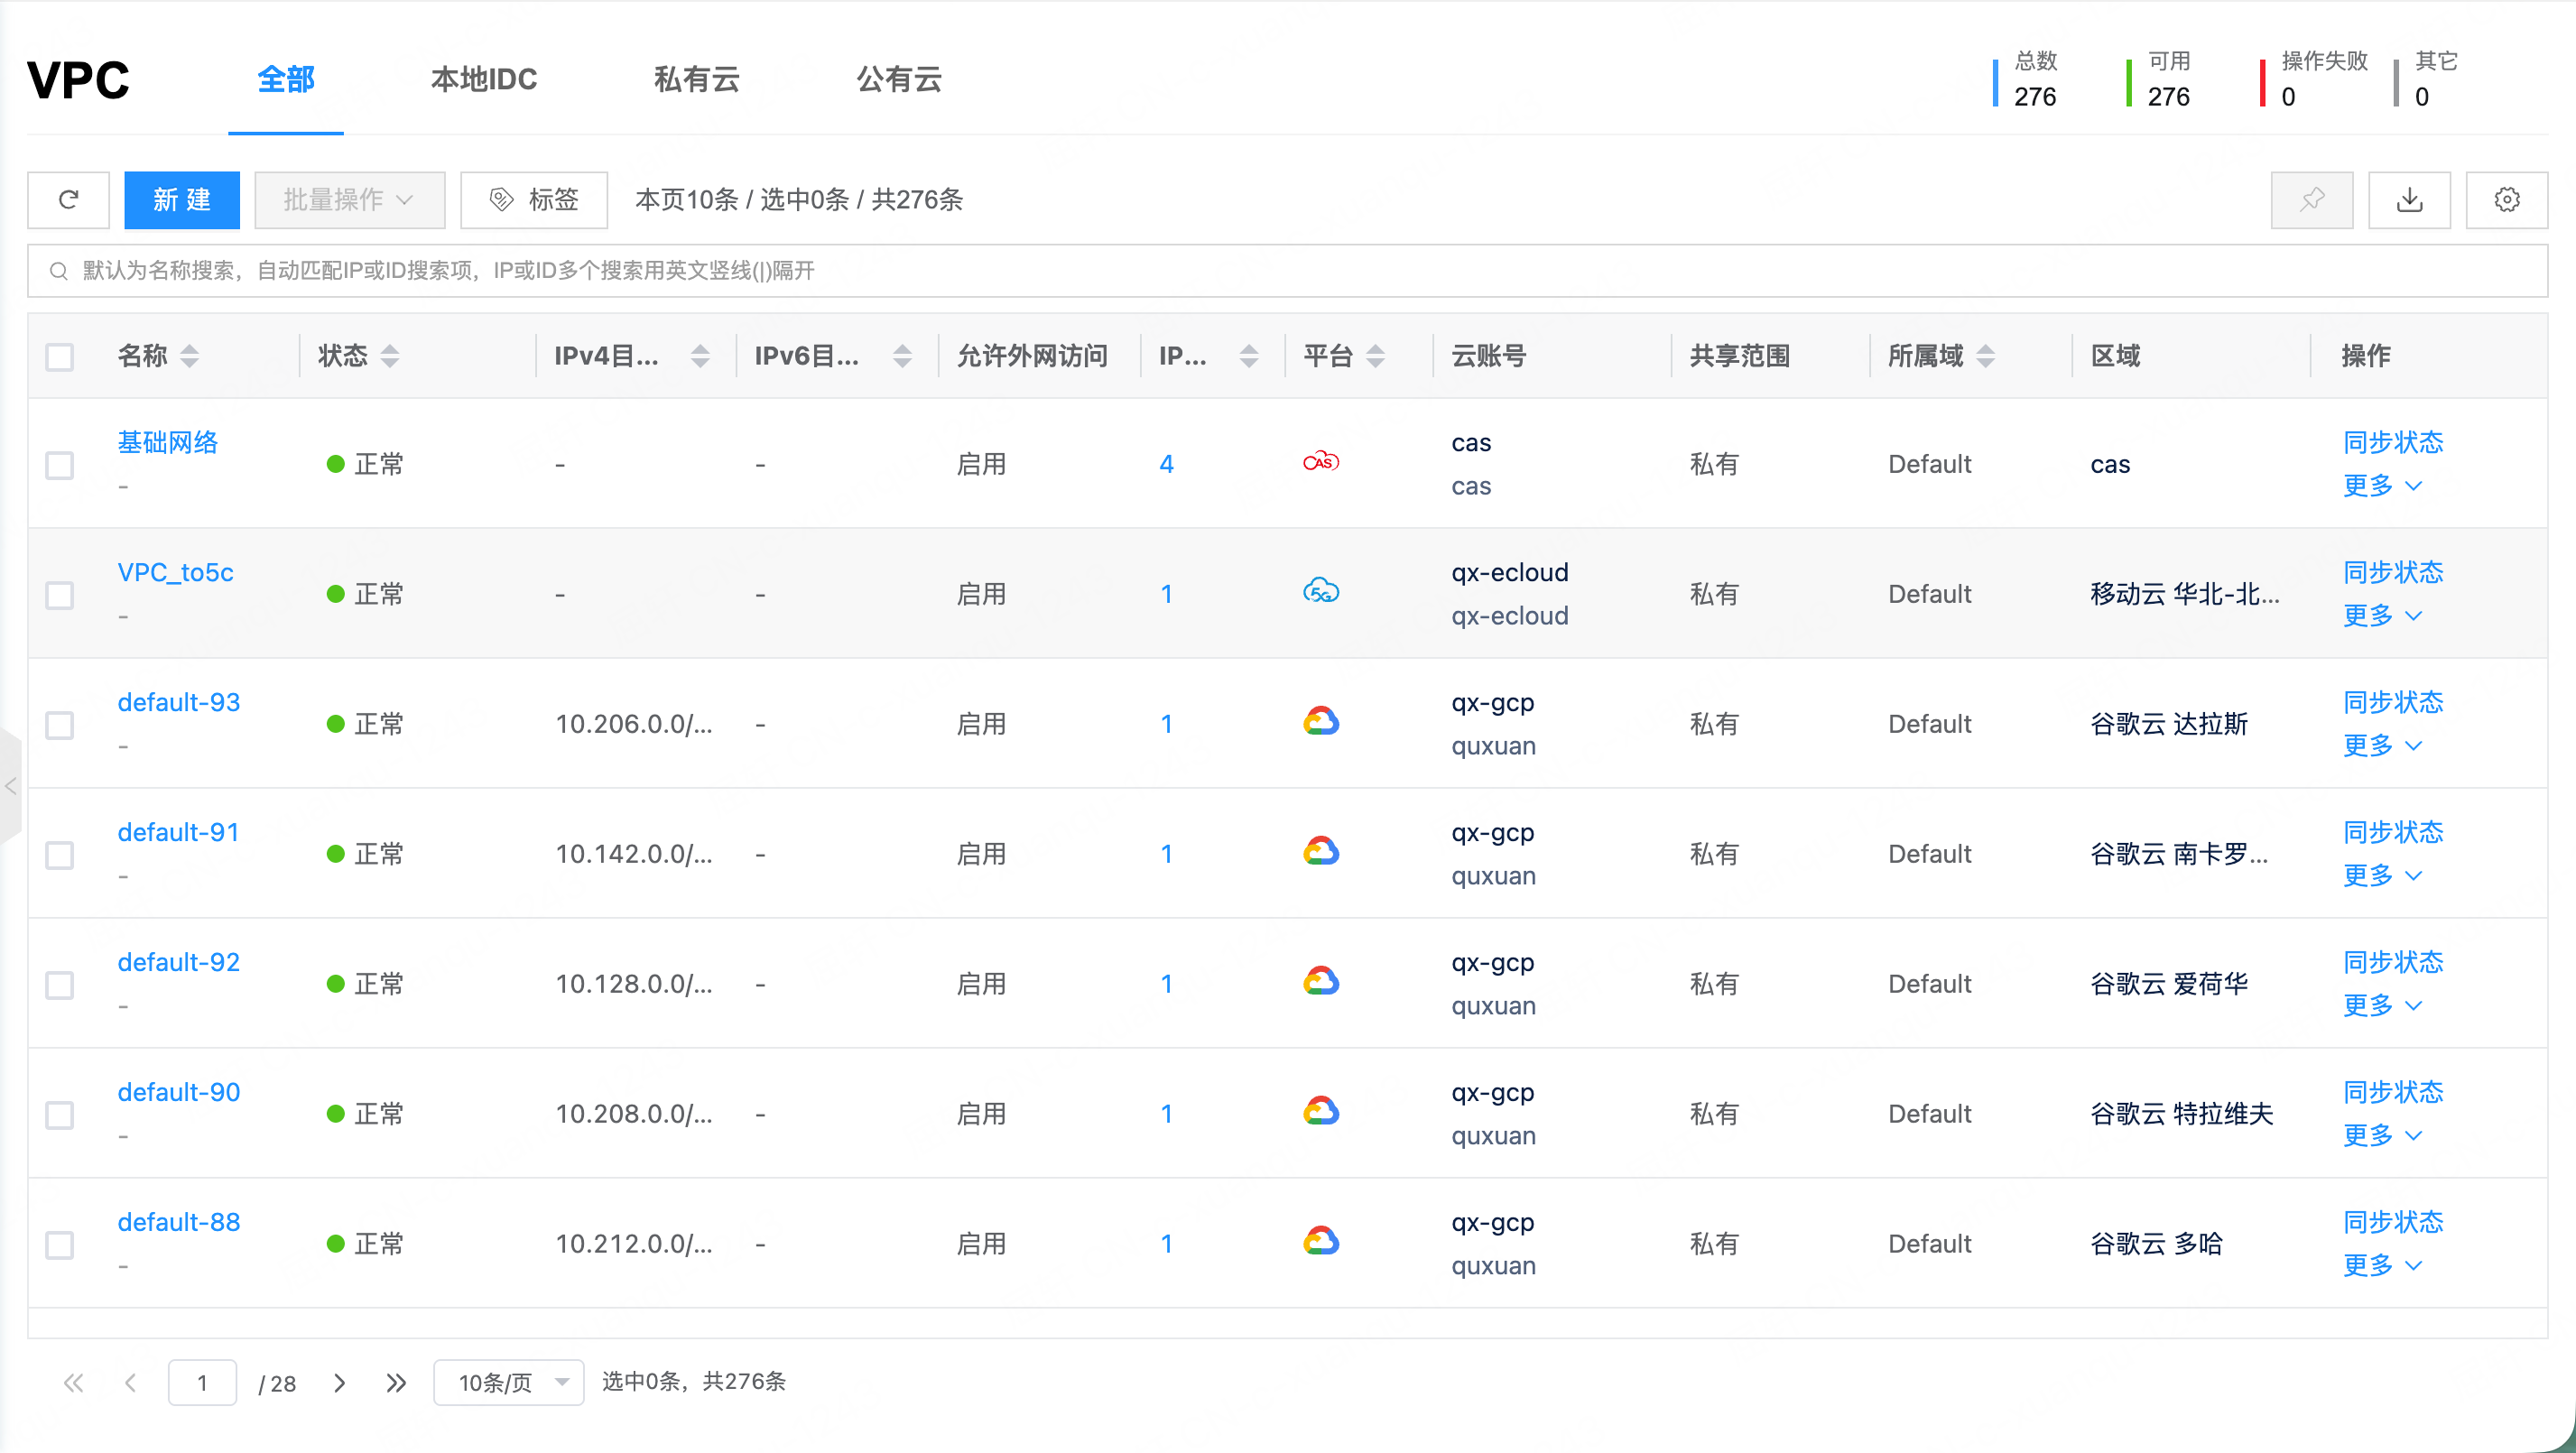
Create VPC
This feature is used to create a Virtual Private Cloud (VPC).
On the create VPC page, click the “Local IDC”, “Private Cloud”, or “Public Cloud” tabs at the top to switch and create VPCs on different platforms.
Create Local IDC VPC
After the OneCloud platform is created, a Default VPC (actually the classic network) is created by default. Creating a local IDC VPC creates a VPC network. Only virtual machines on the local IDC OneCloud platform can use newly created VPC networks. VMware virtual machines, physical machines, hosts, and similar resources still use IP subnets of the classic network.
- On the VPC page, click the “All” or “Local IDC” tab at the top, then click “Create” above the list to open the create local IDC VPC page.
- Configure the following information:
- Domain: Select the domain for the VPC.
- Name: Set the VPC name.
- Region: Select the region for the VPC.
- Destination CIDR: Set the dedicated CIDR for the VPC network. IP subnets under the VPC must use addresses in this CIDR. Only 10.0.0.0/8, 172.16.0.0/12, and 192.168.0.0/16 are supported as VPC destination CIDRs.
- Click “OK” to complete the operation.
Create Private Cloud VPC
Only the OpenStack platform supports creating VPCs. Before creating a private cloud VPC, ensure a cloud account for the corresponding platform exists.
- On the VPC page, click the “Private Cloud” tab at the top, then click “Create” above the list to open the create private cloud VPC page.
- Configure the following information:
- Domain: Select the domain for the VPC.
- Name: Set the VPC name.
- Region: Select the region for the VPC. You can determine the private cloud platform and the private cloud account used to create disks from the region.
- Destination CIDR: Set the dedicated CIDR for the VPC network. IP subnets under the VPC must use addresses in this CIDR. 192.168.0.0/16, 172.16.0.0/12, 10.0.0.0/8 and their subnets are supported as VPC destination CIDRs.
- Click “OK” to complete the operation.
Create Public Cloud VPC
Before creating a public cloud VPC, ensure a cloud account for the corresponding platform exists.
- On the OneCloud platform, a global VPC corresponds to a Google platform VPC; a VPC corresponds to an IP subnet on the Google platform. Therefore, creating a Google platform VPC on OneCloud creates an IP subnet under the Google platform VPC.
- On the VPC page, click the “Public Cloud” tab at the top, then click “Create” above the list to open the create public cloud VPC page.
- Configure the following information:
- Domain: Select the domain for the VPC.
- Name: Set the VPC name.
- Region: Select the region for the VPC. You can quickly filter suitable regions by city and platform.
- Destination CIDR: Set the dedicated CIDR for the VPC network. IP subnets under the VPC must use addresses in this CIDR. Supported destination CIDR ranges differ by public cloud. For details, see Supported ranges for public cloud VPC and IP subnet.
- Allow External Network Access: When external network access is enabled for a VPC, IP subnets under the VPC can access the external network by binding an EIP. Public cloud platforms other than AWS allow this by default and do not allow modification. When an AWS VPC does not allow external network access, virtual machines created with IP subnets under the VPC do not support binding EIPs. When an AWS VPC allows external network access, an Internet gateway and a route table to the Internet gateway are synced and created on AWS, and virtual machines created with IP subnets under the VPC can access the external network by binding an EIP.
- Cloud Subscription: Select the specific cloud subscription used to create the VPC.
- Global VPC: Required only when the Google platform is selected. Select the Google platform VPC in which to create the IP subnet.
- Click “OK” to complete the operation.
Supported ranges for public cloud VPC and IP subnet
| Platform | VPC Destination CIDR Mask Range | IP Subnet CIDR Range |
|---|---|---|
| Alibaba Cloud | 10.0.0.0/8 172.16.0.0/12 192.168.0.0/16~24 | 10.0.0.0/16 172.16.0.0/16 192.168.0.0/17~29 |
| Tencent Cloud | 10.0.0.0/16 172.16.0.0/16 192.168.0.0/16~28 | 10.0.0.0/16 172.16.0.0/16 192.168.0.0/17~29 |
| Huawei Cloud | 10.0.0.0/8 172.16.0.0/12 192.168.0.0/16~24 | 10.0.0.0/9 172.16.0.0/13 192.168.0.0/17~29 |
| UCloud | 10.0.0.0/8 172.16.0.0/12 192.168.0.0/16~29 | 10.0.0.0/9 172.16.0.0/13 192.168.0.0/17~29 |
| AWS | Mask range: 16~28 Public CIDRs used privately are supported but not recommended | Subnet mask range: 16~28 |
| Azure | Mask range: 8~29 Public CIDRs used privately are supported but not recommended | Subnet mask range: 8~29 |
| Subnet mask range: 8~29 |
By default, the cloud management platform does not support using public CIDRs privately. Such CIDRs are treated as public IPs and consume public IP quotas. If you need to use public CIDRs privately, modify the configuration file to allow those CIDRs.
$ climc service-config-edit common

default:
  api_server: https://10.127.190.254
  # Add CIDRs used as private public networks in the configuration file
  customized_private_prefixes:
  - 52.0.0.0/16
  - 54.0.0.0/16
  enable_quota_check: true
  non_default_domain_projects: true
Sync Status
This feature is used to sync the current status of a VPC.
Sync a single status
- On the VPC page, click “Sync Status” in the Actions column on the right of the VPC to sync its status.
Sync status in bulk
- In the VPC list, select one or more VPCs, click “Bulk Actions” above the list, select “Sync Status” from the dropdown, and sync statuses in bulk.
Change Domain
This feature is used to change the domain of a VPC.
Conditions for changing domain: All of the following must be met
- The current user is in the admin console.
- Three-level permissions are enabled on OneCloud.
- The sharing scope of the VPC is private.
Change domain for a single VPC
- On the VPC page, click “More” in the Actions column on the right of the VPC, select “Change Domain” from the dropdown, and the change domain dialog appears.
- Select the domain for the VPC, then click “OK”.
Change domain in bulk
- In the VPC list, select one or more VPCs, click “Bulk Actions” above the list, select “Change Domain” from the dropdown, and the change domain dialog appears.
- Select the domain for the VPC, then click “OK”.
Set Sharing
This feature is used to set the sharing scope of a VPC.
Domain resources have three sharing scopes:
- Not shared (private): The domain resource can only be used by users in the same domain.
- Domain sharing - partial (multi-domain sharing): The domain resource can be shared with specified domains (one or more). Only users in the resource’s domain and the shared domains can use it.
- Domain sharing - all (global sharing): The domain resource can be shared with all domains, meaning all users in the system can use it.
Conditions for setting sharing: All of the following must be met
- The current user is in the admin console.
- Three-level permissions are enabled on OneCloud.
- The sharing scope of private cloud and public cloud VPCs is related to the sharing scope of the cloud account.
- When the cloud account is not shared, resources synced from the cloud account cannot be shared either.
- When sharing is enabled for the cloud account, resources synced from the cloud account will also have sharing enabled with the cloud account.
- When sharing is enabled for the cloud account, resources synced from the cloud account can change their sharing scope. Ensure the sharing scope stays within the cloud account’s sharing scope.
- When the cloud account’s sharing scope is modified, the sharing scope of resources synced from the cloud account must always remain within the cloud account’s sharing scope. For example, if the cloud account is shared with domains A, B, C, and D, and the domain resource is shared with domains A and C, and the cloud account’s sharing scope is then changed to A and B, the domain resource can only be shared with domain A.
- When the cloud account shares cloud subscriptions, domain resources synced from the cloud account cannot be shared.
Set sharing for a single VPC
- On the VPC page, click “More” in the Actions column on the right of the VPC, select “Set Sharing” from the dropdown, and the set sharing dialog appears.
- Configure the following parameters:
- When the sharing scope is “Not shared”, the domain resource is private and can only be used by users in the same domain.
- When the sharing scope is “Domain sharing”, you need to select the domains to share with.
- When one or more domains are selected, the sharing scope is domain sharing - partial. Only users in the resource’s domain and the shared domains can use the domain resource.
- When all domains are selected, the sharing scope is domain sharing - all. All users in the system can use the domain resource.
- Click “OK” to complete the operation.
Set sharing in bulk
- In the VPC list, select one or more VPCs, click “Bulk Actions” above the list, select “Set Sharing” from the dropdown, and the set sharing dialog appears.
- Configure the following parameters:
- When the sharing scope is “Not shared”, the domain resource is private and can only be used by users in the same domain.
- When the sharing scope is “Domain sharing”, you need to select the domains to share with.
- When one or more domains are selected, the sharing scope is domain sharing - partial. Only users in the resource’s domain and the shared domains can use the domain resource.
- When all domains are selected, the sharing scope is domain sharing - all. All users in the system can use the domain resource.
- Click “OK” to complete the operation.
Delete VPC
This feature is used to delete VPCs. Single and bulk deletion are supported.
- The Default VPC of local IDC cannot be deleted;
- Deletion is not supported when the VPC has IP subnets under it.
- When an AWS VPC is deleted, route tables, security groups, and Internet gateways under the VPC are also deleted.
Delete a single VPC
- On the VPC page, click “Delete” in the Actions column on the right of the VPC to open the confirmation dialog.
- Click “OK” to complete the operation.
Delete in bulk
- In the VPC list, select one or more VPCs, click “Delete” above the list, and the confirmation dialog appears.
- Click “OK” to complete the operation.
View VPC Details
This feature is used to view detailed information about a VPC.
- On the VPC page, click the VPC name to open the VPC details page.
- The menu items at the top of the details page support deleting the VPC.
- View the VPC’s cloud ID, ID, name, status, domain, project, sharing scope, platform, destination CIDR, Layer 2 network count, route table count, IP subnet count, NAT gateway count, allow external network access, region, zone, cloud account, creation time, update time, notes, and more.
View IP Subnet Information
This feature is used to view IP subnet information under a VPC.
- On the VPC page, click the VPC name to open the VPC details page.
- Click the “IP Subnet” tab to open the IP subnet page.
- View IP subnet information under the VPC network, including name, IP address, VLAN, whether shared, type, and usage (total and used).
- The Actions column on the right supports management operations on IP subnets.
View Route Table Information
Route tables control the routing of network traffic. Currently only syncing route tables from Alibaba Cloud, Huawei Cloud, and OpenStack is supported.
- After a VPC is created on a public cloud platform, the system automatically creates a default route table and adds system routes to manage VPC traffic.
- An OpenStack route table is actually the route table of a router. When a user creates a route table under an OpenStack router, it is synced under the corresponding VPC.
- On the VPC page, click the VPC name to open the VPC details page.
- Click the “Route Table” tab to open the route table page.
- View the route table name, owning VPC, region, cloud account, and entries (route table type, destination CIDR, next hop).
View Topology
This feature is used to view network topology information under a VPC.
- On the VPC page, click the VPC name to open the VPC details page.
- Click the “Topology” tab to open the topology page.
- When the VPC is the classic network (Default VPC), view network topology information.
- Virtual topology: Visually shows IP subnets under Layer 2 networks, as well as virtual machines and LB resources that use the IP subnets.
- Physical topology: Visually shows host resources under Layer 2 networks.
- When the VPC is not the classic network, view network topology information that visually shows IP subnets under the current VPC, as well as virtual machines, LB resources, and more that use the IP subnets.
View Operation Logs
This feature is used to view log information for operations related to the VPC.
- On the VPC page, click the VPC name to open the VPC details page.
- Click the “Operation Logs” tab to open the operation logs page.
- Load more logs: The list displays 20 operation log entries by default. To view more, click “Load More” to retrieve additional log information.
- View log details: Click “View” in the Actions column on the right of an operation log to view details. You can copy the detail content.
- View logs for a time range: To view operation logs for a specific period, set the start and end dates in the upper-right of the list, then query logs for that range.
- Export logs: Currently only logs displayed on the current page can be exported. Click the
 icon in the upper-right corner, set the columns to export in the dialog that appears, then click “OK” to export the logs.