Layer 2 Network
A Layer 2 network corresponds to a broadcast domain in the physical network. Hosts within a broadcast domain can communicate at Layer 2 without forwarding through Layer 3 devices. Multiple IP subnets can be configured under one Layer 2 network.
A Layer 2 network defines the boundary of a broadcast domain, while an IP subnet defines the pool of IP addresses that can be allocated within a Layer 2 network.
Layer 2 network sources:
- Sync Layer 2 networks from the ZStack platform.
- Create Layer 2 networks belonging to the OneCloud platform during initialization after the cloud management platform control nodes are installed.
Public cloud platforms do not have the concept of Layer 2 networks. IP subnets can be created directly under a VPC.
Entry: On the cloud management platform, click the  navigation menu in the upper-left corner, then in the left menu that appears click “Resource Management / Network / Network / Layer 2 Network” to open the Layer 2 network page.
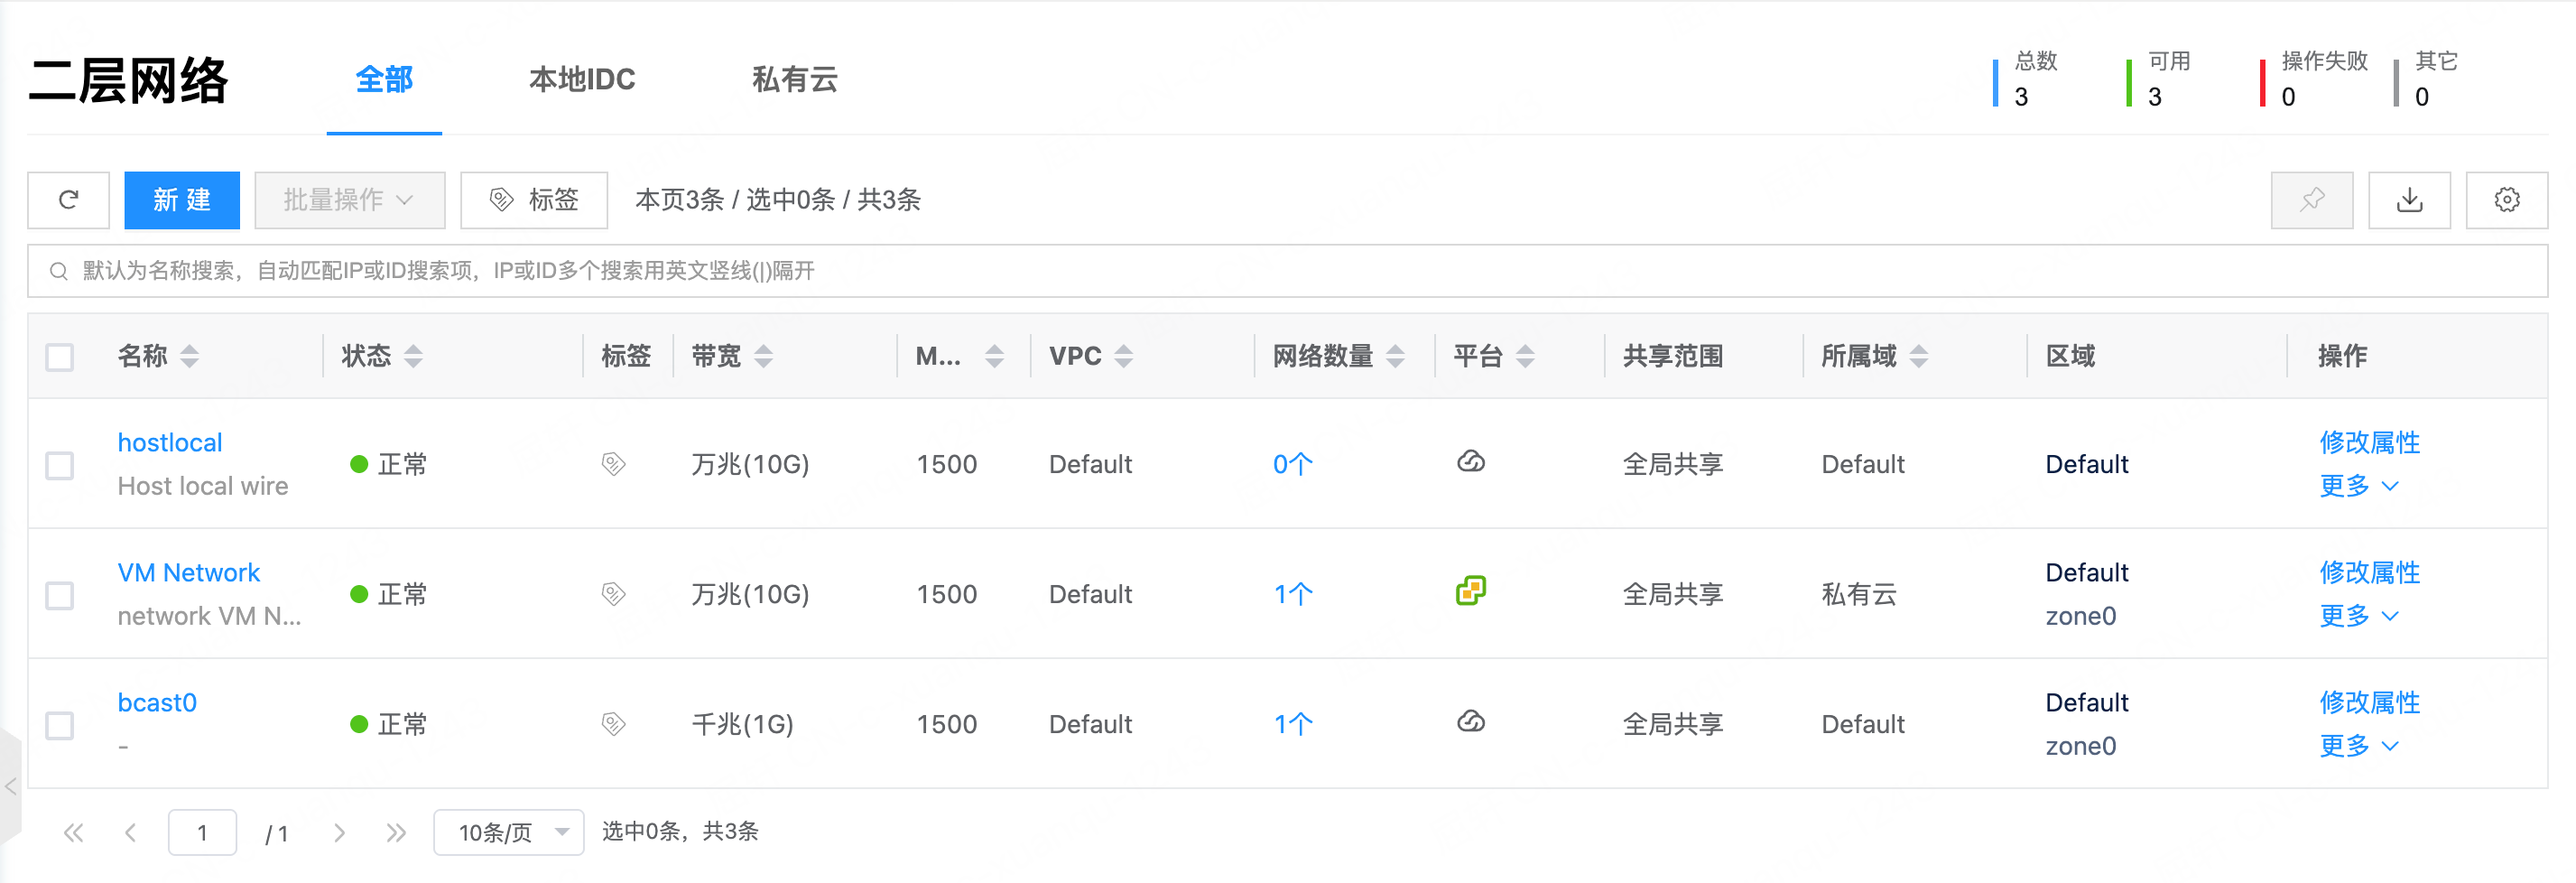
Create Layer 2 Network
This feature is used to create a Layer 2 network on the OneCloud platform. The cloud management platform only supports syncing Layer 2 networks from private cloud platforms and does not support creating them there.
- On the Layer 2 network page, click “Create” above the list to open the create dialog.
- Set the following information:
- Domain: Select the domain for the Layer 2 network.
- VPC: Select the local region and local VDC.
- Zone: Select the zone for the Layer 2 network.
- Name: Set the Layer 2 network name.
- Bandwidth: Set the network bandwidth supported by the Layer 2 network, including 100 Mbps (100M), 1 Gbps (1G), dual 1 Gbps (2x1G), 10 Gbps (10G), dual 10 Gbps (2x10G), 25G, 40G, and 100G. Layer 2 network bandwidth is mainly used to calculate network utilization and determine the network load of virtual machines.
- Click “OK”.
Modify Attributes
This feature is used to adjust the bandwidth and MTU (Maximum Transmission Unit) of a Layer 2 network.
- On the Layer 2 network page, click “Modify Attributes” in the Actions column on the right of the Layer 2 network to open the modify attributes dialog.
- Adjust the bandwidth and MTU value (valid range: 68 bytes to 9216 bytes; typically set to 1500 bytes), then click “OK”.
Merge Wire
This feature is used to merge Layer 2 networks. Currently only Layer 2 networks on the OneCloud platform are supported. A Layer 2 network is an isolated broadcast domain. After merging two or more Layer 2 networks, they become one broadcast domain.
Main use case: After onboarding local virtualization cloud accounts such as VMware and Proxmox, the platform automatically creates Layer 2 networks and IP subnets locally (VMware maps by vSwitch / Distributed vSwitch; Proxmox reuses or auto-creates by node NIC IP and does not sync remote bridges). The same Layer 2 may be split into multiple Layer 2 networks. In that case, use merge wire to merge Layer 2 networks and IP subnets according to the actual network design.
- In the Layer 2 network list, select one or more OneCloud platform Layer 2 networks, click “Bulk Actions” above the list, select “Merge Wire” from the dropdown, and the merge wire dialog appears.
- You can view IP subnets and hosts under the Layer 2 networks. Choose whether to “Automatically merge contiguous subnets under the new Layer 2 network” as needed.
- Click “OK” to start merging Layer 2 networks. The merged Layer 2 network name is the name of the first selected Layer 2 network.
Change Domain
This feature is used to change the domain of a Layer 2 network.
Conditions for changing domain: All of the following must be met
- The current user is in the admin console.
- Three-level permissions are enabled on OneCloud.
- The sharing scope of the Layer 2 network is private.
Change domain for a single Layer 2 network
- On the Layer 2 network page, click “More” in the Actions column on the right of the Layer 2 network, select “Change Domain” from the dropdown, and the change domain dialog appears.
- Select the domain for the Layer 2 network, then click “OK”.
Change domain in bulk
- In the Layer 2 network list, select one or more Layer 2 networks, click “Bulk Actions” above the list, select “Change Domain” from the dropdown, and the change domain dialog appears.
- Select the domain for the Layer 2 network, then click “OK”.
Set Sharing
This feature is used to set the sharing scope of a Layer 2 network.
Domain resources have three sharing scopes:
- Not shared (private): The domain resource can only be used by users in the same domain.
- Domain sharing - partial (multi-domain sharing): The domain resource can be shared with specified domains (one or more). Only users in the resource’s domain and the shared domains can use it.
- Domain sharing - all (global sharing): The domain resource can be shared with all domains, meaning all users in the system can use it.
Conditions for setting sharing: All of the following must be met
- The current user is in the admin console.
- Three-level permissions are enabled on OneCloud.
Set sharing for a single Layer 2 network
- On the Layer 2 network page, click “More” in the Actions column on the right of the Layer 2 network, select “Set Sharing” from the dropdown, and the set sharing dialog appears.
- Configure the following parameters:
- When the sharing scope is “Not shared”, the domain resource is private and can only be used by users in the same domain.
- When the sharing scope is “Domain sharing”, you need to select the domains to share with.
- When one or more domains are selected, the sharing scope is domain sharing - partial. Only users in the resource’s domain and the shared domains can use the domain resource.
- When all domains are selected, the sharing scope is domain sharing - all. All users in the system can use the domain resource.
- Click “OK” to complete the operation.
Set sharing in bulk
- In the Layer 2 network list, select one or more Layer 2 networks, click “Bulk Actions” above the list, select “Set Sharing” from the dropdown, and the set sharing dialog appears.
- Configure the following parameters:
- When the sharing scope is “Not shared”, the domain resource is private and can only be used by users in the same domain.
- When the sharing scope is “Domain sharing”, you need to select the domains to share with.
- When one or more domains are selected, the sharing scope is domain sharing - partial. Only users in the resource’s domain and the shared domains can use the domain resource.
- When all domains are selected, the sharing scope is domain sharing - all. All users in the system can use the domain resource.
- Click “OK” to complete the operation.
Delete
This feature is used to delete Layer 2 networks. Single and bulk deletion are supported. Deletion is not supported when the number of networks under the Layer 2 network is not 0.
Delete a single Layer 2 network
- On the Layer 2 network page, click “Delete” in the Actions column on the right of the Layer 2 network to open the confirmation dialog.
- Click “OK” to complete the operation.
Delete in bulk
- In the Layer 2 network list, select one or more Layer 2 networks, click “Delete” above the list, and the confirmation dialog appears.
- Click “OK” to complete the operation.
View Layer 2 Network Details
This feature is used to view detailed information about a Layer 2 network.
- On the Layer 2 network page, click the Layer 2 network name to open the Layer 2 network details page.
- The menu items at the top of the details page support management operations on the Layer 2 network.
- View the Layer 2 network’s cloud ID, ID, name, status, domain, project, sharing scope, platform, bandwidth, VPC, IP subnets, region, zone, cloud account, creation time, update time, and notes.
View IP Subnets under the Layer 2 Network
This feature is used to view IP subnet information under a Layer 2 network.
- On the Layer 2 network page, click the Layer 2 network name to open the Layer 2 network details page.
- Click the “IP Subnet” tab to open the IP subnet page.
- View IP subnet information under the specified Layer 2 network and manage them.
View Physical Machine Information
This feature is used to view physical machine information under a Layer 2 network.
- On the Layer 2 network page, click the Layer 2 network name to open the Layer 2 network details page.
- Click the “Physical Machines” tab to open the physical machines page.
- View physical machine information under the specified Layer 2 network, including name, enabled status, status, IP, specification, SN, allocation, and IPMI information.
View Host Information
This feature is used to view host information under a Layer 2 network.
- On the Layer 2 network page, click the Layer 2 network name to open the Layer 2 network details page.
- Click the “Hosts” tab to open the hosts page.
- View host information under the specified Layer 2 network, including name, enabled status, status, IP, service, #VM (number of virtual machines), CPU, memory, storage, SN, IPMI, initial account, and type.
View Resource Statistics
This feature is used to view resource statistics under a Layer 2 network.
- On the Layer 2 network page, click the Layer 2 network name to open the Layer 2 network details page.
- Click the “Resource Statistics” tab to open the resource statistics page.
- Donut charts show total, used, and utilization information for CPU, memory, disk, and private IPs of all hosts under the Layer 2 network, as well as enabled and disabled host counts, total virtual machines and counts by status (running, stopped, recycle bin, and others), and used and unused passthrough device counts.
View Topology
This feature is used to view network topology information under a Layer 2 network.
- On the Layer 2 network page, click the Layer 2 network name to open the Layer 2 network details page.
- Click the “Topology” tab to open the topology page.
- View network topology information under the Layer 2 network.
- Virtual topology: Visually shows IP subnets under the Layer 2 network, as well as virtual machines and LB resources that use the IP subnets.
- Physical topology: Visually shows host resources under the Layer 2 network.
View Operation Logs
This feature is used to view log information for operations related to the Layer 2 network.
- On the Layer 2 network page, click the Layer 2 network name to open the Layer 2 network details page.
- Click the “Operation Logs” tab to open the operation logs page.
- Load more logs: The list displays 20 operation log entries by default. To view more, click “Load More” to retrieve additional log information.
- View log details: Click “View” in the Actions column on the right of an operation log to view details. You can copy the detail content.
- View logs for a time range: To view operation logs for a specific period, set the start and end dates in the upper-right of the list, then query logs for that range.
- Export logs: Currently only logs displayed on the current page can be exported. Click the
 icon in the upper-right corner, set the columns to export in the dialog that appears, then click “OK” to export the logs.