Announcements
Announcements are used to publish messages that need to be communicated to all users on the cloud management platform. When an announcement tile is configured on the dashboard, the latest created announcement is displayed on the dashboard.
Entry: In the cloud management platform, click the  navigation menu in the upper left corner, then click “System Configuration/System/Announcements” in the left menu to open the Announcements page.
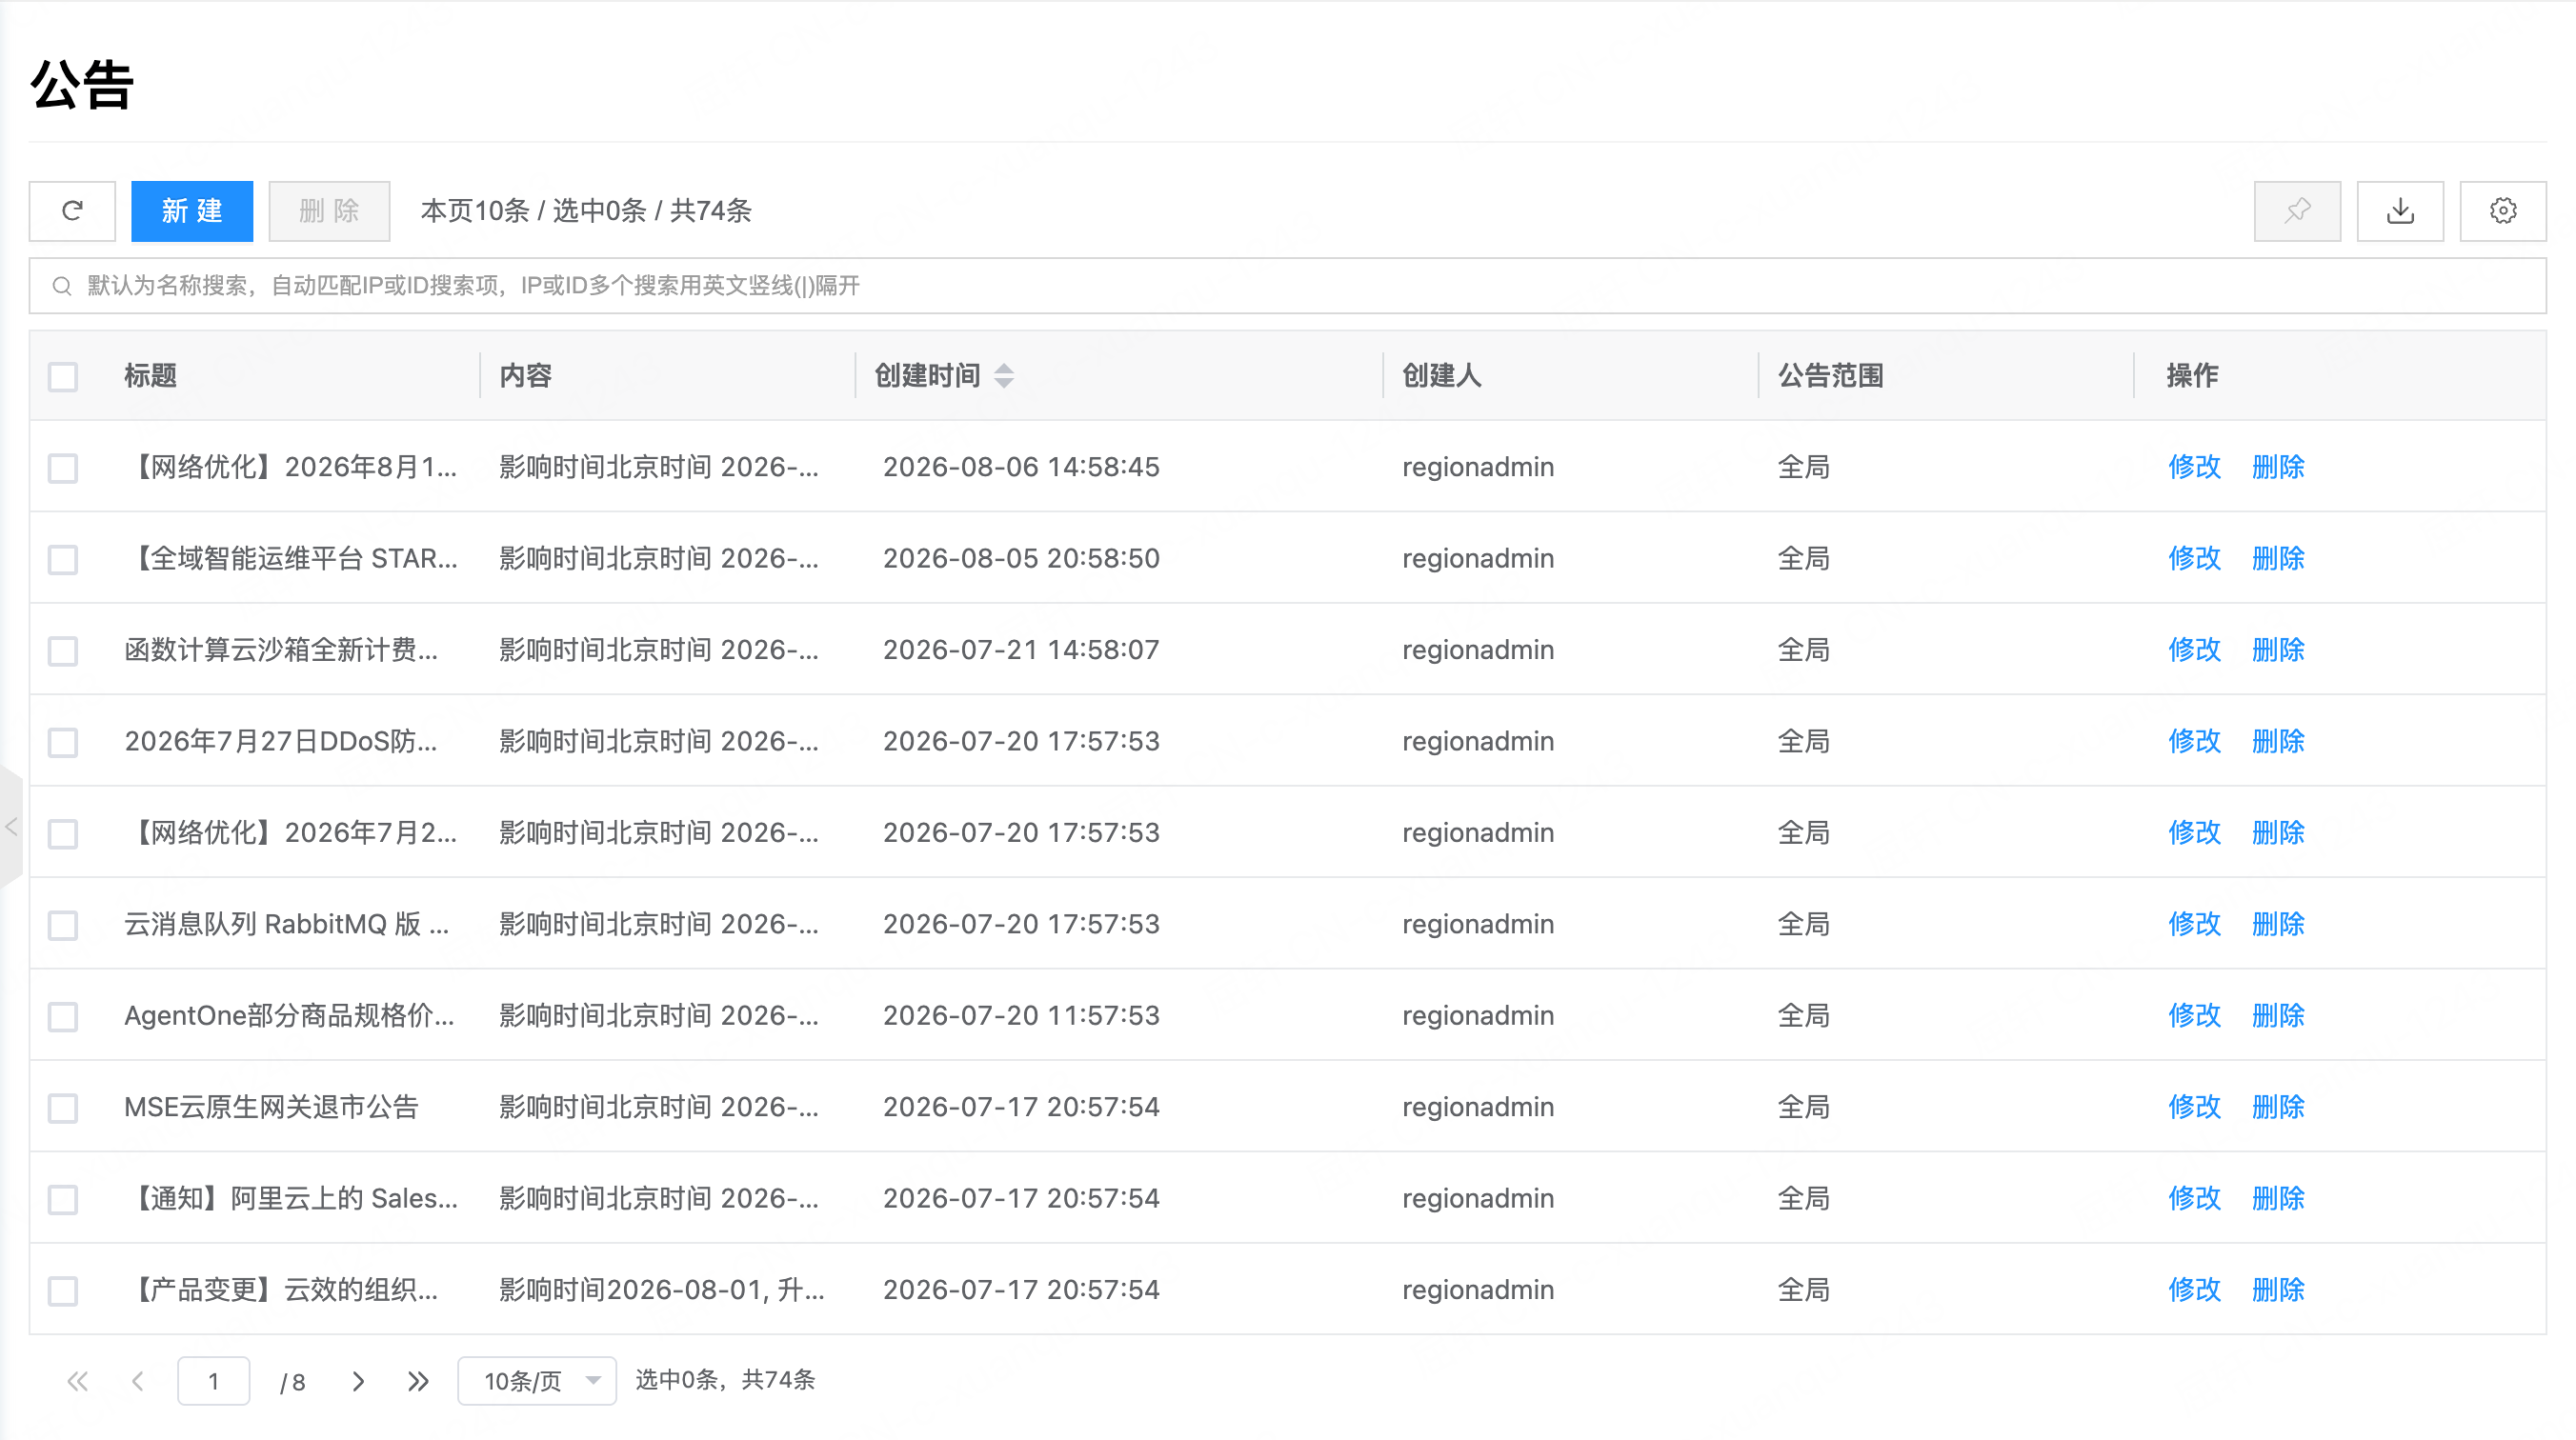
List Field Descriptions
| Field | Description |
|---|---|
| Title | Announcement title; supports click-to-copy |
| Content | Detailed announcement content; supports click-to-copy |
| Creation Time | Creation time of the announcement |
| Created By | Creator of the announcement |
| Announcement Scope | Effective scope of the announcement (global/specified domain) |
| Actions | Available actions for the announcement, including modify and delete |
Note:
- Under the domain admin console, the announcement scope is the current domain;
- Under the system admin console, the announcement scope can be global or a specified domain;
- When the scope is global, the announcement is visible system-wide; when the scope is a domain, it is visible only in that domain.
Public Cloud Announcement Sync
The system automatically syncs the latest announcements from connected public cloud platforms so administrators can stay informed about platform change notices and maintenance announcements.
Sync Rules
| Rule | Description |
|---|---|
| Sync Frequency | Automatic sync via scheduled tasks; no manual trigger required |
| Sync Conditions | Cloud account status is “Connected” and enabled |
| Sync Platforms | Alibaba Cloud, Tencent Cloud, and Oracle public cloud platforms |
| Announcement Scope | Synced announcements have a global scope and are visible to all users |
| Provider Tag | Synced announcements are tagged with the corresponding cloud platform as the Provider for easier distinction |
Notes
Note:
- Public cloud announcements are synced automatically by the system and cannot be modified or deleted;
- To publish a custom announcement, use Create Announcement. Created announcements have Provider “OneCloud”;
- Titles and content of synced announcements follow the official publications of the cloud platforms.
Create Announcement
This feature creates announcement information.
Note: Only the system admin console and domain admin console can create announcements.
- On the Announcements page, click “Create” above the list to open the create dialog.
- Configure the following parameters.
| Parameter | Description |
|---|---|
| Announcement Scope | Visible only in the system admin console. Select the effective scope of the announcement: |
| Global | Visible system-wide to all users |
| Domain | Visible only within the specified domain |
| Title | Announcement title; required; 2–24 characters. Titles cannot be duplicated under the same provider |
| Content | Detailed announcement content; required; 1–140 characters |
- Click “OK” to complete creation.
Modify Announcement
This feature modifies the announcement title and content. Modifying content does not change the creation time. The announcement tile still displays the announcement with the latest time.
Note:
- Only the system admin console can modify global announcements;
- Only the corresponding domain admin console can modify domain-level announcements.
- On the Announcements page, find the announcement to modify.
- Click “Modify” in the Actions column to open the modify dialog.
- Modify the title, content, and other fields.
- Click “OK” to save the changes.
Delete Announcement
This feature deletes an announcement.
Note:
- Only the system admin console can delete global announcements;
- Only the corresponding domain admin console can delete domain-level announcements.
Delete Individually
- On the Announcements page, find the announcement to delete.
- Click “Delete” in the Actions column to open the confirmation dialog.
- Click “OK” to complete deletion.
Delete in Bulk
- In the Announcements list, select one or more announcements to delete.
- Click “Delete” above the list to open the confirmation dialog.
- Click “OK” to complete bulk deletion.