Managing Private Cloud
Managing Private Cloud description
The OneCloud platform supports hosting private cloud platforms such as ZStack, DStack, OpenStack, etc. It supports managing private cloud platforms through cloud accounts, calling APIs on private cloud platforms to synchronize and manage resources on private cloud platforms, and creating servers of private cloud platforms on OneCloud platform, etc.
Management process
The process of hosting the private cloud platform on the OneCloud platform is as follows.
| Process | Platform | Configuration requirements |
|---|---|---|
| Private Cloud Platform Pre-Configuration | Private Cloud Platform | At least the ZStack/Dstack platform is required to be configured with basic resources such as zone, hosts, storage, L2 Network, IP subnets, etc. Subsequent additions of hosts, storage, L2 Network, and other configurations need to be done on the corresponding private cloud platform. |
| At least the basic resources such as admin projects and users, hosts, storage, IP subnets, etc. are required to be configured on the OpenStack platform, and subsequent additions of hosts, storage, etc. need to be done on the OpenStack platform. | ||
| Create cloud account | OneCloud platform | Create private cloud account to synchronize information on the private cloud platform. |
| Create a private cloud platform server | OneCloud platform | Create a private cloud platform server based on a private cloud account |
The OneCloud platform interacts with the private cloud platform as follows.
| interactions | content |
|---|---|
| OneCloud Platform synchronizes private cloud | Supports synchronization of private cloud regions, zone, hosts, storage, VPCs, L2 Network, IP subnets, elastic NICs, servers, packages, security groups, snapshots, servers, etc. |
| OneCloud platform can create private cloud resources | Support for creating zone, IP subnets, packages, snapshots, disks, servers, etc. belonging to the private cloud platform on OneCloud platform |
| OneCloud platform can be used by the private cloud platform resources | Image, security group, package, reserved IP, key, such as in OneCloud platform to create a private cloud server can choose OneCloud platform on the image, package, security group, etc. |
- When you manage private cloud platform, please first configure the platform on the private cloud platform according to the configuration content required by the private cloud platform. For private cloud platform configuration, please see the corresponding platform official website documentation. E.g. ZStack official website user manual, OpenStack official website documentation. After the configuration is done, then create private cloud account on OneCloud platform and synchronize the configuration information, etc.
- When users manage a private cloud platform with existing data, they can directly create private cloud account and synchronize the private cloud configuration to quickly build a server on the OneCloud platform.
Sync rules
-
Synchronize the private cloud platform to the OneCloud platform: The OneCloud platform synchronizes the resources on the private cloud platform using the full synchronization or set the automatic synchronization function. All subsequent operations done by users on the private cloud platform need to be synchronized to the OneCloud platform using the sync feature.
-
Synchronize OneCloud platform to private cloud platform: The servers created by users in OneCloud platform and the resources such as security groups, packages and images that use OneCloud platform when creating servers are synchronized to the private cloud platform.
Prerequisites
Administrators need to prepare the following information when nano-managing the private cloud platform.
| platform | information | access |
|---|---|---|
| ZStack/DStack | Authentication Address (http://host:8080) Key ID (i.e. Access Key ID) Password (i.e. Access Key Secret) | View the Access Key on the “Platform Management/ Access Key” page of the ZStack or DStack platform. Access Key" page on ZStack or DStack platform to view the Access Key ID and Access Key Secret information. |
| OpenStack | Authentication Address (http://host:port/v3) Account/Password Project | View the Identity service access address on the Access API page of the OpenStack platform |
Managing OpenStack
Create OpenStack cloud account
-
In the Cloud Management Platform click on the top left corner of
 navigation menu, and click “Multicloud/Account/Accounts” menu item in the left menu bar that pops up to enter the cloud account page.
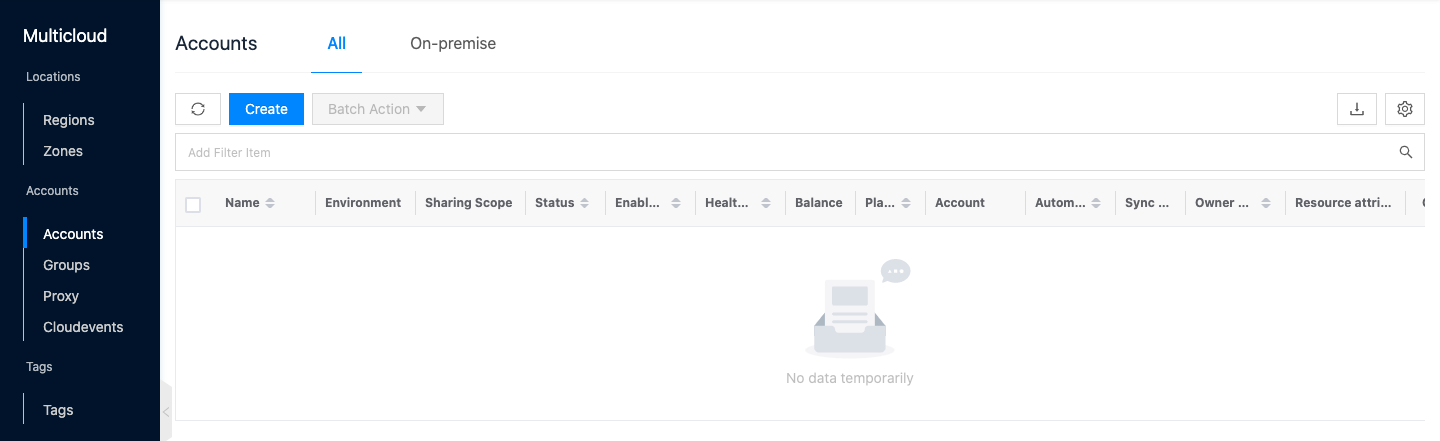
-
Click the “Create” button at the top of the list to enter the Create Accounts page.
-
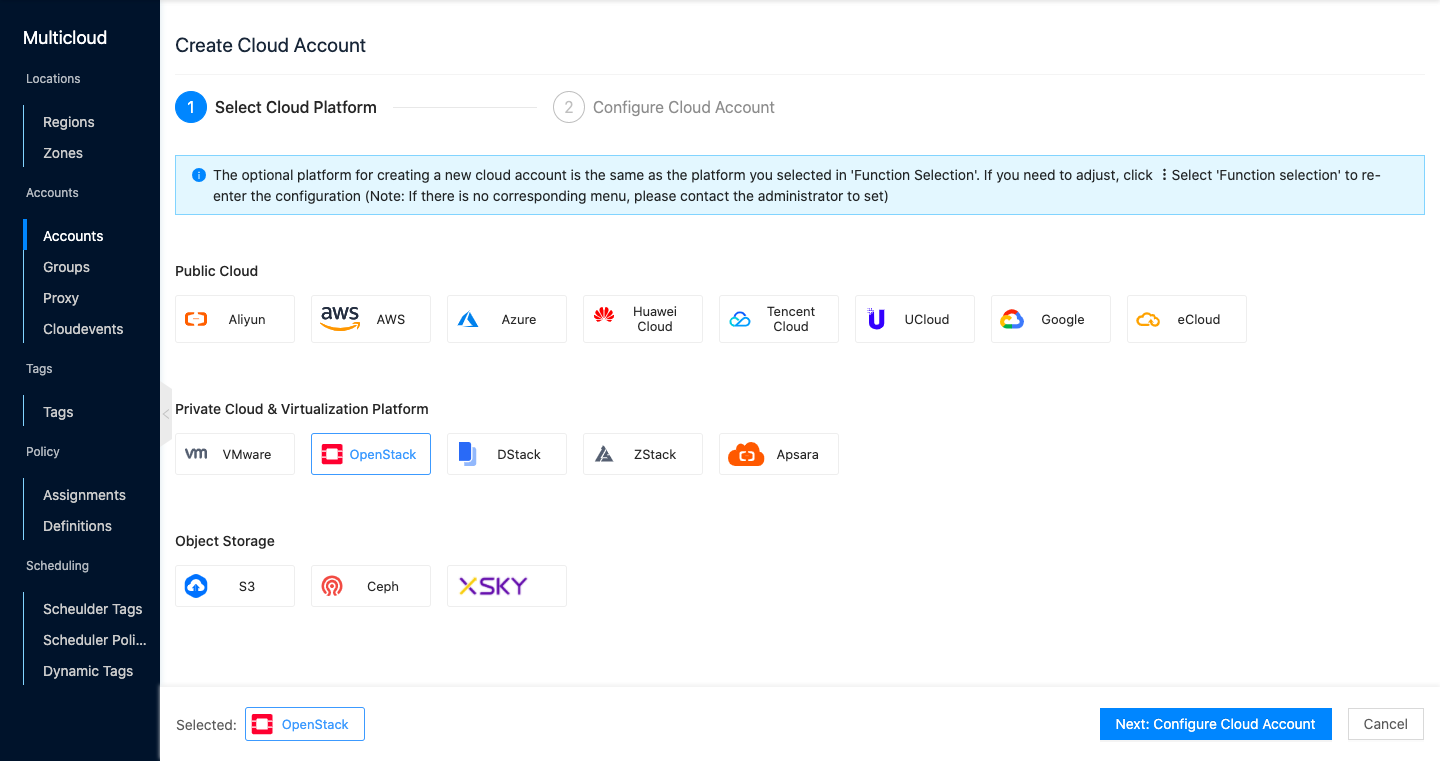
Select the “OpenStack” platform and click the “Next: Configure Cloud Account” button .
-
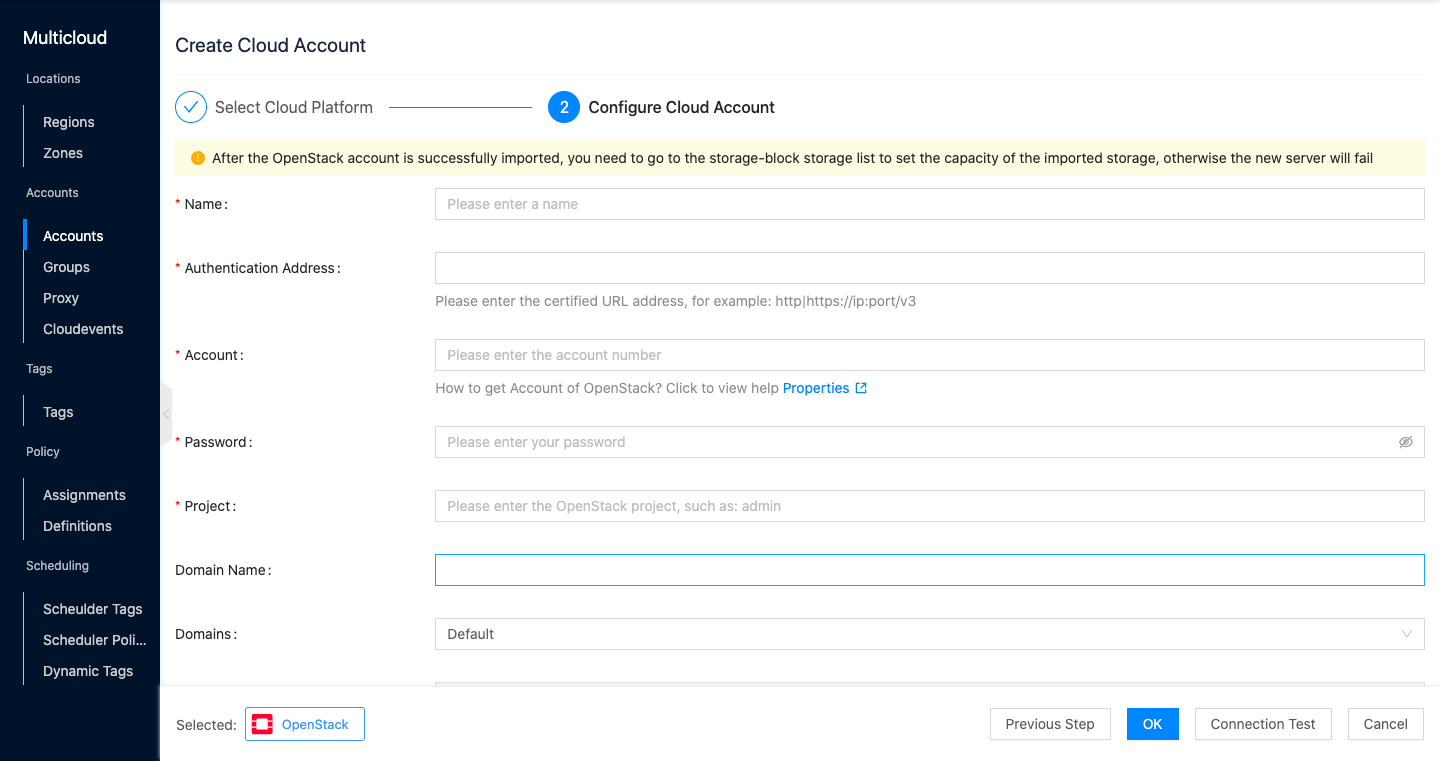
Set the following information in the Configure Accounts page.
- Name: The name of the OpenStack account.
- Authentication address: The authentication address of the OpenStack management platform, such as http://host:port/v3.
- Account: The administrator user name of the OpenStack platform, such as admin.
- Password: The password of the OpenStack platform administrator user.
- Project: The project on the OpenStack platform, such as admin project.
- Domain Name: The Domain name on the OpenStack platform, such as default.
- Domain: Select the domain to which the cloud account belongs. When the cloud account is private, all project users under the domain can use the cloud account to create resources.
- Resource attribution items: The OpenStack platform only supports categorizing the resources on the cloud account according to the projects on the cloud and the default resource attribution items cannot be specified manually. Checking Auto create project will create a local project with the same name as the project on cloud in OneCloud platform and sync the resources to the corresponding project. Resources without project attribution on the cloud will be synchronized to the default resource attribution project.
- Proxy: Set this item when the cloud account needs proxy to access normally, leave it blank for direct connection.
- Auto-sync: Set whether to automatically synchronize the information on OpenStack platform and set the time interval for auto-sync.
-
Click the “Connection Test” button to test whether the parameters entered are correct.
-
Click the “OK” button to create OpenStack cloud account.
-
The OneCloud platform will create or synchronize the following information.
- The region name is a combination of cloud account name + OpenStack; the zone corresponds to the region on the OpenStack platform.
- Synchronize resources such as hosts, storage, VPCs, IP subnets, security groups, packages, servers, disks, snapshots, etc. that have been created to exist on the OpenStack platform.
-
Subsequent users need to select the corresponding regions and zone when creating servers on the OpenStack platform.
Set storage capacity
Since the cloud management platform cannot get the real capacity of storage on OpenStack platform, you need to set the capacity of OpenStack storage manually. Please try to set the storage capacity to the real capacity of storage in order to use the storage as much as possible and avoid the failure of disk creation due to the set capacity exceeding the real capacity of storage.
-
In the cloud management platform, click the top left corner of
navigation menu, and click “Storage/Block Storage/Block Storage” menu item in the left menu bar that pops up to enter the Block Storage page.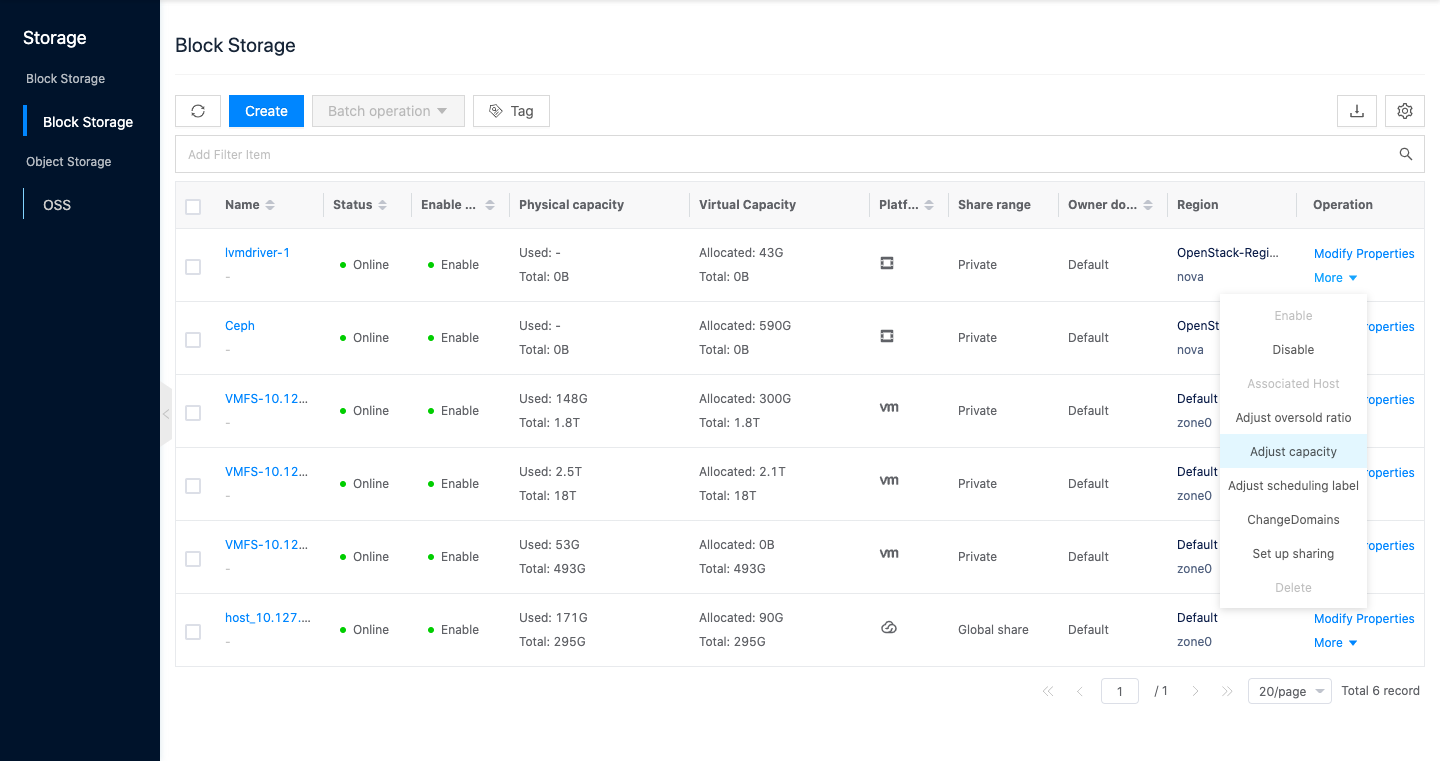
-
Click the “More” button on the right action bar of OpenStack Platform Storage, select the drop-down menu “Adjust Capacity” menu item to bring up the Adjust Capacity dialog box .
-
Set the storage capacity and click the “OK” button.
Create a new ZStack/DStack account
Take the ZStack account as an example, both operations are the same.
-
In the cloud management platform, click the top left corner of  navigation menu, and click “Multicloud/Account/Accounts” menu item in the left menu bar that pops up to enter the cloud account page.
-
Click the “Create” button at the top of the list to enter the Create Cloud Account page.

-
Select the “ZStack” platform and click the “Next: Configure Cloud Account” button.
-
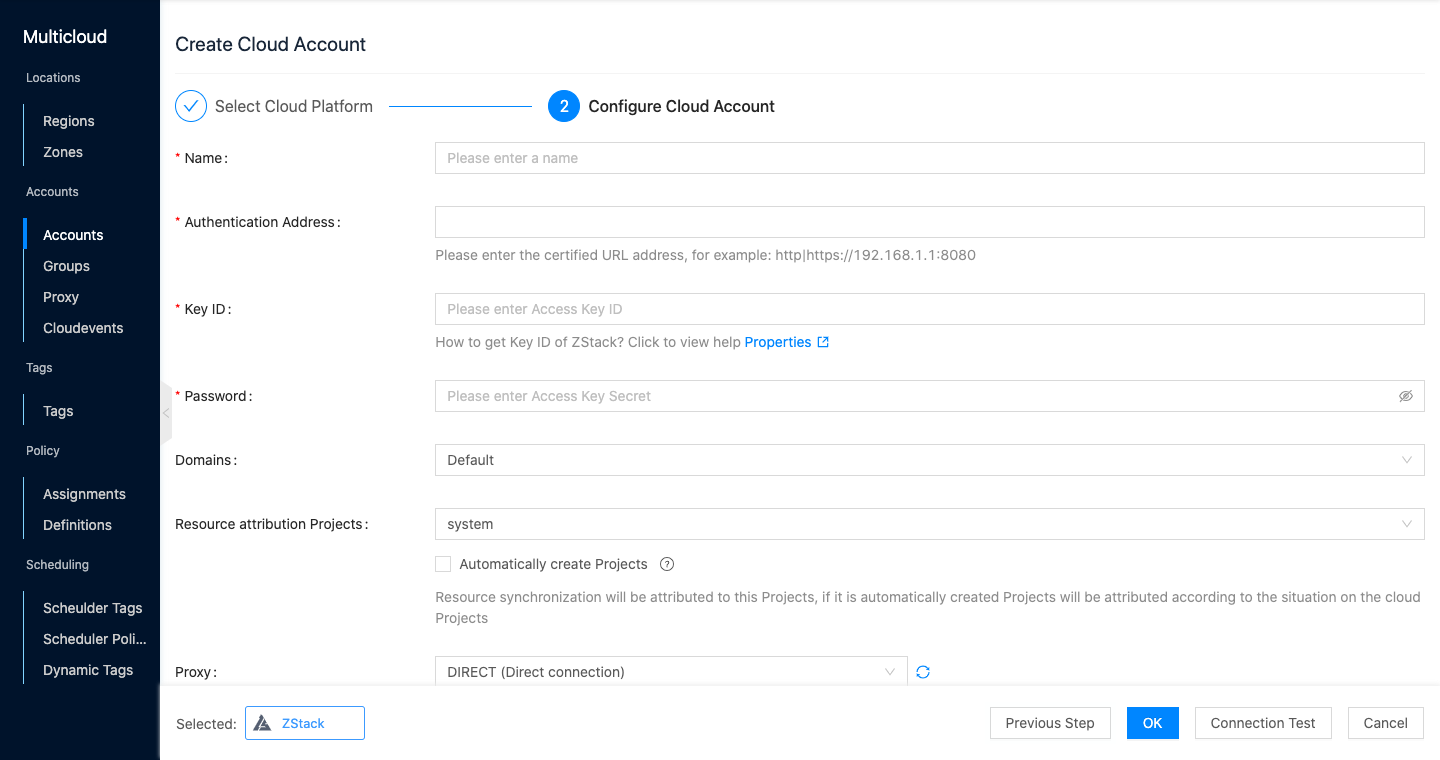
Set the following information in the Configure Cloud Account page.
- Name: Name of the ZStack or DStack account.
- Authentication address: The authentication address of the ZStack or DStack platform, typically http://host:8080/, host is the IP address of the ZStack or DStack control node.
- Key ID: I.e. the Access Key ID on the ZStack or DStack platform.
- Password: I.e. Access Key Secret on ZStack or DStack platform.
Description
Users can generate new Access Key information or use an existing Access Key from the [Platform Management - Access Key] page of the ZStack Management Platform.
- Domain: Select the domain to which the cloud account belongs. When the cloud account is private, all project users under the domain can use the cloud account to create resources.
- Resource attribution project: Select the local project that synchronizes the resources on the cloud account to the OneCloud platform. If you want to categorize the resources on the cloud account according to the projects on the cloud, please specify the default resource attribution project first and check the box to create the project automatically. After checking the box, a local project with the same name as the project on the cloud will be created in the OneCloud platform and the resources will be synchronized to the corresponding project. Resources without project attribution on the cloud will be synchronized to the default resource attribution project.
- Proxy: Set this item when the cloud account needs proxy to access normally, leave it blank for direct connection.
- Auto-sync: Set whether to auto-sync the information on ZStack/DStack platform and set the time interval for auto-sync.
-
Click the “Connection Test” button to test whether the parameters entered are correct.
-
Click the “OK” button to create a new ZStack cloud account.
-
The OneCloud platform will create and synchronize the following information.
- The region name is the cloud account name; the availability zone name will synchronize the region information on the ZStack platform.
- Availability zones, Layer 2 networks, IP subnets, hosts, storage, security groups, packages, servers, hard disks, snapshots, etc. that have been created to exist on the ZStack platform.
-
Subsequent users need to select the corresponding regions and availability zones when creating ZStack platform Servers.
Create private cloud platform server
When the private cloud account is private, only the project users in the domain to which the cloud account belongs can create private cloud platform servers. When the private cloud account is shared, all project users in the system can create private cloud platform servers. This section takes cloudadmin administrator to create a private cloud platform server in the system backend as an example.
Description
- When the private cloud account is normal and the synchronized hosts and storage are enabled and online, users can create private cloud servers in the OneCloud platform.
- When creating a server, the private cloud platform to which the server belongs needs to be determined by the region availability zone information, such as selecting the region and availability zone where the ZStack account is synchronized, then the server for the ZStack platform is created.
-
In the cloud management platform click on the top left corner of  navigation menu, and click “Compute/Compute/Servers” menu item in the pop-up left menu bar to enter the Server page.
-
Click the “Private Cloud” tab at the top, click the Create button at the top of the list to enter the Create Private Cloud Server page. Or click the “Create” button at the top of the list, and then click the “Private Cloud” tab at the top to enter the Create Private Cloud server page.

-
Set the following parameters.
-
Specify the project: The administrator user supports specifying the project where the server is located. When the project user creates a server, the default is the project where the user is currently located. If the cloud account is in private status, only the projects and users of the domain to which the private cloud platform resources belong can create private cloud platform servers.
-
Region: Select the region and availability zone to determine the private cloud platform to which the server belongs through the region information. That is, users can create servers for ZStack, DStack, or OpenStack platform by selecting the region and availability zone.

-
Name: The name of the server.
-
Number: Support creating multiple servers at a time, the name is followed by - number.
-
CPU, Memory, packages: Display and select the available private cloud packages and OneCloud platform packages by selecting CPU cores and memory size. If there is no available package, the administrator can add the required package information of the corresponding platform in the “Host/package/package” page of the platform.
-
OS: According to the actual situation, you can select the required image from the private cloud image list, public image list, and custom image list, and it is recommended to select from the public image.
-
System disk: Select the disk type supported by the private cloud platform and set the size.
-
Data disk: Select the disk type supported by the private cloud platform and set the size.
-
Administrator password: You can keep the default and generate a random password.
-
Network: Specify the IP subnet.
-
Security group: Keep the default or specify the security group. If there is no available security group, the administrator or user needs to create a security group in the “Host/Network/Security Group” page and set the corresponding rules, etc.
-
Scheduler policy: It is recommended to keep the default, users in the project do not need to configure this item. Click the “Create” button at the top of the list to create a private cloud platform server.

-