IP Subnets
IP subnets are used to provide IP addresses for servers, hosts, and other resources.
- Under classic network, IP address ranges between IP subnets cannot overlap.
- Under VPC network, the IP subnet address ranges under different VPCs can overlap.
IP subnet source.
- Create IP subnets are added in the cloud management platform, and the shared range of IP subnets for new server types is shared globally by default, and the shared range of IP subnets for new other types is not shared by default.
- Synchronize IP subnets in public or private cloud environment, the shared range of synchronized IP subnets is shared by default in this domain.
Note
After adding an Azure cloud account to the OneCloud platform, the IP subnets of the VPC network and classic network of the Azure platform will be synchronized to the OneCloud platform, but the OneCloud platform only supports the creation of Azure servers that use the VPC network, so the IP subnets of the Azure classic network synchronized to the OneCloud platform will appear as unavailable on the OneCloud platform.
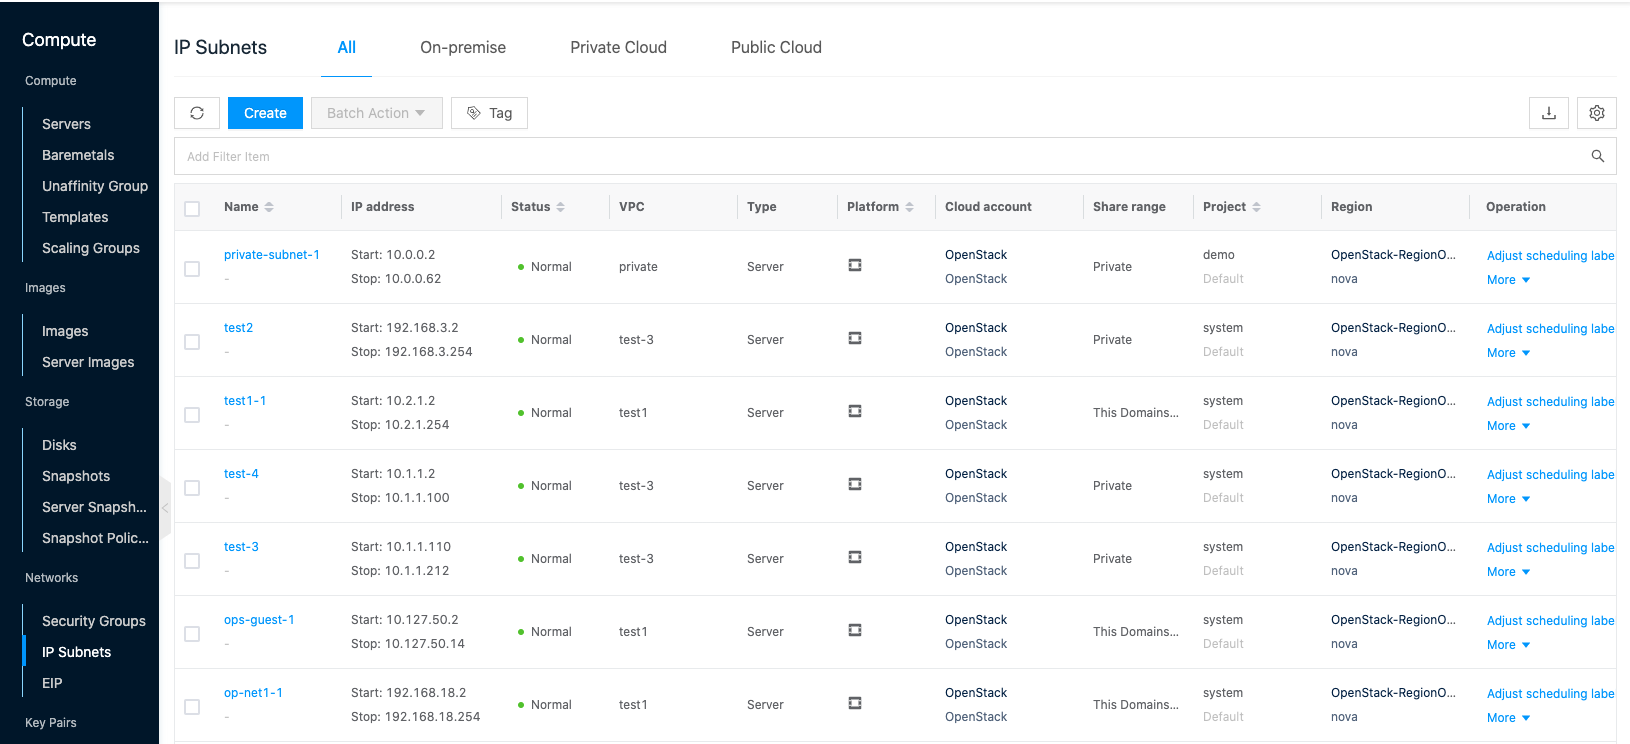
Entry: In the cloud management platform click on the top left corner of  navigation menu, and click “Compute/Networks/IP Subnets” menu item in the left menu bar that pops up to enter the IP Subnets page.
Create IP subnets
This function is used to create an IP subnet.
Description
On the Create IP Subnets page, you can click the “On-premise”, “Private Cloud”, and “Public Cloud” tabs at the top to switch between creating IP subnets on different platforms.
Create IP subnets for On-premise
The IP subnet of On-premise is divided into IP subnet of classic network (i.e. VPC is default) and IP subnet of VPC network (i.e. VPC is non-default). Among them, the IP subnet of classic network supports setting VLAN, and a VLAN is also a L2 Network. IP subnets belonging to the same VLAN can communicate directly with each other, and IP subnets belonging to different VLANs cannot communicate directly, and need to communicate through Layer 3 devices, etc.
-
On the IP Subnets page, click “All” or “On-premise” tab at the top, and click “Create” button at the top of the list to enter the IP subpage of On-premise.
-
Set the following information.
- Specify Project: Select the project to which the IP subnet belongs.
- Region: Select the area to which the IP subnet belongs.
- Name: Set the name of the IP subnet.
- VPC: Select the VPC to which the IP subnet belongs.
- When VPC is selected as “default (classic network)”.
- L2 Network: Select the region, proprietary network, and L2 Network.
- Server Type: Set the IP subnet to assign IP addresses to which type of servers, including servers (servers and baremetal), physical machines (physical machines and hosts), PXE, IPMI, and resilient public IP.
- Subnet segment: Set the starting IP address, ending IP address, subnet mask, default gateway (optional), VLAN ID (optional), etc. Support adding 6 IP subnet segments at one time. When creating multiple IP subnets at one time, the subnet names are automatically assigned by the system, such as creating 3 IP subnets and setting the IP subnet name to network in the page, the names will be network0, network1 and network2 in order.
- Auto scheduling: Auto scheduling is supported only when the server type is server. When auto scheduling is enabled, users will assign IP addresses for servers from the IP subnets with auto scheduling enabled when they create server networks with auto scheduling specified.
- Advanced Configuration: Click the Advanced Configuration hyperlink to expand the advanced configuration options.
- Line Type: When the server type is EIP, it supports customizing the line type for marking EIP, such as Unicom, Mobile, etc.; in [Cost-Rate Configuration], it supports setting different rates for EIP of different line types, if there is no line type, the default EIP rate will be used.
- Address allocation policy: Including default policy (baremetal hosts is allocated from IP subnet high address, server is allocated from IP subnet low address), allocation from high address, allocation from low address, random allocation.
- Domain name server: Set the domain name server.
- Host domain suffix: When setting the host domain suffix, when the system assigns an IP to the host, it also creates a domain record pointing to that IP, and the domain name format consists of host name + host domain suffix. E.g. the host name is VM01, the assigned IP address is 192.168.1.1, and the host domain suffix is test.com. i.e. a domain record corresponding to 192.168.1.1 and VM01.test.com is created, and when using the ping command, ping VM01.test.com, it will return the 192.168.1.1 IP address.
- When the VPC selects “vpc name (segment)”.
- Availability Zone: Select the zone to which the IP subnet belongs to, there can be multiple IP subnets in the zone under one VPC, and subnets in different zones under the same VPC are interoperable by default.
- Subnet segment: Set the IP address range of the subnet, the IP subnet needs to be within the network segment range of the VPC. Support adding up to 5 subnets.
- Auto Scheduling: When auto scheduling is enabled, users will assign IP addresses to Servers from the IP subnets with auto scheduling enabled when they create Server networks to specify auto scheduling.
- When VPC is selected as “default (classic network)”.
-
Click the “OK” button to complete the creation.
Create IP subnet for private cloud
- On the IP subpage, click the “Private Cloud” tab at the top, and click the “Create” button at the top of the list to enter the IP subpage for the new private cloud.
- Set the following information.
- Specify Project: Select the project to which the IP subnet belongs.
- Region: Select the region to which the IP subnet belongs.
- When the region is selected as “OpenStack” region.
- VPC: Select the VPC on the OpenStack platform.
- Availability Zone: Set the zone to which the IP subnet belongs. There can be multiple IP subnets in the zone under one VPC, and the subnets in different zones under the same VPC are interoperable by default.
- When the zone is selected as “ZStack/DStack” zone
- VPC: Select the L2 Network on the ZStack/DStack platform.
- L2 Network: Set the L2 Network to which the IP subnet belongs.
- When the region is selected as “OpenStack” region.
- Name: Set the name of the IP subnet.
- Subnet Segment: Set the IP address range segment in the format of 192.168.0.0/24. The IP subnet needs to be within the range of the VPC’s network segment.
- Auto scheduling: When enabled, users will assign IP addresses to Servers from the IP subnet with auto scheduling enabled when they create a Server network to specify auto scheduling.
- Click the “OK” button to complete the creation.
Create IP subnet for the public cloud
- On the IP subpage, click the “Public Cloud” tab at the top and click the “Create” button at the top of the list to enter the IP subpage of the new public cloud.
- Set the following information.
- Specify Project: Select the project to which the IP subnet belongs.
- Region: Select the region to which the IP subnet belongs. You can filter the appropriate region by city and platform quickly.
- Name: Set the name of the IP subnet.
- VPC: Select the VPC to which the IP subnet belongs.
- Availability Zone: Set the zone to which the IP subnet belongs. There can be multiple IP subnets of zones under one VPC, and subnets of different zones under the same VPC are interoperable by default.
- Subnet segment: Set the IP address range segment in the format of 192.168.0.0/24, and the IP subnet needs to be within the range of the VPC’s network segment.
- Auto scheduling: When auto scheduling is enabled, users will assign IP addresses to Servers from the IP subnets with auto scheduling enabled when they create Server networks to specify auto scheduling.
- Click the “OK” button to complete the creation.
Adjust scheduling tab
This function is used to bind a scheduler tag to an IP subnet. The IP subnet to which the scheduler tag is bound will follow the scheduler policy to assign IP addresses to servers.
- Click the “Adjust Scheduler Tag” button on the right column of IP subnet to bring up the Adjust Scheduler Tag dialog box.
- Select the scheduler tag and click the “OK” button.
Modify Properties
This function is used to modify the IP subnet. Only the IP subnet under Default VPC (Classic Network) on OneCloud platform is supported to be modified.
modification.
- On the IP Subnets page, click the “More” button in the operation column on the right side of the IP subnet, and select the drop-down menu “Modify Properties” menu item to enter the Modify Properties page.
- The following items are supported for modification: Subnet Name, Server Type, Start IP, End IP, Subnet Mask, Default Gateway, VLAN ID, Advanced Configuration (Line Type (only supported for EIP Type), Address Assignment Policy, Domain Name Server, Host Domain Suffix).
- When the modification is complete, click the “OK” button.
Batch Modification.
- Select one or more IP subnets in the IP subnet list, click the**_“Batch Action”_** button at the top of the list, and select the drop-down menu **_“Modify Properties”_** menu item to enter the Modify Properties page.
- Support modifying items as follows: Subnet Name, Start IP, End IP, Subnet Mask, Default Gateway, VLAN ID.
- Click the “OK” button when the modification is finished.
Change Project
This function is used to change the item to which the IP subnet belongs. The item can be changed only when the IP subnet is private.
Change item for individual IP subnet
- On the IP Subnets page, click the “More” button on the right action bar of the IP subnet, and select the drop-down menu “Change Project” menu item to bring up the Change Project dialog box.
- Modify the fields and items, click “OK” button.
Batch Change Projects
- Select one or more IP subnets in the IP subnet list, click the “Batch Action” button at the top of the list, and select the drop-down menu “Change Project” menu item to bring up the Change Project dialog box.
- Modify the domain and project, click “OK” button.
Set up sharing
This function is used to set the sharing status of IP subnet.
There are five types of sharing ranges for project resources.
- No sharing (private): I.e. project resources are only available to users of this project.
- Project sharing-part (shared by multiple projects in this domain): that is, project resources can be shared to specified projects (one or more) under the same domain, and only users under this project and the shared project can use project resources.
- Project Sharing-All (shared by this domain): I.e. project resources can be shared to all projects under the domain, i.e. all users of the project’s domain can use the project resources.
- Domain sharing-part (Multiple Domains sharing): I.e. project resources can be shared to the specified domain (one or more), and only users under the domain where the project resources are located and the shared domain can use the project resources.
- Domain Share-All (Global share): I.e. project resources can be shared to all domains, i.e. all users in the system can use project resources.
Description
To set the conditions for domain sharing.
- Three-level Resource Hierarchy have been turned on in the OneCloud platform.
- The user is in the admin backend.
To set up project sharing.
- The user is in the admin backend or domain admin backend.
Note
- It is recommended that IP subnets of baremetal hosts, PXE, and IPMI types are not set to shared status.
- The IP subnets of local IDCs are shared in any range.
- The shared range of IP subnets for private and public clouds is related to the shared range of the cloud account.
- When the cloud account is not shared, the resources synced down through the cloud account cannot be shared either.
- When the cloud account is enabled for sharing, the resources synchronized down through the cloud account will also be enabled for sharing with the cloud account.
- When the cloud account is enabled for sharing, the resources synced through the cloud account can change the sharing range. Please make sure the sharing range is within the sharing range of the cloud account.
- When the cloud account modifies the sharing range, the sharing range of the resources synced through the cloud account should always remain within the sharing range of the cloud account. E.g. if the cloud account shares domain A, B, C, D, and domain resources share domain A and C, and the cloud account modifies the sharing range to domain A and B, then the domain resources can only be shared to domain A.
- When the cloud account shares cloud subscriptions, the domain resources synced down through the cloud account cannot be shared.
Setting up sharing for a single IP subnet
- On the IP Subnets page, click the “More” button in the action bar on the right side of the IP subnet, and select the drop-down menu “Set up sharing” menu item to bring up the Set up sharing dialog box.
- Configure the following parameters.
- When “No Sharing” is selected as the sharing scope, the sharing scope of project resources is private and only users of this project can use them.
- When the sharing scope is selected as “Project Sharing”, you need to select the projects that can be shared under this domain.
- When the project selects one or more projects under the same domain, the shared scope of the project resources is Project Shared - Part, and only the users under the project where the project resources are located and the shared project can use the project resources.
- When All is selected for the project, the shared scope of the project resource is Project Shared - All, and all users under the project’s domain can use the project resource.
- When the sharing scope is “Domain Sharing”, you need to select the shared domains.
- When one or more of the domains are selected, the sharing scope of the project resources is Domain Sharing - Partial, and only the users under the domain where the project resources are located and the shared domain can use the domain resources.
- When All is selected for the domain, the sharing scope of the project resource is Domain Shared-All, and all users in the system can use the project resource.
- Click the “OK” button to complete the operation.
Batch Setting Sharing
The sharing range for multiple IP subnets set in batch must be the same. Otherwise, please set up shares for IP subnets separately.
- Select one or more IP subnets in the IP subnets list, click the**_“Batch Action”_** button at the top of the list, and select the drop-down menu **_“Set up sharing”_** menu item to bring up the Set up sharing dialog box.
- Configure the following parameters.
- When “No Sharing” is selected as the sharing scope, the sharing scope of project resources is private and only users of this project can use them.
- When the sharing scope is selected as “Project Sharing”, you need to select the projects that can be shared under this domain.
- When the project selects one or more projects under the same domain, the shared scope of the project resources is Project Shared - Part, and only the users under the project where the project resources are located and the shared project can use the project resources.
- When All is selected for the project, the shared scope of the project resource is Project Shared - All, and all users under the project’s domain can use the project resource.
- When the sharing scope is “Domain Sharing”, you need to select the shared domains.
- When one or more of the domains are selected, the sharing scope of the project resources is Domain Sharing - Partial, and only the users under the domain where the project resources are located and the shared domain can use the domain resources.
- When All is selected for the domain, the sharing scope of the project resource is Domain Shared-All, and all users in the system can use the project resource.
- Click the “OK” button to complete the operation.
Split IP Subnet
This function is used to split the IP subnet range to divide a subnet into two subnets. Only OneCloud platform supports it.
- Click the “More” button in the operation bar on the right of IP subnet, select the drop-down menu “Split IP Subnet” menu item, and the Split IP Subnet dialog box will pop up.
- Enter the new IP subnet name and new IP subnet starting IP (original IP subnet address range: original IP subnet starting IP to new IP subnet starting IP end-1; new IP subnet address range: new IP subnet starting IP to original IP subnet ending IP).
- Click the “OK” button.
Merge IP Subnets
This function is used to merge split IP subnets, into one IP subnet, which is only supported by OneCloud platform.
- Select two IP subnets with consecutive IP address segments in the IP subnet list, click the**_“Batch Action”_** button at the top of the list, select the drop-down menu **_“Merge IP Subnets”_** menu item, and the operation confirmation dialog box pops up.
- Click the “OK” button to merge two IP subnets into one, and the IP subnet name is the name of the IP subnet with the larger IP address.
Reserved IP
This function is used to reserve IPs in the IP subnet. The reserved IPs will not be assigned by the cloud management platform for use by the server.
- Click the button “More” in the operation column on the right side of the IP subnet, select the drop-down menu “Reserved IP” menu item, and the Reserved IP dialog box pops up.
- Enter the IP addresses to be reserved in the IP subnet (support adding 6 IP addresses at one time), the reason for reserving, and click “OK” button.
Set up automatic scheduling
This function is used to enable or disable the auto-scheduling function for IP subnets. When enabled, when users create servers with network auto-scheduling, IP addresses will be assigned to servers from the IP subnets with auto-scheduling enabled.
Note
Only IP subnets of the server type support setting up automatic scheduling.
Setting up automatic scheduling for a single IP subnet
- Click the “More” button on the right action bar of the IP subnet and select the drop-down menu “Set Auto Scheduling” menu item to bring up the Set Auto Scheduling dialog box.
- Set whether to enable the automatic scheduling function, and click the “OK” button after the setting is completed.
Set up automatic scheduling in batch
- Select one or more IP subnets in the IP subnet list, click the**_“Batch Action”_** button at the top of the list, and select the drop-down menu **_“Set Auto Scheduler”_** menu item to bring up the Set Auto Scheduler dialog box.
- Set whether to enable the automatic scheduling function, and click the “OK” button when the setting is finished.
Sync Status
This function is used to get the current status of IP subnet.
synchronization status
- Click the “More” button in the operation column on the right side of the IP subnet and select the drop-down menu “Sync Status” menu item to synchronize the IP subnet status.
Batch synchronization status.
- Select one or more IP subnets in the IP subnet list, click the action bar “Batch Action” button on the right side of the IP subnet, and select the drop-down menu “Sync Status” menu item to synchronize the status in batch.
Delete IP Subnet
This function is used to delete IP subnets. IP subnets with assigned IPs are not supported to be deleted.
Delete
- Click the “More” button in the operation column on the right side of the IP subnet, select the drop-down menu “Delete” menu item, and the operation confirmation dialog box pops up.
- Click the “OK” button to complete the operation.
Batch Delete
- Select one or more IP subnets in the IP subnet list, click the**_“Batch Action”_** button in the operation column on the right of the IP subnet, select the drop-down menu **_“Delete”_** menu item, and the operation confirmation dialog box pops up.
- Click the “OK” button to complete the operation.
View IP Subnet Details
This function is used to view IP subnet details.
- On the IP Subnets page, click the IP subnet name item to enter the IP subnet details page.
- The menu item at the top of the details page supports managing IP subnet operations.
- View the following information.
- Basic Information: Including Cloud ID, ID, name, status, domain, project, user tag, shared range, platform, scheduler tag, region, zone, cloud account, cloud subscription, created at, updated at, notes, etc.
- Configuration information: Including VPC, L2 Network, server type, line type, IP range, subnet mask, gateway, VLAN ID, usage, name servers, host domain suffix.
View IP Usage
This function is mainly used to view the IP information of IP subnets used for host, host, reserved IP, load balancing IP, and resilient NIC IP usage respectively.
- On the IP Subnet Details page, click the IP Usage tab to enter the IP Usage page.
- View the IP address information of the IP subnet for various purposes.
Reserved IP
This function is used to view the reserved IP details in the IP subnet, and supports creating and releasing reserved IPs.
- On the IP subnet details page, click the Reserved IP tab to enter the Reserved IP page.
- View the information of reserved IPs in the IP subnet.
Create Reserved IP
This function is used to create a new reserved IP. The reserved IP will not be assigned to the server by the cloud management platform.
- On the Reserved IP page, click the “Create” button at the top of the list to bring up the Create dialog box.
- Enter the IP addresses to be reserved in the IP subnet (supports adding 6 IP addresses at one time), the reason for reservation, and click the “OK” button.
Release reserved IP
This function is used to release the reserved IPs so that they can be assigned by the cloud management platform. Individual or batch release of IP addresses is supported.
release
- On the reserved IP page, click the “Release” button in the action column to the right of the IP to bring up the action confirmation dialog.
- Click the “OK” button to complete the operation.
Batch release
- Select one or more IP addresses in the reserved IP list, click the “Release” button at the top of the list, and the operation confirmation dialog box will pop up.
- Click the “OK” button to complete the operation.
View operation log information
This function is used to view the log information of IP address-related operations.
- On the IP Subnet Details page, click the Operation Log tab to enter the Operation Log page.
- Load More Logs: In the Operation Logs page, the list shows 20 operation logs by default. To view more operation logs, please click the “Load More” button to get more logs.
- View Log Details: Click the “View” button on the right column of the operation log to view the log details. Copy details are supported.
- View logs of specified time period: If you want to view the operation logs of a certain time period, set the specific date in the start date and end date at the top right of the list to query the log information of the specified time period.
- Export logs: Currently, only the logs displayed on this page are supported to be exported. Click the upper-right corner of
 icon, set the export data column in the pop-up export data dialog, and click the “OK” button to export the logs.