Scaling Groups
The Scaling Groups is to set the scaling policy according to the business requirements and policies to achieve the function of elastic expansion and contraction of servers.
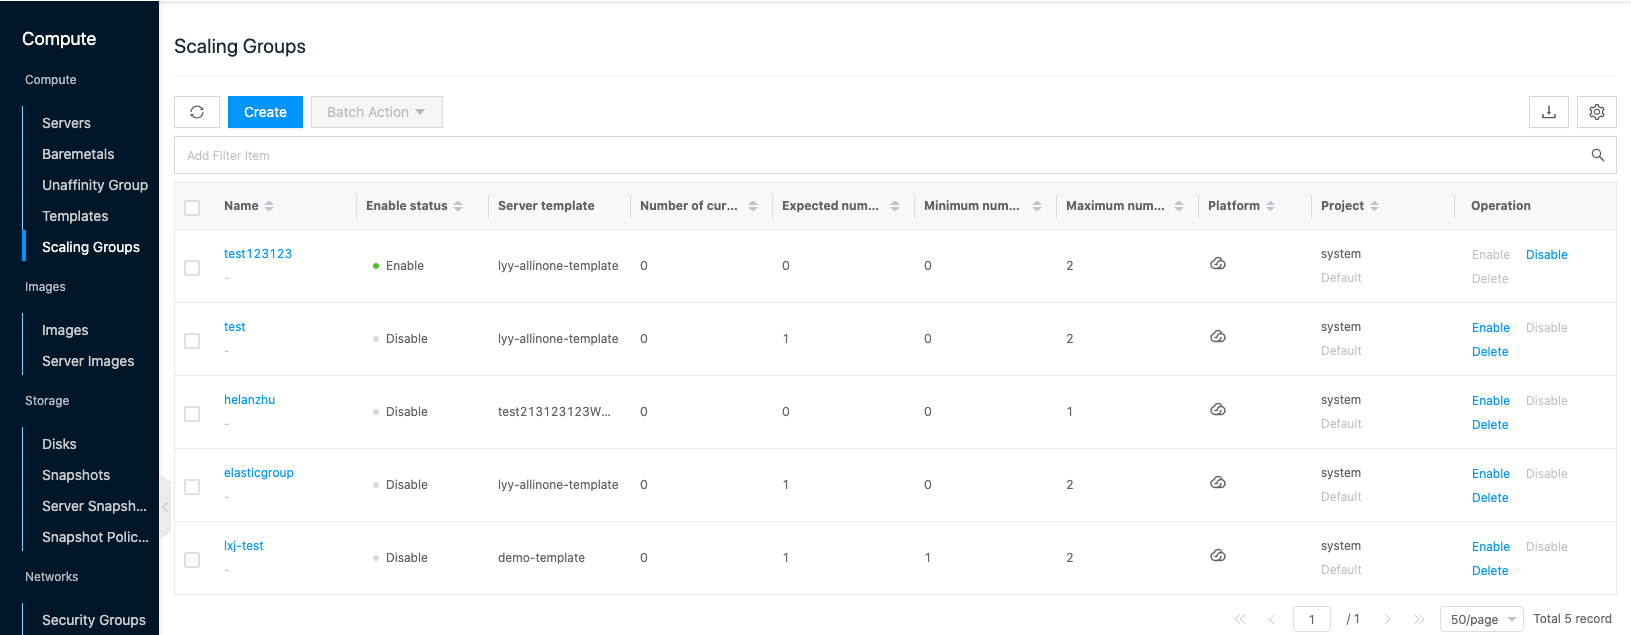
Entry: In the cloud management platform, click the top left corner of  navigation menu, and click “Compute/Compute/Scaling Groups” menu item in the left menu bar that pops up to enter the Scaling Groups page.
Flow of use
- Create the scaling group for the elastic scaling group on the Templates page to create a templates for the elastic scaling group, currently only templatess for OneCloud and Azure platform are supported.
- Create the elastic scaling group in the elastic scaling group page, and select the templates created in the previous step, and set the maximum number of instances, minimum number of instances, and expected number of instances for the scaling activity, etc.
- The created elastic scaling group is enabled by default, set the scaling policy in the scaling policy of the elastic scaling group, such as adding or reducing instances at regular intervals, setting the scaling policy according to the alert status, and setting the periodic scaling policy, etc.
Scaling Groups Management
The Scaling Groups is a group that creates servers with the same configuration based on templatess by configuring templatess and other parameters. Later, you can configure the scaling policy to automatically expand and contract the group.
Create Scaling Groups
This function is used to create elastic scaling groups.
Prerequisites
- Please make sure you have created a templates that meets the requirements. Currently, only templatess for OneCloud platform and Azure platform are supported.
- If you need to bind a load balancing instance to the elastic scaling group, you need to set up a load balancing instance in advance in SLB Instances page to create eligible load balancing instances and configure listeners and backend server groups. Currently, only the OneCloud platform’s elastic scaling group supports binding load balancing instances.
Steps
- In the Scaling Groups list, click the “Create” button at the top of the list to enter the Create Scaling Groups page.
- Configure the following parameters.
- Specify Project: Only need to be selected under the System View and domain System View, and the designated project under the project view is the project view where the current user is.
- Name: Set the name of the Elasticity Scaling Group.
- Platform: Currently only support OneCloud and Azure platform.
- Host template: The templates is the template used to create servers in the subsequent elastic scaling group. You cannot use a templates with an invalid state.
- Network: Select the IP subnet of the servers created in the scaling group.
- Maximum number of instances: The maximum number of instances allowed to be created in the elastic scaling group. When the desired number of instances exceeds the maximum number of instances after the scaling policy is executed, the scaling group will change the desired number of instances to the maximum number of instances to ensure that the instances in the scaling group cannot exceed the maximum number of instances.
- Minimum number of instances: the minimum number of instances allowed to be created in the elastic scaling group. When the expected number of instances is less than the minimum number of instances after the execution of the scaling policy, the scaling group will change the expected number of instances to the minimum number of instances to ensure that the instances in the scaling group cannot be lower than the minimum number of instances.
- Expected number of instances: The scaling group will create or delete servers according to the value of the expected number of instances. Keeps the number of Servers in the scaling group at the desired number of instances without manual involvement. The expected number of instances must be less than or equal to the maximum number of instances in the scaling group and must be greater than the minimum number of instances in the scaling group.
- Instance removal policy: When the scaling group shrinks, choose a policy for removing servers, including priority removal of the earliest created instances, priority removal of the latest created instances, etc. Servers removed by the scaling policy will be deleted directly and will not go to the trash.
- Load balancing: Currently only OneCloud platform supports binding load balancing instances. When binding load balancing instances, you need to select load balancing instances, back-end server groups, server group ports, and weights, etc.
- Health check method: Including server health check and load balancing health check.
- Server Health Check: Check the running status of the servers in the scaling group. When a server is found not to be running, it will be removed and deleted, and a new server will be created.
- Load balancing health check: Only the scaling group with load balancing supports this item. It checks whether the servers in the back-end server group can forward traffic normally through load balancing health check, and when it cannot forward traffic normally, it will remove and delete the servers and create new servers.
- Check period: Set the period for the health check of the scaling group.
- Health status check grace period: When the servers in the scaling group are created successfully, the health status of the servers will not be checked immediately, but will wait until after the grace period before starting the health check.
- Click the “OK” button to create the elastic scaling group.
Enable
This feature is used to enable a stretch group in the “disabled” state. The scaling policy in the scaling group will take effect only when the scaling group is enabled.
Enable
- In the list of elastic stretching groups, click the “Enable” button in the right column of the “Disabled” elastic stretching group to bring up the action confirmation dialog.
- Click the “OK” button to enable the elastic stretch group.
Batch Enable
- Check one or more “Disabled”-status elastic stretching groups in the list of elastic stretching groups, click the**_“Batch Action”_** button at the top of the list, and select the **_“Enable”_** menu item in the drop-down menu to bring up the operation confirmation dialog box.
- Click the “OK” button to enable the elastic stretch group in batch.
Disable
This function is used to disable the stretch group in the “enabled” state. All stretching policies in a disabled stretching group are not effective and cannot be executed, but you can still create stretching policies.
Disable
- In the Flexible Scaling Group list, click the “Disable” button in the action bar to the right of the enabled flexible scaling group to bring up the action confirmation dialog.
- Click the “OK” button to disable the elasticity group.
Batch Disable
- Check one or more “Enabled” elastic stretch groups in the elastic stretch group list, click the “Batch Action” button at the top of the list, and select the “Disable” menu item in the drop-down menu to bring up the action confirmation dialog box.
- Click “OK” button to disable the group.
Delete Scaling Groups
You can delete an Scaling Groups only when there are no servers under the Scaling Groups and it is disabled.
Deleting a single elasticity group
- In the Elasticity Group list, click the “Delete” button in the right column of the Elasticity Group to bring up the action confirmation dialog.
- Click the “OK” button to complete the operation.
Batch Delete Resilient Stretch Group
- Check one or more flexible expansion groups in the flexible expansion group list, click the “Batch operation” button at the top of the list, select the drop-down menu “Delete” menu item, and the flexible operation confirmation dialog box will appear.
- Click the “OK” button to complete the operation.
View elastic stretch group details
This function is used to view the details of the elastic expansion group.
- In the list of elastic stretching groups, click the stretching group name item to enter the elastic stretching group details page.
- The menu item at the top of the details page supports the management operations of the elastic stretch group, etc.
- View the following information.
- Basic Information: Including the Cloud ID, ID, name, status, domain, project, enable status, platform, number of scaling policies, created at, updated at, description, etc. of the elastic scaling group.
- Scaling group information: Including templates of the elastic scaling group, current instance number, expected instance number, minimum instance number, maximum instance number, removal policy, VPC, load balancing, health check method, check period, grace period for health status check, etc.
Scaling Strategy Management
Entry: In the Scaling Groups list, click the Scaling Group Name item, and then click the Scaling Strategy tab at the top of the Scaling Groups details page to enter the Scaling Strategy page.
Create Scaling Strategy
This function is used to set a scaling policy for the elastic scaling group, and the scaling group will automatically expand or contract according to the scaling policy.
- Click the “Create” button at the top of the list to bring up the Create dialog box.
- Set the following parameters.
- Name: The name of the scaling policy.
- Policy type: Including alert policy, timing policy and period policy.
- Alert policy: Set the scaling policy according to the conditions such as the resource utilization of servers in the scaling group.
- Timing policy: The expansion or contraction operation of the scaling group is performed at the specified time.
- Periodic policy: Expand or shrink the scaling group within the specified period.
- When the policy type is “Alert Policy”, the following parameters need to be configured.
- Trigger Condition: Select alert indicators according to requirements, including average CPU utilization, average network inbound traffic, average network outbound traffic, average disk write rate, average disk read rate; and set the scaling activity to be executed when the alert indicator is greater or less than the set target value.
- Number of consecutive occurrences: The scaling activity will be performed when the above trigger conditions occur for a set number of consecutive times.
- Execute action: When the trigger condition is met, the action to be executed by the scaling group, including adding N instances, reducing N instances, or adjusting the number of instances to N (where adjusting the number of instances N needs to be greater than or equal to the minimum value and less than or equal to the maximum value).
- Default cooldown time: After the execution of the scaling activity, no scaling action will be executed within the set cooldown time even if any alert policy of the scaling group meets the trigger conditions.
- When the policy type is “Timing Policy”, the following parameters need to be configured.
- Trigger time: Select a specific date and time when the trigger time is reached, the scaling activity will be executed.
- Execute action: When the trigger condition is met, the action to be executed by the scaling group, including increasing N instances, decreasing N instances, or adjusting the number of instances to N (where adjusting the number of instances N needs to be greater than or equal to the minimum value and less than or equal to the maximum value).
- Default cooldown time: After the execution of the scaling activity, no scaling action will be executed within the set cooldown time even if any alert policy of the scaling group meets the trigger conditions.
- When the policy type is “Periodic Policy”, the following parameters need to be configured.
- Repeat period: Set the period of execution, including daily, weekly and monthly.
- Trigger date (week): When choose weekly, you need to set the trigger week; when choose monthly, you need to choose the trigger date.
- Trigger time: The specific time point to execute the policy.
- Effective time: Set the start date and end date of the periodic policy to execute the stretch policy only within the effective time.
- Execution action: The action to be executed by the scaling group when the trigger conditions are met, including adding N instances, reducing N instances, or adjusting the number of instances to N (where adjusting the number of instances N needs to be greater than or equal to the minimum value and less than or equal to the maximum value).
- Default cooldown time: After the execution of the scaling activity is completed, no scaling action will be executed within the set cooldown time even if any alert policy exists in the scaling group to meet the trigger conditions.
- Click the “OK” button to create the scaling policy.
Execute Scaling Strategy Immediately
This function is used to execute the scaling policy immediately without waiting for the trigger condition to take effect. After immediate execution, the expected number of instances of the scaling group will be changed according to the execution action set by the policy. Only the scaling policies in the “enabled” state can be executed immediately.
- In the Scaling Strategy list, click the “Execute Now” button in the right column of the scaling policy in the “Enabled” state to bring up the action confirmation dialog.
- Click the “OK” button to execute the policy immediately and change the expected number of instances according to the policy execution action.
Enable
This function is used to enable the scaling policy, which can be executed or triggered only when the scaling policy is enabled.
Enable
- In the Scaling Strategy list, click the “More” button in the action bar to the right of the scaling policy in the “Disabled” state, and select the “Enable” menu item in the drop-down menu to bring up the action confirmation dialog.
- Click the “OK” button to enable the stretching policy.
Batch Enable
- Check one or more scaling policies with “Disabled” status in the scaling policy list, click the “Batch Action” button at the top of the list, and select the drop-down menu “Enable” menu item to bring up the operation confirmation dialog box.
- Click the “OK” button to enable the stretching policy.
Disable
This function is used to disable the scaling policy. The scaling policy in the disabled state cannot be executed.
Disable
- In the Scaling Policies list, click the “More” button in the action bar to the right of the enabled scaling policy, and select the “Disable” menu item to bring up the action confirmation dialog.
- Click the “OK” button to disable the stretch policy.
Batch Disable
- Check one or more “Enabled” expansion policies in the expansion policy list, click the “Batch Action” button at the top of the list, and select the “Disable” menu item in the drop-down menu to bring up the action confirmation dialog box. Click the “OK” button to disable the stretch policy.
Delete Scaling Strategy
This function is used to delete a scaling policy. Before deleting a scaling policy, please disable the scaling policy first.
Deleting a single stretch policy
- In the list of stretching policies, click the “More” button on the right column of the stretching policy in the “Disabled” status, and select the “Delete” menu item to bring up the action confirmation dialog box.
- Click the “OK” button to complete the operation.
Batch Delete Stretch Policy
- Check one or more “Disabled” stretch policies in the stretch policy list, click the**_“Batch Action”_** button at the top of the list, and select the drop-down menu **_“Delete”_** menu item to bring up the operation confirmation dialog box.
- Click the “OK” button to complete the operation.
Activity History
When a scaling group executes a scaling policy or manually removes instances, it will change the expected number of instances in the scaling group to achieve expansion or contraction. The activity history will record the expansion and contraction activities of the scaling group.
Entry: In the Scaling Groups list, click the Scaling Group Name item, and then click the Activity History tab at the top of the Scaling Groups details page to enter the Activity History page.
Scaling Activity Status
| Scaling Activity Status | Description | Example |
|---|---|---|
| Rejected | The scaling operation was rejected at the request stage and no expansion or contraction operation was performed | Scenario: - The maximum number of instances in the scaling group is 100; - The current number of instances in the scaling group is 100; - The scaling policy requires that 10 servers be created automatically; Result: The scaling operation failed the condition check and was rejected for execution . The current number of instances in the scaling group remains at 100 after the scaling activity is completed. |
| Partial success | After the scaling activity is executed, at least one server joins or moves out of the scaling group, and at least one server fails to join or move out of the scaling group successfully | Scenarios: - The maximum number of instances in the scaling group is 100; - The current number of instances in the scaling group is 95; - The scaling policy requires that 10 servers be created automatically; Results: The scaling operation created only 5 servers to join the scaling group, and the other 5 servers were not successfully created. After the scaling activity finished, the current instance in the scaling group was 100. |
| Success | After the scaling activity completes, the servers required by the scaling policy are joined or moved out of the scaling group | Scenario: - The maximum number of instances in the scaling group is 100; - The current number of instances in the scaling group is 90; - The scaling policy requires that 10 servers be created automatically; Result: The scaling operation creates 10 servers joined the scaling group. After the scaling activity ends, the current instances in the scaling group are 100. |
| Failure | None of the Servers requested by the scaling policy joined or moved out of the scaling group after the scaling activity ended | Scenario: - Insufficient resources requested by the scaling group - The maximum number of instances in the scaling group is 100; - The current number of instances in the scaling group is 90; - The scaling policy requested that 10 Servers be created automatically; Result: The scaling operation passed the condition check, but the creation failed due to insufficient resources. After the scaling activity ends, the current instance in the scaling group remains at 90. |
View Activity History Details
This feature is used to view the details of the scaling activity and understand the results generated by the scaling actions triggered by the scaling policy.
- In the Activity History page, you can view the ID, status, cause description, action description, start time, end time, etc. of the scaling activity.
- Click the “View” button on the right column of the activity history to view the detailed information of the scaling activities with failed or partial success or rejected status.
Current Instance
This function is used to view the information of the currently existing instances in the scaling group, and supports removing the current instance.
Entry: In the list of elastic scaling groups, click the name of the scaling group, and then click the “Current Instance” tab at the top to enter the current instance page in the elastic scaling group details page.
View current instance
- In the current instance page, you can view the name, IP, system, password, status, configuration, created at, host, cloud account and other information of the server.
Remove current instance
This function is used to remove the server from the scaling group. Removing a server will modify the expected number of instances, e.g. if you remove a server, the expected number of instances will be reduced by one.
Remove a single server
- On the Current Instance page, click the “Remove” button on the right column of the server to bring up the Remove dialog box.
- Set the removal method.
- Remove and Delete: Removes the server from the telescoping group and removes it completely.
- Remove Only: Remove the server from the scaling group only, the removed server will also be displayed in the server list.
- Click the “OK” button to perform the operation according to the removal method.
Batch Removal
- Select one or more instances in the current instance list and click the “Remove” button at the top of the list to bring up the Remove dialog box.
- Set the removal method.
- Remove and Delete: Remove the server from the telescoping group and delete it completely.
- Remove Only: Remove the server from the scaling group only, the removed server will also be displayed in the server list.
- Click the “OK” button to perform the operation according to the removal method.
Templates
This function is only used to view the templates information selected by the scaling group.
- In the list of elastic stretch group, click the name of the stretch group, and then click the “Templates” tab at the top of the elastic stretch group details page to enter the templates page.
- On the templates page, you can view the name, configuration, system, system image, billing method, status, VPC, project, platform and other information of the templates.
View operation log
This function is used to view the log information of related operations in the scaling group.
- In the list of the elastic scaling group, click the name of the scaling group, and then click the “Operation Log” tab at the top of the elastic scaling group details page to enter the operation log page.
- Load More Logs: In the Operation Logs page, the list shows 20 operation logs by default. To view more operation logs, please click the “Load More” button to get more logs.
- View Log Details: Click the “View” button on the right column of the operation log to view the log details. Copy details are supported.
- View logs of specified time period: If you want to view the operation logs of a certain time period, set the specific date in the start date and end date at the top right of the list to query the log information of the specified time period.
- Export logs: Currently, only the logs displayed on this page are supported to be exported. Click the upper-right corner of
 icon, set the export data column in the pop-up export data dialog, and click the “OK” button to export the logs.