Certificates
When configuring HTTPS listeners on a load balancing instance to forward requests from the HTTPS protocol, a certificate needs to be configured. Load balancing only supports certificates in PEM format.
Certificate source.
- Synchronize the certificate bound by the https listener on the instance on the public cloud and automatically add a record in the certificate cache, and the synchronized certificate is shared by this domain by default. The certificate synchronized from the public cloud will not be synchronized to the certificate content and certificate key, and the certificate status is partially available at this time, i.e. such certificates can only be used for listening on the corresponding platform area of the certificate details-cache list. When the corresponding public cloud account is deleted, the certificates with partially available will be deleted together.
- Create certificate through the cloud management platform.
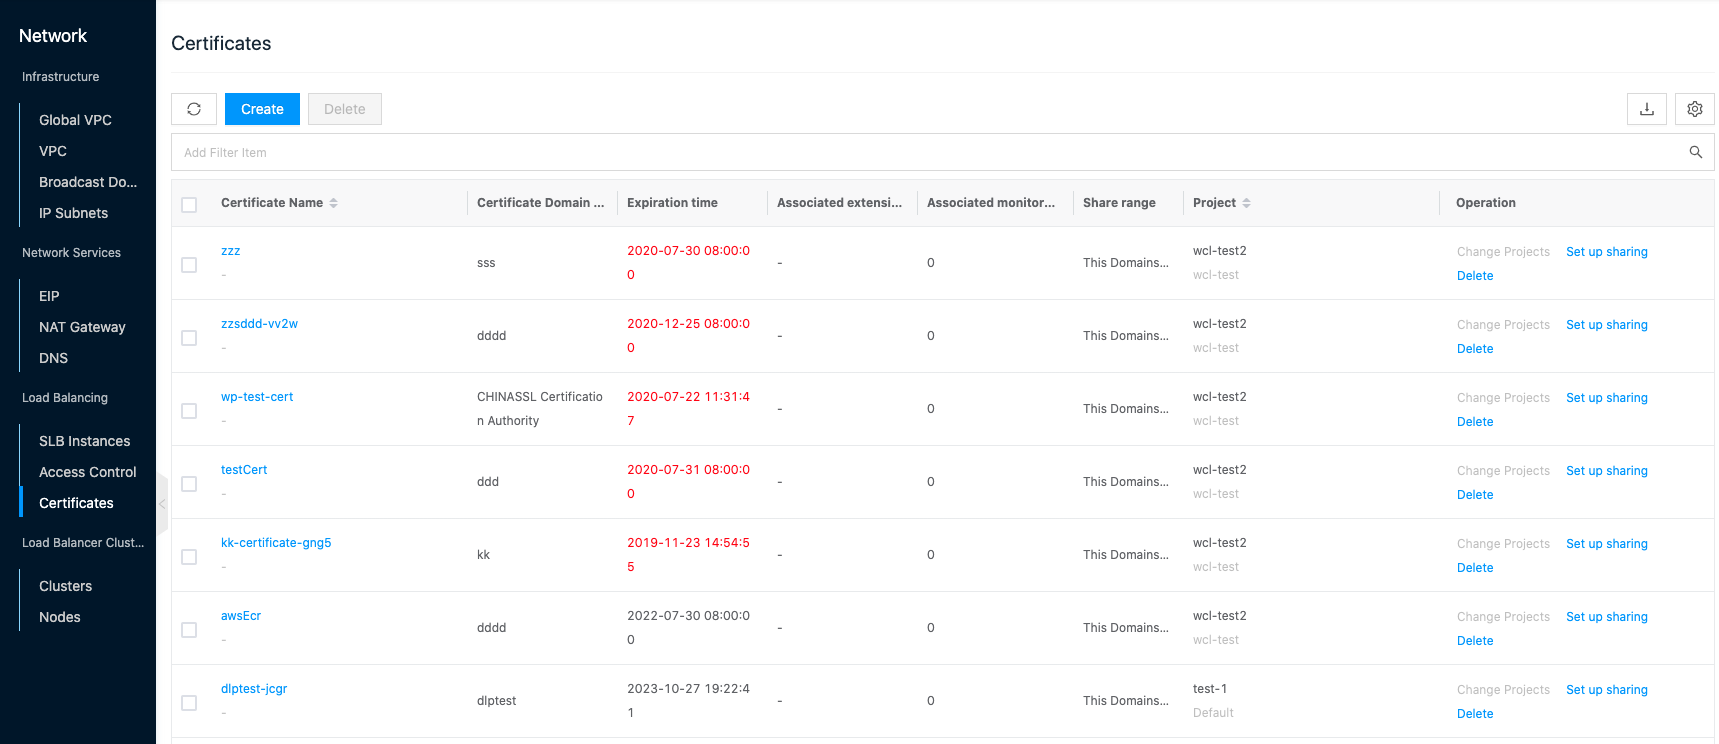
Entry: In the cloud management platform, click the top left corner of  navigation menu, and click “Network/Load Balance/Certificates” menu item in the left menu bar that pops up to enter the certificates page.
Create certificates
Description
Common certificate application process.
- Generate private key locally: openssl genrsa -out privateKey.pem 2048 , where the generated privateKey.pem is the private key file, please keep it safe.
- Generate the certificate request file: openssl req -new -key privateKey.pem -out server.csr , where server.csr is the certificate request file, use it to apply for a certificate.
- Get the contents of the request file to apply for a certificate at the site of an authority such as CA.
- Click the “Create” button at the top of the list to bring up the Create Certificate dialog box.
- Set the following parameters.
- Certificate name: Set the certificate name.
- Certificate content: the content of cert.pem certificate, the certificate content requires
- start with —–BEGIN CERTIFICATE—– and end with —–END CERTIFICATE—–.
- 64 characters per line, and the length of the last line can be less than 64 characters.
- The certificate content cannot contain spaces.
- Certificate key: the content of privkey.pem key, and the key content requirements.
- Begin with —–BEGIN RSA PRIVATE KEY—– and end with —–END RSA PRIVATE KEY—–.
- 64 characters per line and the length of the last line can be less than 64 characters.
- The certificate key content cannot contain spaces.
- Click “OK” button to create a new certificate.
Change Project
This function is used to change the project to which the certificate belongs. The item can be changed only when the certificate is private.
To change the item of a single certificate
In the certificate page, click the “More” button on the right column of the certificate and select the drop-down menu item “Change Project” to bring up the Change Project dialog box. 2. Modify the domain and item, click “OK” button.
Batch Change Projects
- Select one or more certificates in the certificate list, click the “Batch Action” button at the top of the list, and select the drop-down menu “Change Project” menu item to bring up the Change Project dialog box.
- Modify the domain and project, click “OK” button.
Set up sharing
This function is used to set the sharing status of the certificate.
There are five types of sharing ranges for project resources.
- Not shared (private): I.e. project resources can be used only by users of this project.
- Project sharing-part (shared by multiple projects in this domain): that is, project resources can be shared to specified projects (one or more) under the same domain, and only users under this project and the shared project can use project resources.
- Project Sharing-All (shared by this domain): I.e. project resources can be shared to all projects under the domain, i.e. all users of the project’s domain can use the project resources.
- Domain sharing-part (Multiple Domains sharing): I.e. project resources can be shared to the specified domain (one or more), and only users under the domain where the project resources are located and the shared domain can use the project resources.
- Domain Share-All (Global share): I.e. project resources can be shared to all domains, i.e. all users in the system can use project resources.
Description
To set the conditions for domain sharing.
- Three-level Resource Hierarchy have been turned on in the OneCloud platform.
- The user is in the admin backend.
To set up project sharing.
- The user is in the admin backend or domain admin backend.
certificate setting sharing
In the certificate page, click the “More” button on the right column of the certificate, and select the “Set up sharing” menu item to bring up the Set up sharing dialog box. 2. Configure the following parameters.
- When “No Sharing” is selected as the sharing scope, the sharing scope of project resources is private and only users of this project can use them.
- When the sharing scope is selected as “Project Sharing”, you need to select the projects that can be shared under this domain.
- When the project selects one or more projects under the same domain, the shared scope of the project resources is Project Shared - Part, and only the users under the project where the project resources are located and the shared project can use the project resources.
- When All is selected for the project, the shared scope of the project resource is Project Shared - All, and all users under the project’s domain can use the project resource.
- When the sharing scope is “Domain Sharing”, you need to select the shared domains.
- When one or more of the domains is selected, the sharing scope of the project resources is Domain Sharing - Partial, and only the users under the domain where the project resources are located and the shared domain can use the domain resources.
- When All is selected for the domain, the sharing scope of the project resource is Domain Shared-All, and all users in the system can use the project resource.
- Click the “OK” button to complete the operation.
Batch Setting Sharing
The scope of sharing for multiple certificate batch settings must be the same. Otherwise, set up separate shares for the certificates.
- Select one or more certificates in the certificate list, click the**_“Batch Action”_** button at the top of the list, and select the drop-down menu **_“Set up sharing”_** menu item to bring up the Set up sharing dialog box.
- Configure the following parameters.
- When “No Sharing” is selected as the sharing scope, the sharing scope of project resources is private and only users of this project can use them.
- When the sharing scope is selected as “Project Sharing”, you need to select the projects that can be shared under this domain.
- When the project selects one or more projects under the same domain, the shared scope of the project resources is Project Shared - Part, and only the users under the project where the project resources are located and the shared project can use the project resources.
- When All is selected for the project, the shared scope of the project resource is Project Shared - All, and all users under the project’s domain can use the project resource.
- When the sharing scope is “Domain Sharing”, you need to select the shared domains.
- When one or more of the domains is selected, the sharing scope of the project resources is Domain Sharing - Partial, and only the users under the domain where the project resources are located and the shared domain can use the domain resources.
- When All is selected for the domain, the sharing scope of the project resource is Domain Shared-All, and all users in the system can use the project resource.
- Click the “OK” button to complete the operation.
Delete Certificate
This function is used to delete a certificate when the number of listeners associated with the certificate is 0.
- Click the “Delete” button in the operation column on the right side of the certificate to bring up the operation confirmation dialog box.
- Click the “OK” button to complete the operation.
View Certificate Details
This function is used to view the details of the certificate.
- In the certificate page, click the certificate name item to enter the certificate details page.
- The menu item at the top of the details page supports the deletion operation of the certificate.
- View the Cloud ID, ID, name, status, domain, item, fingerprint, certificate domain name, expiration time, created at, updated at, and remarks of the certificate.
View the list of listeners associated with the certificate
This function is used to view the list of https listeners associated with a certificate.
In the certificate page, click the certificate name item to enter the certificate details page. 2. Click the Listening tab to enter the Listening page. 3. View all https listener information associated with the certificate.
Replace certificate
This function is used to replace the certificate for the https listener. When the certificate is about to expire, you can use this function to replace the certificate for the https listener in batch.
replacement certificate
- On the listener page, click the “Replace Certificate” button on the right column of the listener to bring up the Replace Certificate dialog box.
- Select the new certificate and click the “OK” button to complete the operation.
Batch Replace Certificate
Description
Batch certificate replacement is only supported for listeners under the same domain.
- Select one or more listeners in the listener page and click the “Replace Certificate” button at the top of the list to bring up the Replace Certificate dialog.
- Select the new certificate and click the “OK” button to complete the operation.
View the certificate cache list
There are two sources of the cache list.
- When creating a load balancing instance on the public cloud platform using a certificate on the OneCloud platform, the certificate is cached to the public cloud platform.
- Synchronizing the load balancing certificate on the public cloud platform will synchronize the new certificate and cache records on the OneCloud platform.
- On the certificate page, click the certificate name item to enter the certificate details page. Click the Cache List tab to enter the cache page. View the cache list information, including certificate name, certificate domain name, expiration time, associated extension domain name, platform, region, and cloud account.
Delete cache
This function is used to delete the certificate of the corresponding account region on the public cloud. It can be deleted only when the number of listeners associated with the certificate is 0.
- On the certificate page, click the certificate name item to enter the certificate details page.
- Click the Cache List tab to enter the cache page.
- Click the “Delete” button in the operation column on the right of the certificate cache to bring up the operation confirmation dialog box.
- Click the “OK” button to complete the operation.
View operation log
This function is used to view the log information of the operation related to the certificate.
In the certificate page, click the certificate name item to enter the certificate details page.
2. Click the Operation Log tab to enter the Operation Log page.
- Load more logs: In the Operation Log page, the list displays 20 operation logs by default. To view more operation logs, click the “Load more” button to get more log information.
- View Log Details: Click the “View” button on the right column of the operation log to view the log details. Copy details are supported.
- View logs of specified time period: If you want to view the operation logs of a certain time period, set the specific date in the start date and end date at the top right of the list to query the log information of the specified time period.
- Export logs: Currently, only the logs displayed on this page are supported to be exported. Click the upper-right corner of  icon, set the export data column in the pop-up export data dialog, and click the “OK” button to export the logs.