DNS
DNS is used to resolve simple and memorable domain names into IP addresses used by computers for communication, so that users can easily access specified URLs or servers through domain names. Currently, only Alibaba Cloud, Tencent Cloud and AWS are supported, and Tencent Cloud only supports PublicZone type of DNS.
- PublicZone DNS: that is, public DNS service, users can access the domain name through the Internet before.
- PrivateZone DNS: Private DNS service based on VPC network, which supports the use of private domain names to resolve resources in the VPC environment. Private domain names are not accessible outside the VPC.
Use process.
- Create domain name.
- Add a record in Domain Details-Record.
- Sync to public cloud.
- Domains of PublicZone type need to be synchronized to the public cloud by creating a new cache.
- PrivateZone type domain name needs to be associated with VPC and synchronized to the public cloud by creating a new cache.
Sync rules.
- Local-Cloud: The local DNS will be synchronized to the public cloud through the corresponding public cloud cache. Subsequent new records, etc. will also be synchronized to the public cloud.
- PublicZone type DNS requires DNS synchronization to the public cloud through the new cache.
- PrivateZone type DNS will synchronize DNS to the public cloud by creating a new cache at the same time when it is associated with a VPC.
-
- Cloud - Local: When DNS local and public cloud one-to-one correspondence, the operation on the public cloud will be synchronized to the local, if DNS local and public cloud for a one-to-many relationship, it will not be two-way synchronization, only the first docking cloud account, will fully synchronize the cloud domain name to the local; subsequent need for full synchronization cloud account synchronization cloud new domain name and domain name under the record, has been synchronized to the local domain name in the cloud add or delete records will not be synchronized to the local, it is recommended that the user completely in the cloud management platform for operation, to ensure the consistency of the cloud and local data.
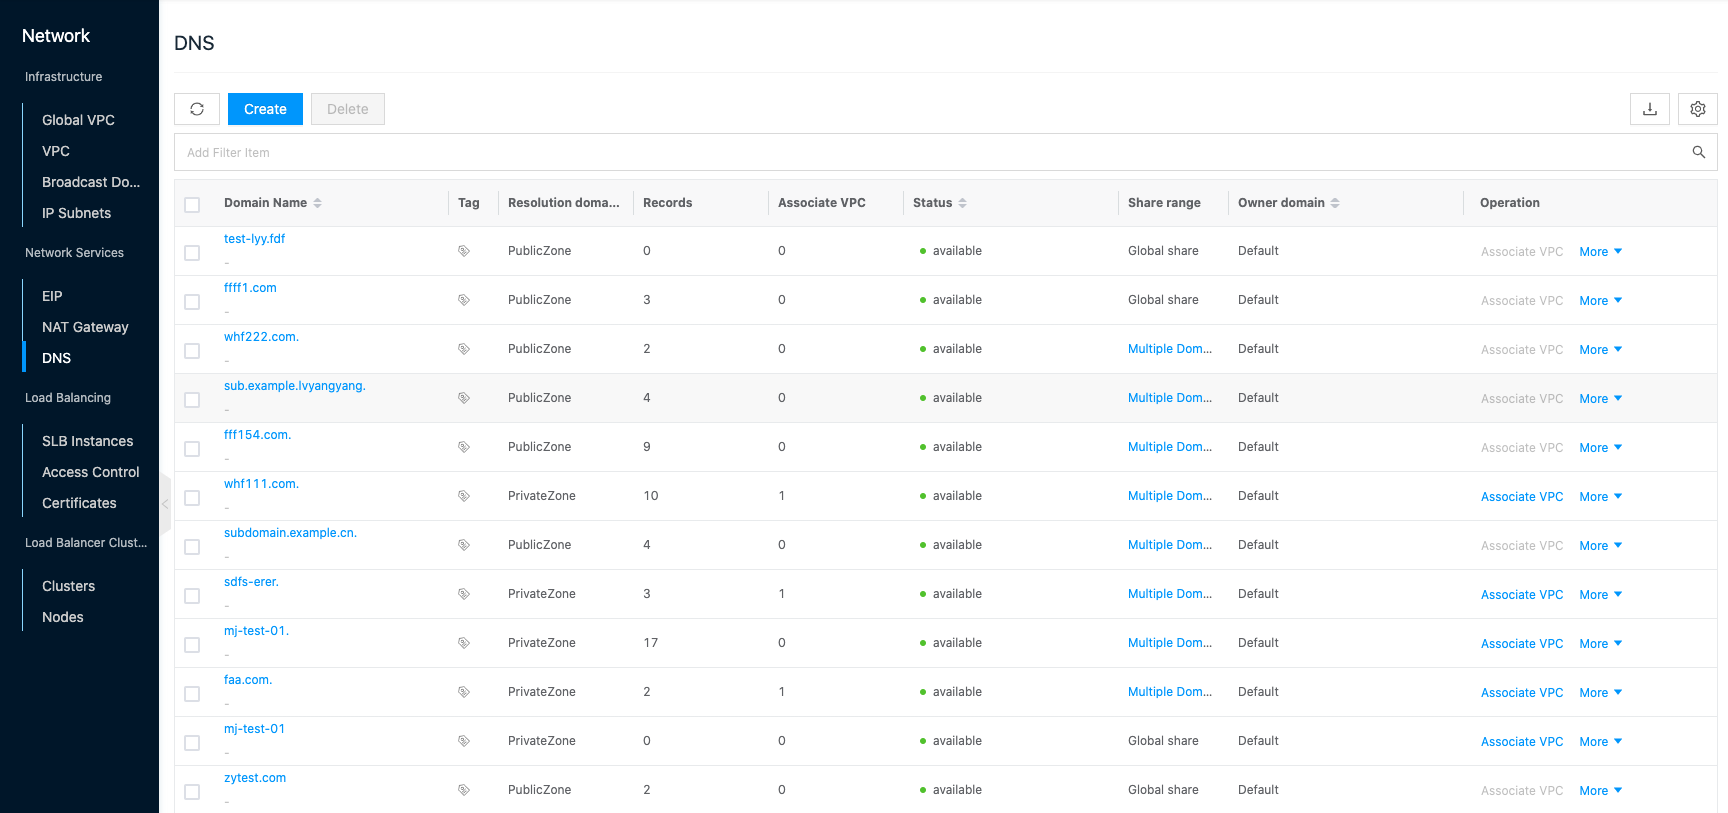
Entry: In the cloud management platform click the top left corner navigation menu, and click “Network/Network Services/DNS” menu item in the left menu bar that pops up to enter the DNS page.
Create DNS Resolution
This function is used to specify the main domain name or subdomain name to be resolved, etc. PublicZone type domain name requires a domain name registered with the Internet.
- In the DNS page, click the “Create” button at the top of the list to bring up the Create Domain Name dialog box.
- Configure the following parameters.
- Domain: Select the domain to which DNS belongs.
- Zone type: Including PublicZone and PrivateZone.
- PublicZone DNS: I.e. public DNS service, users can access the domain name before through the Internet.
- PrivateZone DNS: Private DNS service based on VPC network, which supports the use of private domain names to resolve resources in VPC environment. Private domain names are not accessible outside the VPC.
- Domain name: Set the domain name that needs to be resolved. Among them, the PublicZone type currently supports only second-level domain names.
- Click “OK” button to enter the synchronization to public cloud page.
- If you need to synchronize the domain name to the public cloud, configure the following parameters, and click “OK” button after the configuration is finished.
- When the resolution domain type is PublicZone, select the platform and cloud subscription to synchronize the domain name to the corresponding platform.
- When the resolution domain type is PrivateZone, select the zone and the corresponding VPC, that is, synchronize the domain name to the corresponding public cloud platform by associating the VPC of the corresponding platform.
- If you do not need to synchronize the domain name to the public cloud for the time being, you can directly click the “Skip” button.
Associated VPC
This function is used to associate the domain name of PrivateZone type to VPC, and the domain name will be synchronized to the corresponding public cloud platform at the same time.
Description
Tencent Cloud does not support PrivateZone type DNS, i.e. it cannot associate with Tencent Cloud’s VPC.
- On the DNS page, click the “Associate VPC” button on the right column of the domain name to bring up the Associate VPC dialog box.
- Set the following parameters.
- Zone: Set the zone and filter the VPC by zone. you can filter the appropriate zone by city and platform quickly.
- VPC: Select the VPC to be associated, and the DNS domain name will be synchronized to the platform account where the VPC is located after association.
- Click “OK” button to complete the operation.
Sync Status
This function is used to synchronize the current status of the domain name.
- On the DNS page, click the “More” button on the right column of the domain name and select the drop-down menu “Sync Status” menu item to synchronize the status of the DNS domain name.
Push Records
When the local DNS records are not fully synchronized to the public cloud platform due to other reasons, you can push the list of records under the status available domain names to the public cloud platform through this function. If there are records on the public cloud that have not been synchronized to the local domain, they may be deleted, so please operate with caution.
- On the DNS page, click the “More” button on the right side of the domain name, and select the “Push Records” menu item to bring up the operation confirmation dialog.
- Click the “OK” button to complete the operation.
Change Domain
This function is used to change the domain to which the DNS belongs.
Description
Conditions for changing the domain: Both conditions must be met
- The current user is in the system backend.
- Three-level Resource Hierarchy are enabled in OneCloud .
- The shared scope of DNS is private.
- On the DNS page, click the “More” button in the action bar to the right of the domain name, and select the “Change Domain” menu item to bring up the Change Domain dialog box.
- Select the domain to which the DNS belongs to, and click “OK” button.
Set up sharing
This function is used to set the shared scope of DNS domain name.
There are three types of shared ranges for domain resources.
- No sharing (private): I.e. domain resources can only be used by users of this domain.
- Domain Sharing-Partial (Multi-domain Sharing): I.e. domain resources can be shared to the specified domain (one or more), and only users under the domain where the domain resource is located and the shared domain can use the domain resource.
- Domain Share-All (Global share): I.e. domain resources can be shared to all domains, i.e. all users in the system can use the domain resources.
Description
Conditions for setting up sharing: need to satisfy both
- The current user is in the system backend.
- Three-level Resource Hierarchy have been enabled in OneCloud
- On the DNS page, click the “More” button on the right column of the domain name, select the drop-down menu “Set up sharing” menu item to bring up the Set up sharing dialog box.
- Configure the following parameters.
- When the sharing range is selected as “No Sharing”, the sharing range of domain resources is private and only users of this domain can use it.
- When Shared Range is selected as “Domain Shared”, you need to select the domain to be shared.
- When the domain is selected as one or more domains, the shared scope of the domain resource is Domain Shared-Partial, and only users in the domain where the domain resource is located and under the shared domain can use the domain resource.
- When the domain selects All, i.e. the sharing scope of the domain resource is Domain Share-All, all users in the system can use the domain resource.
- Click the “OK” button to complete the operation.
Delete
This function is used to delete DNS domain name, supports single and batch operation.
Delete
- On the DNS page, click the “More” button on the right column of the domain name, select the drop-down menu “Delete” menu item, and the operation confirmation dialog box will pop up.
- Click the “OK” button to complete the operation.
Batch Delete
- Select one or more domain names in the DNS list, click the “Delete” button at the top of the list, and the operation confirmation dialog box will pop up.
- Click the “OK” button to complete the operation.
View DNS Details
This function is used to view DNS details.
- On the DNS page, click the Domain Name item to enter the DNS Details page.
- View the following information: Including Cloud ID, ID, name, status, domain, resolution domain type, number of records, associated VPC, created at, updated at, description, etc.
Record Management
This function is used to manage the records under the domain name.
Create record creation
This function is used to create a new resolution record.
Description
The host record only supports characters a-z, A-Z, 0-9, underscore (-), underscore (_), period (.) , @, *, and dashes and periods cannot appear at the beginning and end.
Create A record
A record implements pointing a domain name to an IP address.
- On the DNS page, click the domain name item to enter the DNS details page.
- Click the Records tab to enter the Records page.
- Click the “Create” button at the top of the list to bring up the Create Record dialog box.
- Configure the following information.
- Record Type: Select “A: Point the domain name to an IPv4 address”.
- Host record: Generally, it is the prefix of the sub-domain, e.g. if you create www.example.com, enter www for the host record; if you want to implement example.com, enter @ for the host record.
- Record value: Set the address of IPv4.
- TTL (Time to live): the caching time of DNS records in DNS server. After the user resolves the domain name, the domain name and IP address will be saved in the cache for ttl time, and the user will directly return the IP address if he accesses the domain name again within the ttl time, or re-resolve the domain name if the TTL expires. The smaller the value, the faster the modification record takes effect. The default is 5 minutes.
- Resolution line: Set the resolution mode of the record in different platforms, if not set, the default line will be used.
Description
Example.
If the parsing line is set to Tencent Cloud - operator - China Unicom, AWS - weighted - weighted.
- When the record is synchronized to Tencent Cloud, the resolution line is China Unicom. It means that only users from China Unicom accessing the domain name will return the set record value, and users from other operators will not be able to access the website. At this time, you also need to add a Tencent Cloud default line.
- When the record is synchronized to AWS, the resolution line is weighted-weighted. This means that the record will respond to queries, etc. based on the set weighting ratio.
- Click the “OK” button to complete the operation.
Create AAAA record
The AAAA record implements pointing the domain name to an IPv6 address.
- On the DNS page, click the Domain Name item to enter the DNS details page.
- Click the Records tab to enter the Records page.
- Click the “Create” button at the top of the list to bring up the Create Record dialog box.
- Configure the following information.
- Record Type: Select “AAAA: Point the domain name to an IPv6 address”.
- Host record: Generally, it is the prefix of the sub-domain, e.g. if you create www.example.com, enter www for the host record; if you want to implement example.com, enter @ for the host record.
- Record value: Set the address of IPv6.
- TTL (Time to live): the caching time of DNS records in DNS server. After the user resolves the domain name, the domain name and IP address will be saved in the cache for ttl time, and the user will directly return the IP address if he accesses the domain name again within the ttl time, or re-resolve the domain name if the TTL expires. The smaller the value, the faster the modification record takes effect. The default is 5 minutes.
- Resolution line: Set the resolution mode of the record in different platforms, if not set, the default line will be used.
Description
Example.
If the parsing line is set to Tencent Cloud - operator - China Unicom, AWS - weighted - weighted.
- When the record is synchronized to Tencent Cloud, the resolution line is China Unicom. It means that only users from China Unicom accessing the domain name will return the set record value, and users from other operators will not be able to access the website. At this time, you also need to add a Tencent Cloud default line.
- When the record is synchronized to AWS, the resolution line is weighted-weighted. This means that the record will respond to queries, etc. based on the set weighting ratio.
- Click the “OK” button to complete the operation.
Create CNAME record
The CNAME record implements pointing a domain name to another domain name, which in turn resolves to an IP address, etc.
Note
When a CNAME record is created for a subdomain, no other records can be created for that domain.
- On the DNS page, click the domain name item to enter the DNS details page.
- Click the Records tab to enter the Records page.
- Click the “Create” button at the top of the list to bring up the Create Record dialog box.
- Configure the following information.
- Record Type: Select “CNAME: Point the domain name to another domain name”.
- Host record: Generally, it is the prefix of the sub-domain, e.g. if you create www.example.com, enter www for the host record; if you want to implement example.com, enter @ for the host record.
- Record value: Only domain name can be set.
- TTL (Time to live): the caching time of DNS records in DNS servers. After the user resolves the domain name, the domain name and IP address will be saved in the cache ttl time, the user accesses the domain name again within the ttl time, the IP address will be returned directly, if the TTL expires, the domain name will be resolved again. The smaller the value, the faster the modification record takes effect. The default is 5 minutes.
- Resolution line: Set the resolution mode of the record in different platforms, if not set, the default line will be used.
Description
Example.
If the parsing line is set to Tencent Cloud - operator - China Unicom, AWS - weighted - weighted.
- When the record is synchronized to Tencent Cloud, the resolution line is China Unicom. It means that only users from China Unicom accessing the domain name will return the set record value, and users from other operators will not be able to access the website. At this time, you also need to add a Tencent Cloud default line.
- When the record is synchronized to AWS, the resolution line is weighted-weighted. This means that the record will respond to queries, etc. based on the set weighting ratio.
- Click the “OK” button to complete the operation.
Create MX record
MX record implements to point the domain name to the mail server address for the email system to locate the mail server according to the mail suffix of the recipient, and the system will forward the email to the corresponding mail server according to the priority of MX record.
In the DNS page, click the domain name item to enter the DNS details page. 2. Click the Records tab to enter the Records page. 3. Click the “Create” button at the top of the list to bring up the Create Record dialog box. 4. Configure the following information.
- Record Type: Select “MX: Point the domain name to the mail server address”.
- Host record: Generally, it is the prefix of the sub-domain, usually set as @ or mail. e.g. host record is set as @, 邮箱地址是xxx@example.com; e.g. host record is set as mail, 邮箱地址为xxx@mail.example.com.
- Record value: you can set the domain name and IP address.
- MX priority: the lower the value, the higher the priority, it will be forwarded to the mailbox server corresponding to the record value with high priority first.
- TTL (Time to live): the caching time of DNS records in DNS server. After the user resolves the domain name, the domain name and IP address will be saved in the cache for ttl time, and the user will directly return to the IP address if he accesses the domain name again within ttl time, and re-resolve the domain name if the TTL expires. The smaller the value, the faster the modification record takes effect. The default is 5 minutes.
- Resolution line: Set the resolution mode of the record in different platforms, if not set, the default line will be used.
Description
Example.
If the parsing line is set to Tencent Cloud - operator - China Unicom, AWS - weighted - weighted.
- When the record is synchronized to Tencent Cloud, the resolution line is China Unicom. It means that only users from China Unicom accessing the domain name will return the set record value, and users from other operators will not be able to access the website. At this time, you also need to add a Tencent Cloud default line.
- When the record is synchronized to AWS, the resolution line is weighted-weighted. This means that the record will respond to queries, etc. based on the set weighting ratio.
- Click the “OK” button to complete the operation.
Create SRV record
SRV records are used to identify that a server is using a certain service, and are commonly used in Microsoft system directory management.
On the DNS page, click the Domain Name item to enter the DNS details page. 2. Click the Records tab to enter the Records page. 3. Click the “Create” button at the top of the list to bring up the Create Record dialog box. 4. Configure the following information.
- Record Type: Select “SRV: Record the server that provides the specific service”.
- Host record: The format is the name of the service. Protocol type, e.g. _sip._tcp.
- Record value: The format is “priority weight port destination address”, each item is separated by a space. E.g. 0 5 5060 sipserver.example.com.
- TTL (Time to live): The cache time of DNS records in the DNS server. After the user resolves the domain name, the domain name and IP address will be stored in the cache ttl time, the user accesses the domain name again within the ttl time, the IP address will be returned directly, if the TTL expires, the domain name will be resolved again. The smaller the value, the faster the modification record takes effect. The default is 5 minutes.
- Resolution line: Set the resolution mode of the record in different platforms, if not set, the default line will be used.
Description
Example.
If the parsing line is set to Tencent Cloud - operator - China Unicom, AWS - weighted - weighted.
- When the record is synchronized to Tencent Cloud, the resolution line is China Unicom. It means that only users from China Unicom accessing the domain name will return the set record value, and users from other operators will not be able to access the website. At this time, you also need to add a Tencent Cloud default line.
- When the record is synchronized to AWS, the resolution line is weighted-weighted. This means that the record will respond to queries, etc. based on the set weighting ratio.
- Click the “OK” button to complete the operation.
Create PTR record created
PTR reverse resolution maps IP addresses to domain names. This type is only supported for PrivateZone type DNS domain names.
- On the DNS page, click the domain name item to enter the DNS details page.
- Click the Records tab to enter the Records page.
- Click the “Create” button at the top of the list to bring up the Create Record dialog box.
- Configure the following information.
- Record Type: Select “PTR: for address reverse resolution to domain name”.
- Host record: Fill in the name of the reverse resolution record. Enter the IP address to be reverse resolved, such as 4.3.2.1 if the IP address is 1.2.3.4.
- Record value: Set the intranet domain name corresponding to the IP address of the private network, only one domain name can be filled in.
- TTL (Time to live): the caching time of DNS records in DNS server. After the user resolves the domain name, the domain name and IP address will be saved in the cache for ttl time, and the user will directly return the IP address if he accesses the domain name again within the ttl time, or re-resolve the domain name if the TTL expires. The smaller the value, the faster the modification record takes effect. The default is 5 minutes.
- Resolution line: Set the resolution mode of the record in different platforms, if not set, the default line will be used.
Description
Example.
If the parsing line is set to Tencent Cloud - operator - China Unicom, AWS - weighted - weighted.
- When the record is synchronized to Tencent Cloud, the resolution line is China Unicom. It means that only users from China Unicom accessing the domain name will return the set record value, and users from other operators will not be able to access the website. At this time, you also need to add a Tencent Cloud default line.
- When the record is synchronized to AWS, the resolution line is weighted-weighted. This means that the record will respond to queries, etc. based on the set weighting ratio.
- Click the “OK” button to complete the operation.
Create TXT record
TXT records are used to identify and describe the domain name for making SPF records (anti-spam).
- On the DNS page, click the domain name item to enter the DNS details page.
- Click the “Records” tab to enter the records page.
- Click the “Create” button at the top of the list to bring up the Create Record dialog box.
- Configure the following information.
- Record type: select “TXT: usually SPF record (anti-spam)”.
- Host record: usually the prefix of the sub-domain, such as creating www.example.com, enter www for the host record; if you want to implement example.com, enter @ for the host record.
- Record value: There is no fixed format. TXT records are usually used for SPF anti-spam. The most typical example of TXT record in SPF format is “v=spf1 a mx ~all”, which means only the IP address in A record and MX record of this domain has permission to send emails using this domain.
- TTL (Time to live): The cache time of DNS records in DNS servers. After the user resolves the domain name, the domain name and IP address will be saved in the cache for ttl time, and the user will directly return the IP address if he accesses the domain name again within the ttl time, or re-resolve the domain name if the TTL expires. The smaller the value, the faster the modification record takes effect. The default is 5 minutes.
- Resolution line: Set the resolution mode of the record in different platforms, if not set, the default line will be used.
Description
Example.
If the parsing line is set to Tencent Cloud - operator - China Unicom, AWS - weighted - weighted.
- When the record is synchronized to Tencent Cloud, the resolution line is China Unicom. It means that only users from China Unicom accessing the domain name will return the set record value, and users from other operators will not be able to access the website. At this time, you also need to add a Tencent Cloud default line.
- When the record is synchronized to AWS, the resolution line is weighted-weighted. This means that the record will respond to queries, etc. based on the set weighting ratio.
- Click the “OK” button to complete the operation.
Modify
This function is used to modify the resolution record.
- On the DNS page, click the domain name item to enter the DNS details page.
- Click the Records tab to enter the Records page.
- Click the “Modify” button on the right column of the record to bring up the Modify menu item.
- Modify the relevant information and click the “OK” button.
Enable
This function is used to enable the “disabled” status of records so that they can be served normally.
On the DNS page, click the Domain Name item to enter the DNS details page. 2. Click the Records tab to enter the Records page. 3. Click the “More” button in the action bar to the right of the record with “Disabled” status, and select the “Enable” menu item in the drop-down menu to bring up the action confirmation dialog. Click the “OK” button to enable parsing records.
Disable
This function is used to disable parsing records in the “enabled” state. A disabled resolution record cannot be used.
- On the DNS page, click the domain name item to enter the DNS details page.
- Click the Records tab to enter the Records page.
- Click the “More” button in the action bar to the right of the record with “Enabled” status, and select the “Disabled” menu item to bring up the action confirmation dialog. Click the “OK” button to disable parsing records.
Clone
This function is used to create a new record based on the current resolution record.
- On the DNS page, click the Domain Name item to enter the DNS details page.
- Click the Records tab to enter the Records page.
- Click the “More” button in the action bar to the right of the record, and select the “Clone” menu item to bring up the Clone dialog box.
- Configure relevant information and click “OK” button to create a new domain name.
Delete
This function is used to delete the resolution record.
Delete.
- On the DNS page, click the domain name item to enter the DNS details page.
- Click the Record tab to enter the Record page.
- Click the “More” button in the action bar on the right side of the record, and select the “Delete” menu item to bring up the action confirmation dialog.
- Click the “OK” button to complete the operation.
Batch Delete
- Select one or more records in the record list and click the “Delete” button at the top of the list to bring up the operation confirmation dialog box.
- Click the “OK” button to complete the operation.
View record details
This function is used to view the details of a record.
- On the DNS page, click the domain name item to enter the DNS details page.
- Click the Records tab to enter the Records page.
- Click the record name to enter the Record Details page. View the following information: Cloud ID, ID, name, record type, record value, TTL, enable status, created at, updated at, and description.
Associated VPC Management
This function is used to manage the DNS domain name association VPC of PrivateZone type.
Association VPC
This function is used to associate a PrivateZone type resolved domain name to VPC, which is only supported when the domain name status is available.
- On the DNS page, click the “PrivateZone” type domain name item to enter the DNS details page. Click the “Associate VPC” tab to enter the Associate VPC page. Click the “Associate VPC” button at the top of the list to bring up the Associate VPC dialog box.
- Set the following parameters.
- Region: Set the region and filter the VPC by region. you can filter the appropriate region by city and platform quickly.
- VPC: Select the VPC to be associated, and the DNS domain name will be synchronized to the VPC’s platform account after association.
- Click “OK” button to complete the operation.
Unbundle VPC
This function is used to unbind the domain name and VPC. After unbinding, the cache records and the resolution domain name corresponding to the public cloud platform will be deleted synchronously, etc.
Unbinding
- On the DNS page, click the domain name item of “PrivateZone” type to enter the DNS details page.
- Click the “Associate VPC” tab to enter the Associate VPC page.
- Click “Unbundle” button on the right column of VPC to bring up the operation confirmation dialog.
- Click “OK” button to complete the operation.
Batch Unbundling
- On the DNS page, click the domain name item of “PrivateZone” type to enter the DNS details page.
- Click the “Associate VPC” tab to enter the Associate VPC page.
- Select one or more VPCs in the VPC list, click the “Unbundle” button at the top of the list to bring up the operation confirmation dialog.
- Click the “OK” button to complete the operation.
Cache List Management
The cache record means the mapping relationship between DNS domain name local and public cloud.
Cache list source.
- PrivateZone type DNS associated with VPC will generate a cache record for the corresponding platform.
- PublicZone type DNS generates a cache record for the corresponding platform through the Create Cache function.
Create Cache
This function is used to synchronize the DNS of PublicZone type to the public cloud platform.
- On the DNS page, click the domain name item to enter the DNS details page. Click the “Cache List” tab to enter the cache list page.
- Click the “Create” button at the top of the list to bring up the Create Cache dialog box.
- Select the platform and the cloud subscription for the corresponding platform.
- Click the “OK” button to synchronize the DNS domain name to the specified account of the corresponding public cloud platform.
Release Cache
This function is used to delete the cache, and the deletion of the cache will synchronize the DNS domain names on the public cloud platform, etc.
- On the DNS page, click the domain name item to enter the DNS details page. Click the “Cache List” tab to enter the cache list page.
- Click the “Release Cache” button in the action column on the right side of the cache to bring up the action confirmation dialog.
- Click the “OK” button to complete the operation.
View Cache Operation Log
This function is used to view the operation log of local DNS domain name synchronization to public cloud for troubleshooting problems, etc.
- On the DNS page, click the domain name item to enter the DNS details page.
- Click the Cache List tab to enter the Cache List page.
- Click the Cache Name item to enter the Cache Details page.
- Click the Operation Log tab to enter the Cache Operation Log page.
- If you want to view more operation logs, please click “Load More” button to get more log information.
- View Log Details: Click the “View” button on the right column of the operation log to view the log details. Copy details are supported.
- View logs of specified time period: If you want to view the operation logs of a certain time period, set the specific date in the start date and end date at the top right of the list to query the log information of the specified time period.
- Export logs: Currently, only the logs displayed on this page are supported to be exported. Click the upper-right corner of
 icon, set the export data column in the pop-up export data dialog box, and click the “OK” button to export the logs.
View Operation Logs
This function is used to view the log information of DNS related operations.
- On the DNS page, click the domain name item to enter the DNS details page.
- Click the Operation Log tab to enter the Operation Log page.
- Load More Logs: In the Operation Logs page, the list shows 20 operation logs by default. To view more operation logs, please click the “Load More” button to get more logs.
- View Log Details: Click the “View” button on the right column of the operation log to view the log details. Copy details are supported.
- View logs of specified time period: If you want to view the operation logs of a certain time period, set the specific date in the start date and end date at the top right of the list to query the log information of the specified time period.
- Export logs: Currently, only the logs displayed on this page are supported to be exported. Click the upper-right corner of icon, set the export data column in the pop-up export data dialog, and click the “OK” button to export the logs.