Azure
How to get the Tenant ID and Client information for Azure?
-
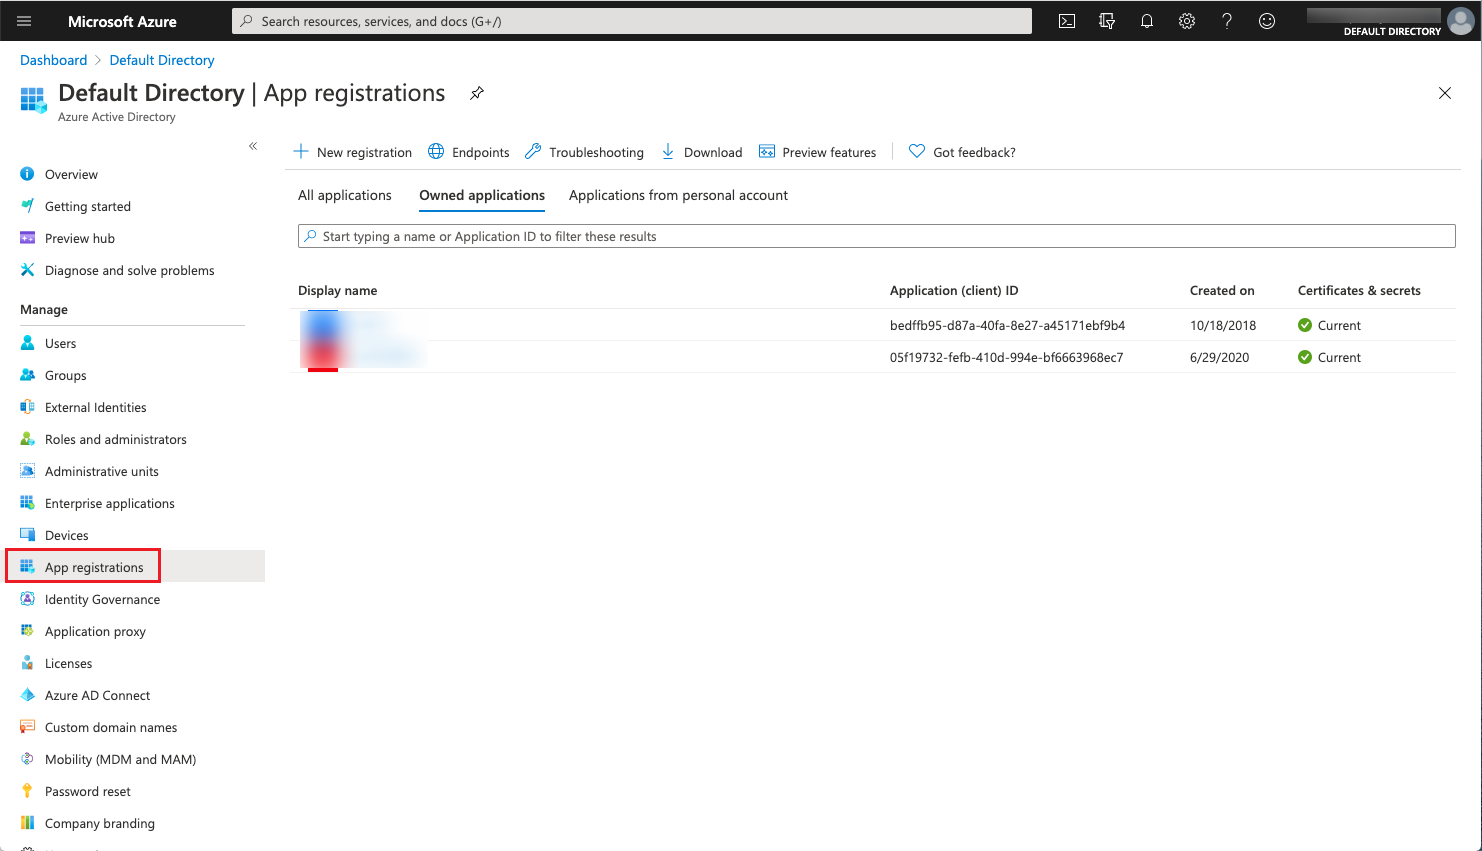
Log in to the Azure console and click on the “Azure Active Directory/App registrations” menu item on the left navigation bar to enter the application registration page. It is recommended to create a new dedicated application for the cloud management platform to call the Azure API.
-
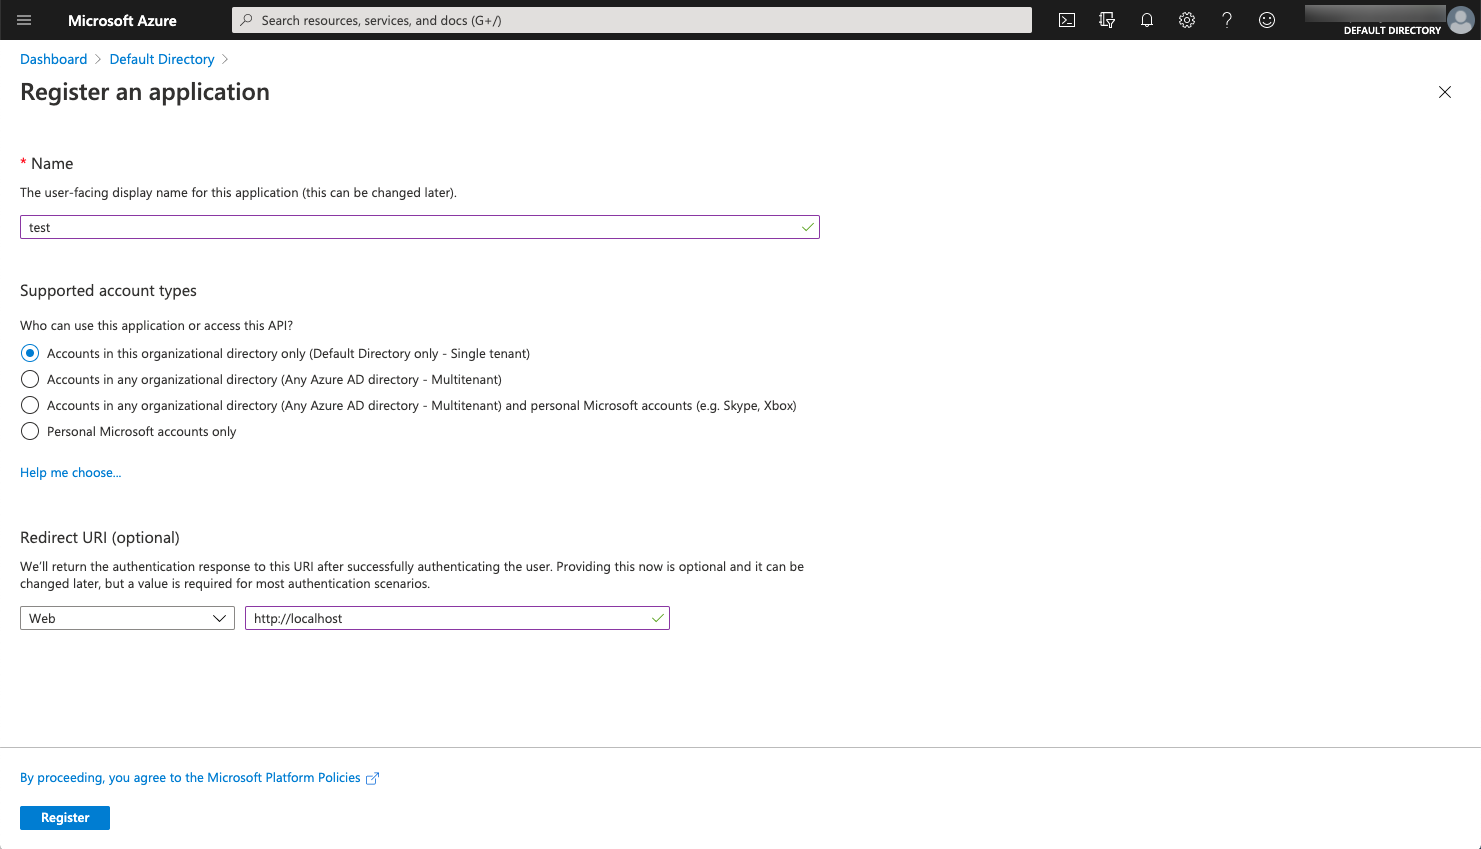
Click the **_ Registration_** button, and on the registered application page, set the name to any value, set the supported account type to “Account in this directory only”, set the redirect URI to web, and enter the name as “https:// " or “http://localhost”, and click the **_“Register”_** button.
-
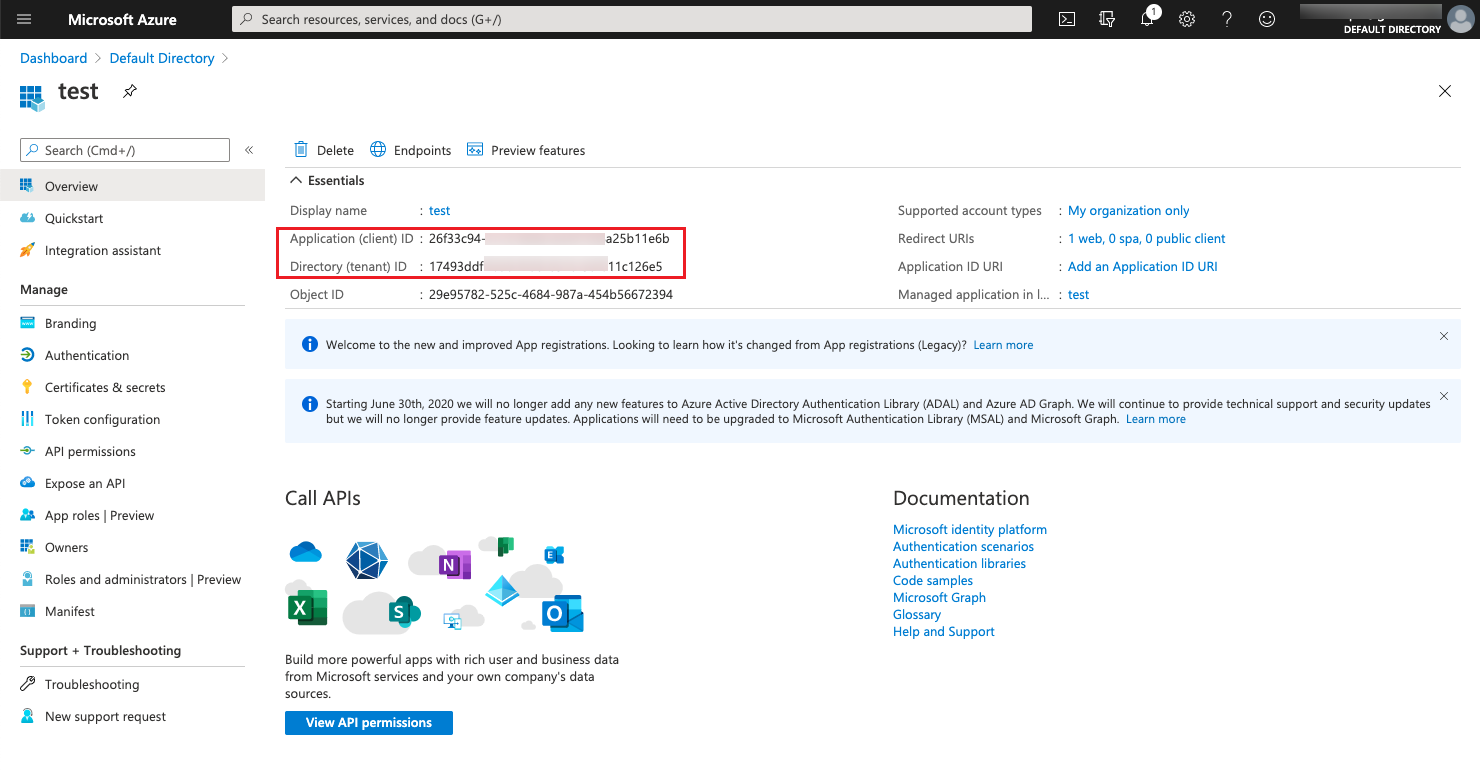
After successful creation, the system automatically displays the application details page just created. Get client id and tenant ID in the page.
-
Click the “Certificates &secrets” menu item on the Application Details page. Go to the Credentials and Passwords page. Click the “New Client Secret” button.
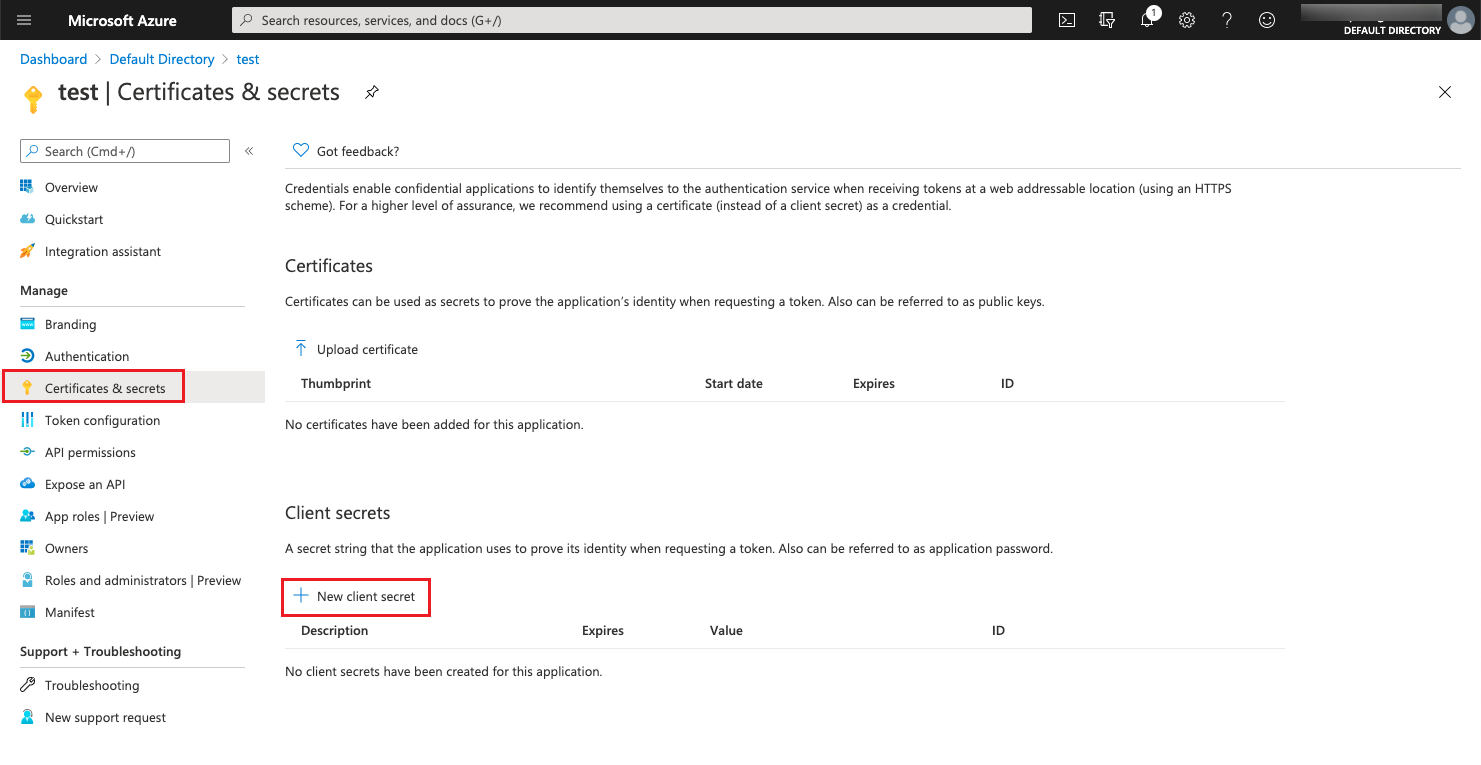
-
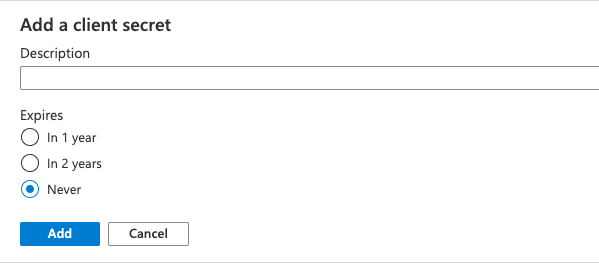
In the Add Client dialog box that pops up, enter the password description, the expiration date as “Never”, and click the “Add” button to create a new client password.
-
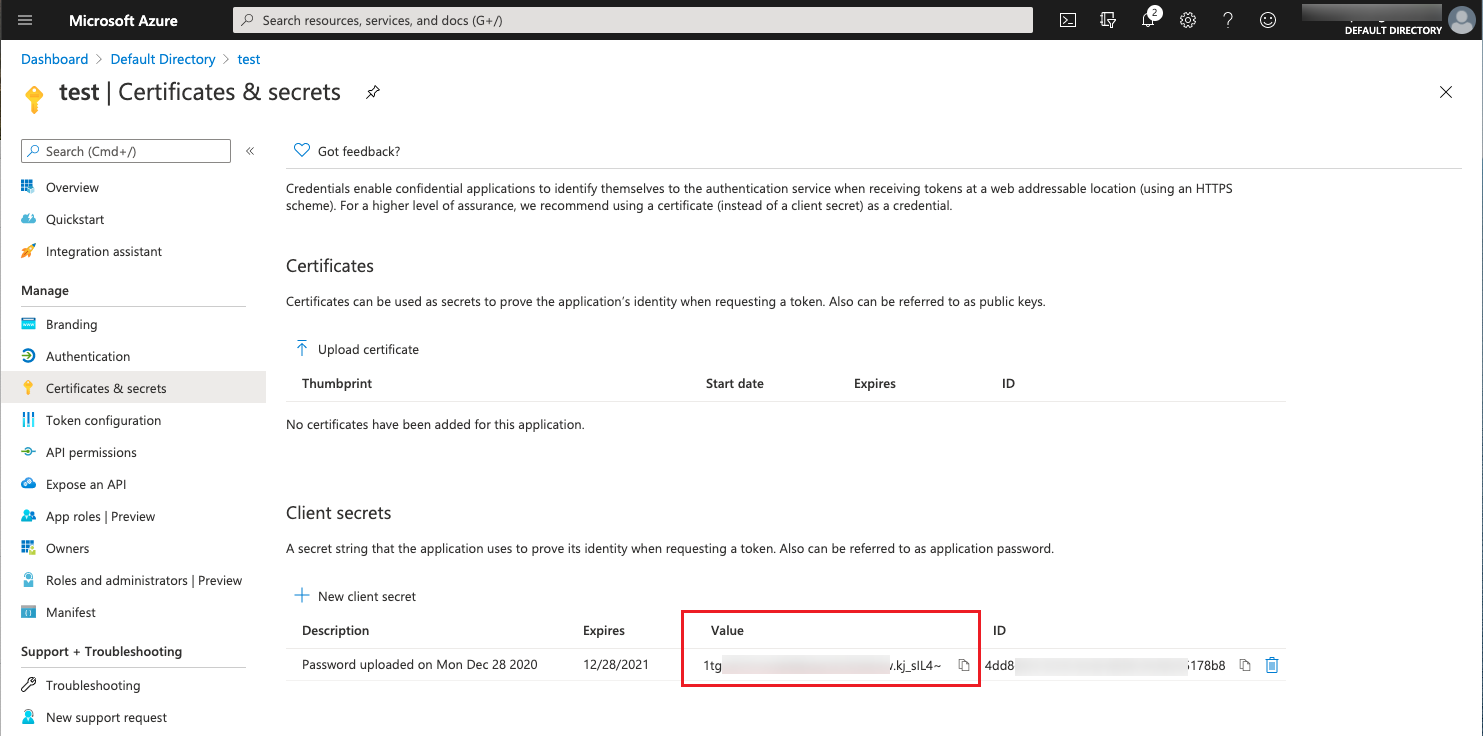
After successful saving, the value of the page password will be the required client password information.
How to grant subscription permissions to an application?
-
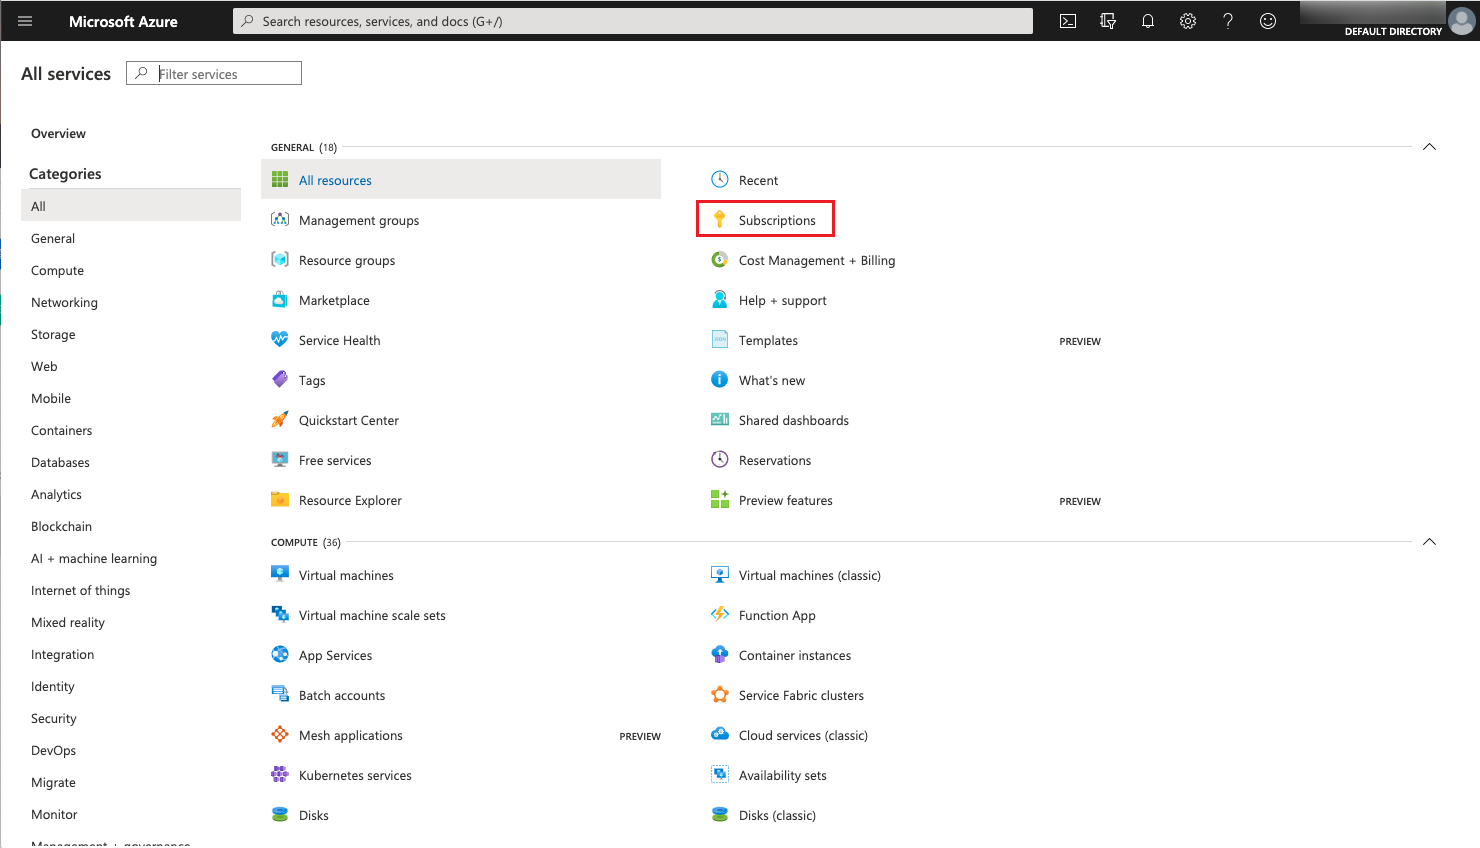
Log in to the Azure console, click the “All Services” menu item in the left navigation bar, and click the “Subscriptions” menu item in the All Services list to enter the list of subscriptions.
-
click on the subscriptions that need to be authorized to enter the subscription details page.
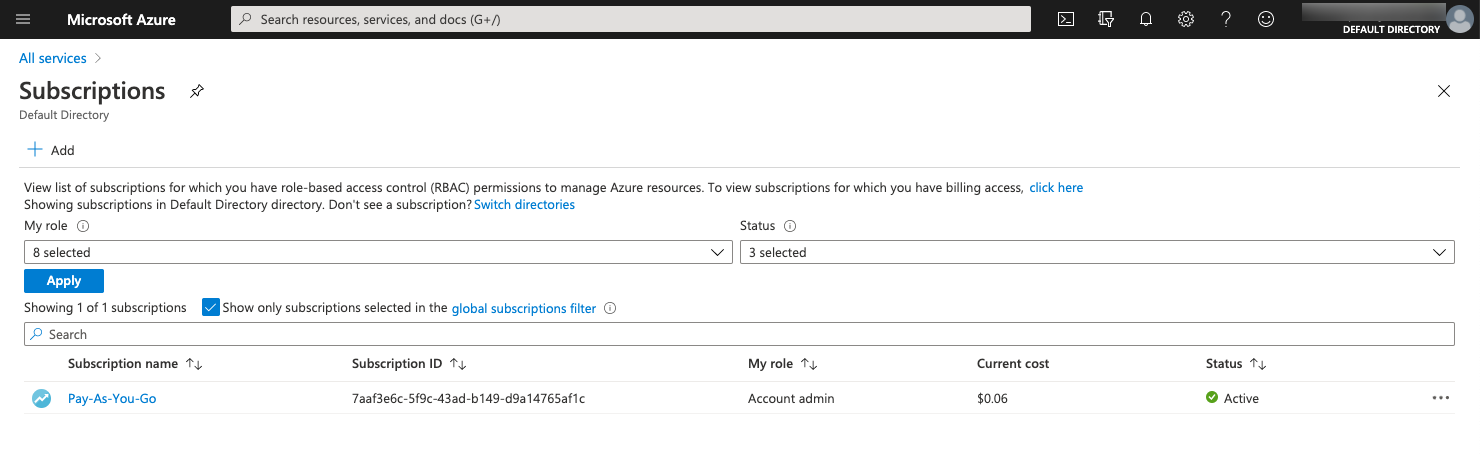
-
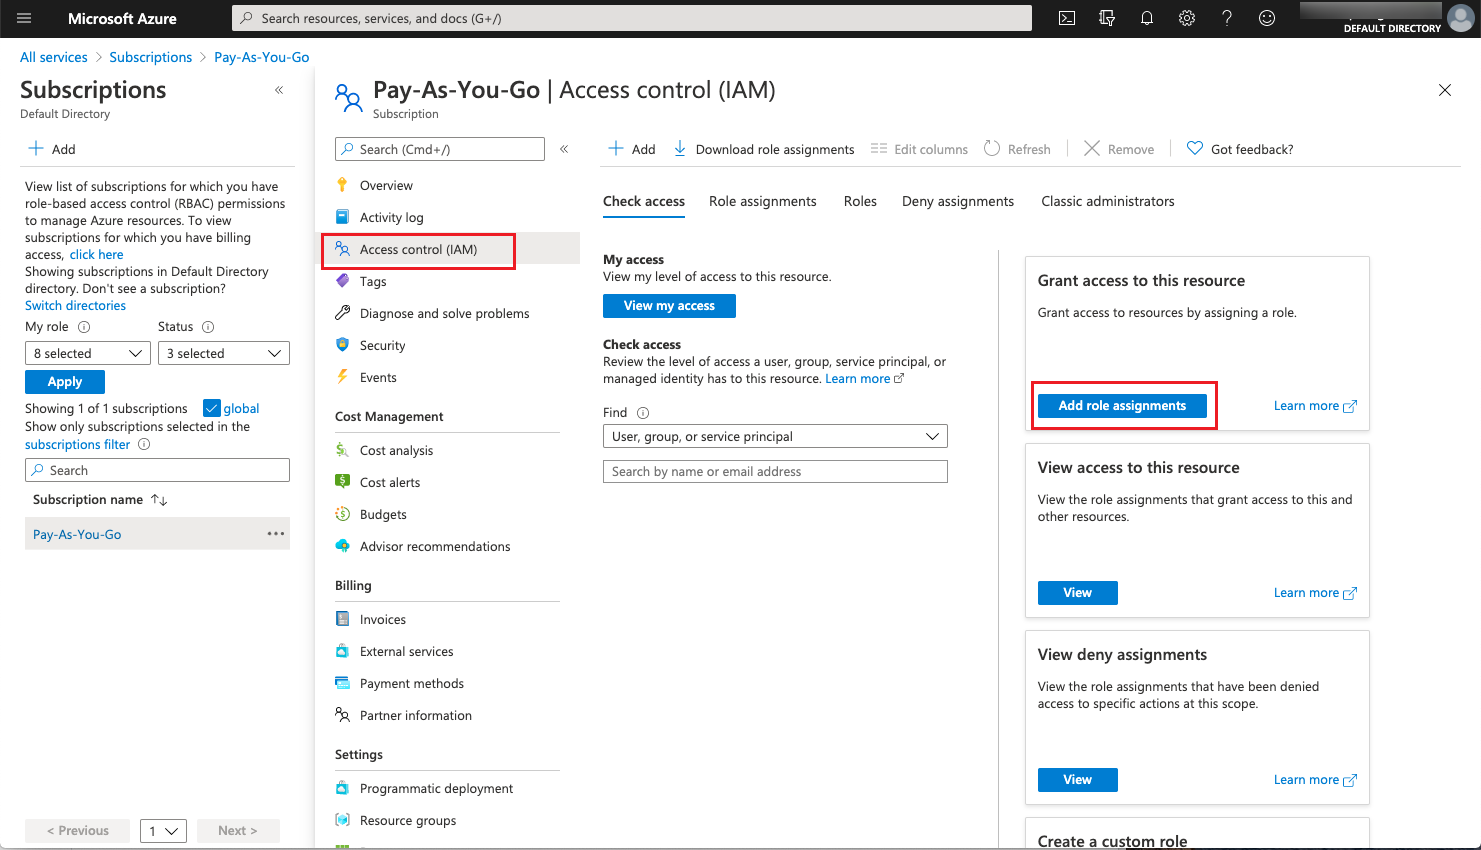
Click “Access Control (IAM)" , and click the “Add Role Assignment” button on the Access Control (IAM) page to enter the Add Role Assignment page.
-
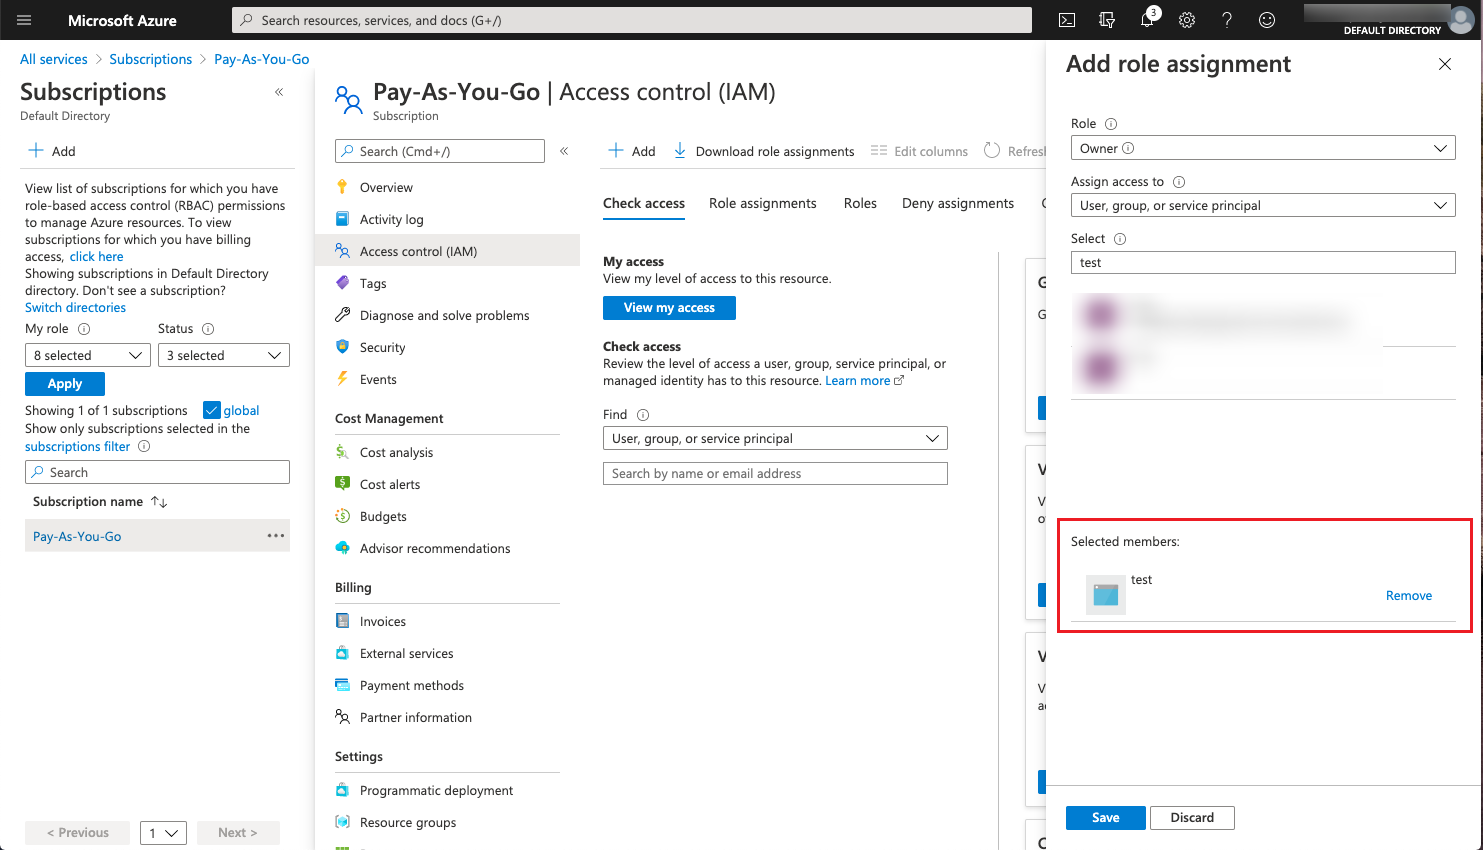
On the Add Role Assignment page, set the role to “Owner” , assign the access rights to the dialog box “User, group or service principal”, search for the name of the application created in the previous step in the Select Search box, and select the application. Search for the name of the application created in the previous step in the Select Search box, select the application, and click the “Save” button.
-
On the Role Assignment page, The aubscription permissions have been granted to the application.

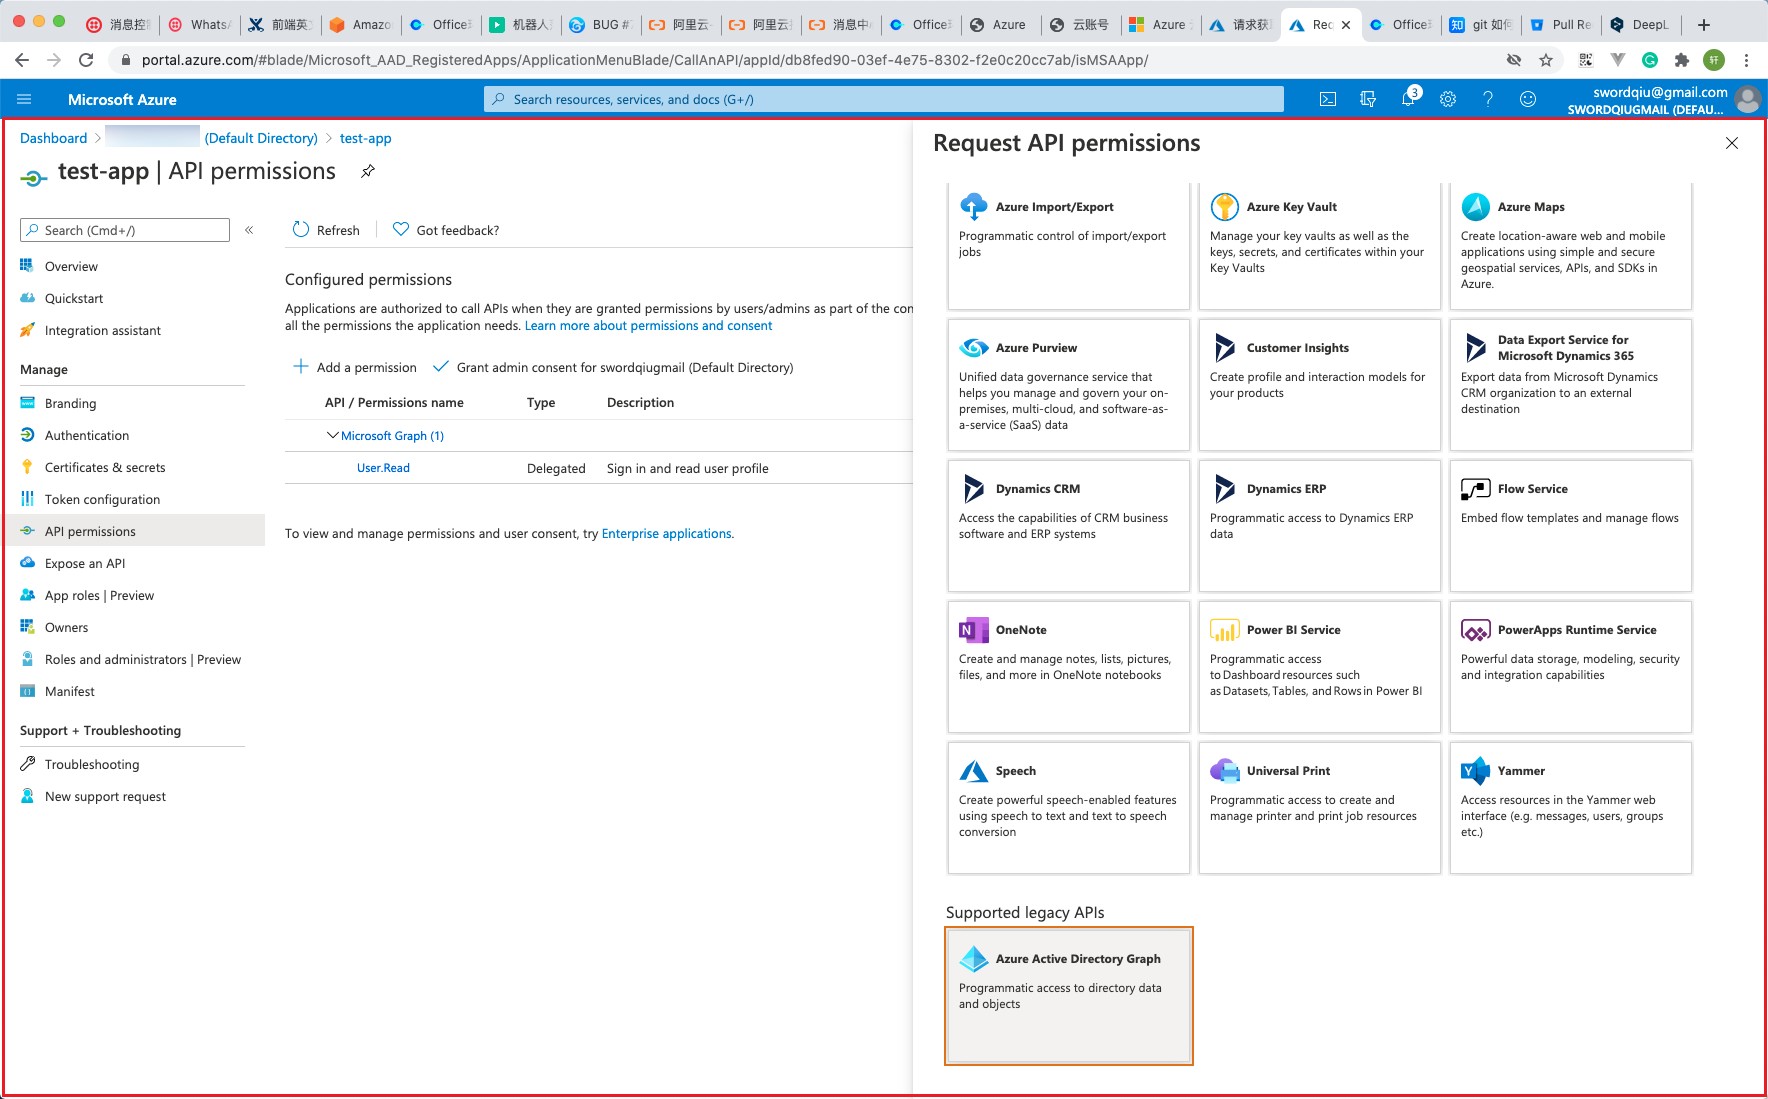
API permissions setting
Make sure the application has the following permissions under the Azure Active Directory API.
| Region | API Permissions |
|---|---|
| Azure China | Dictionary: Dictionary.Read.All, Dictionary.ReadWrite.All Domain: Domain.Read.All |
| Azure | Dictionary: Dictionary.Read.All, Dictionary.ReadWrite.All Domain: Domain.Read.All, Domain.ReadWrite.All; Member: Member.Read.Hidden; Policy: Policy.Read.All; |
View and setup steps
Take Azure Global as an example.
-
In the Azure console, click the “Azure Active Directory/App registration” menu item in the left navigation bar to enter the application registration page.
-
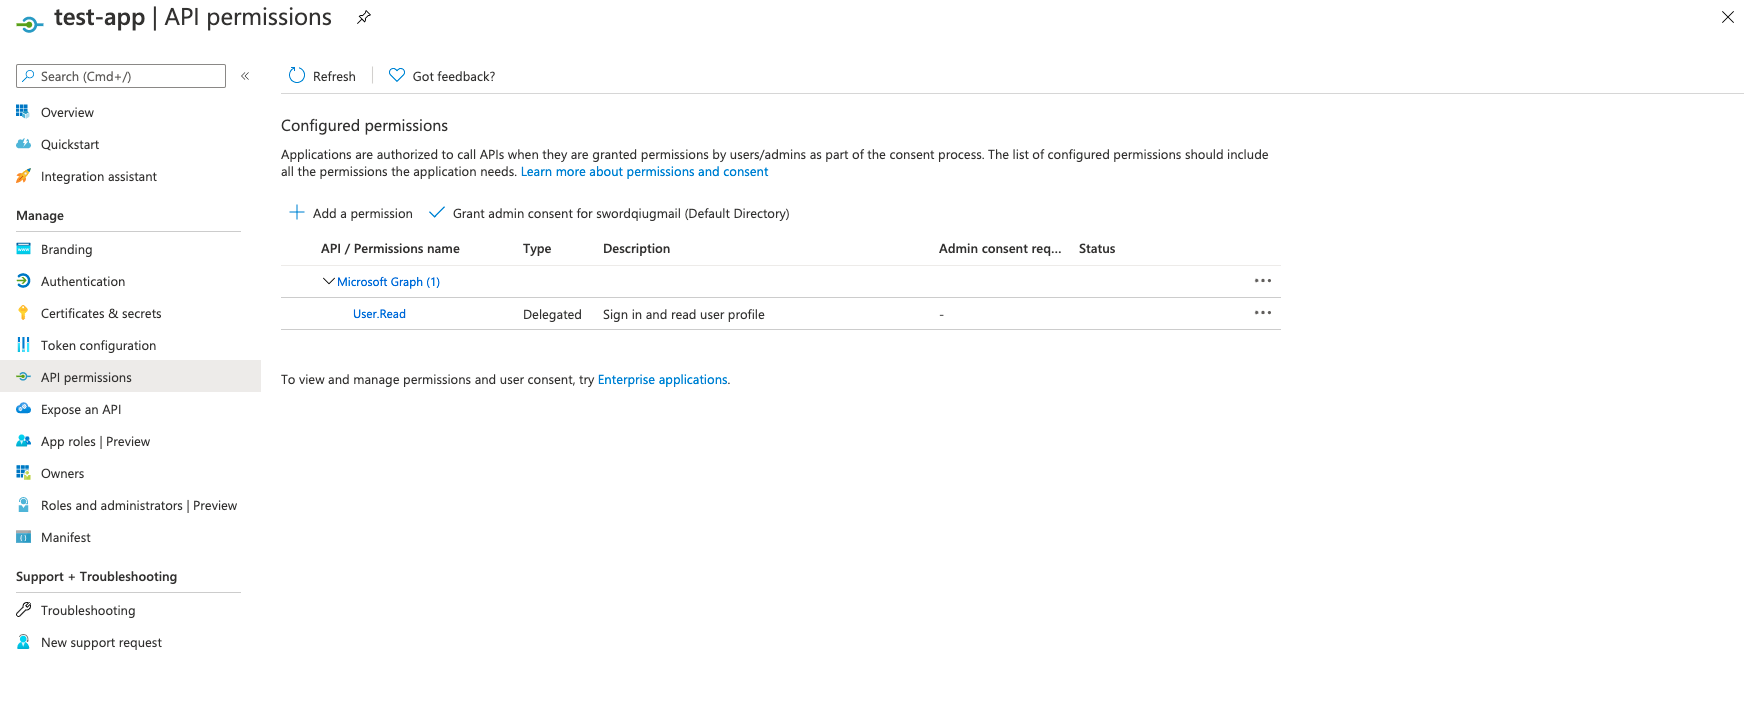
On the newly registered application details page, click “API Permissions” menu item to enter the API Permissions page and view the API permissions.
-
Check whether the API permission of the application meets the above requirements, if not, click “Add a Permission” button to bring up the Request API Permissions dialog.
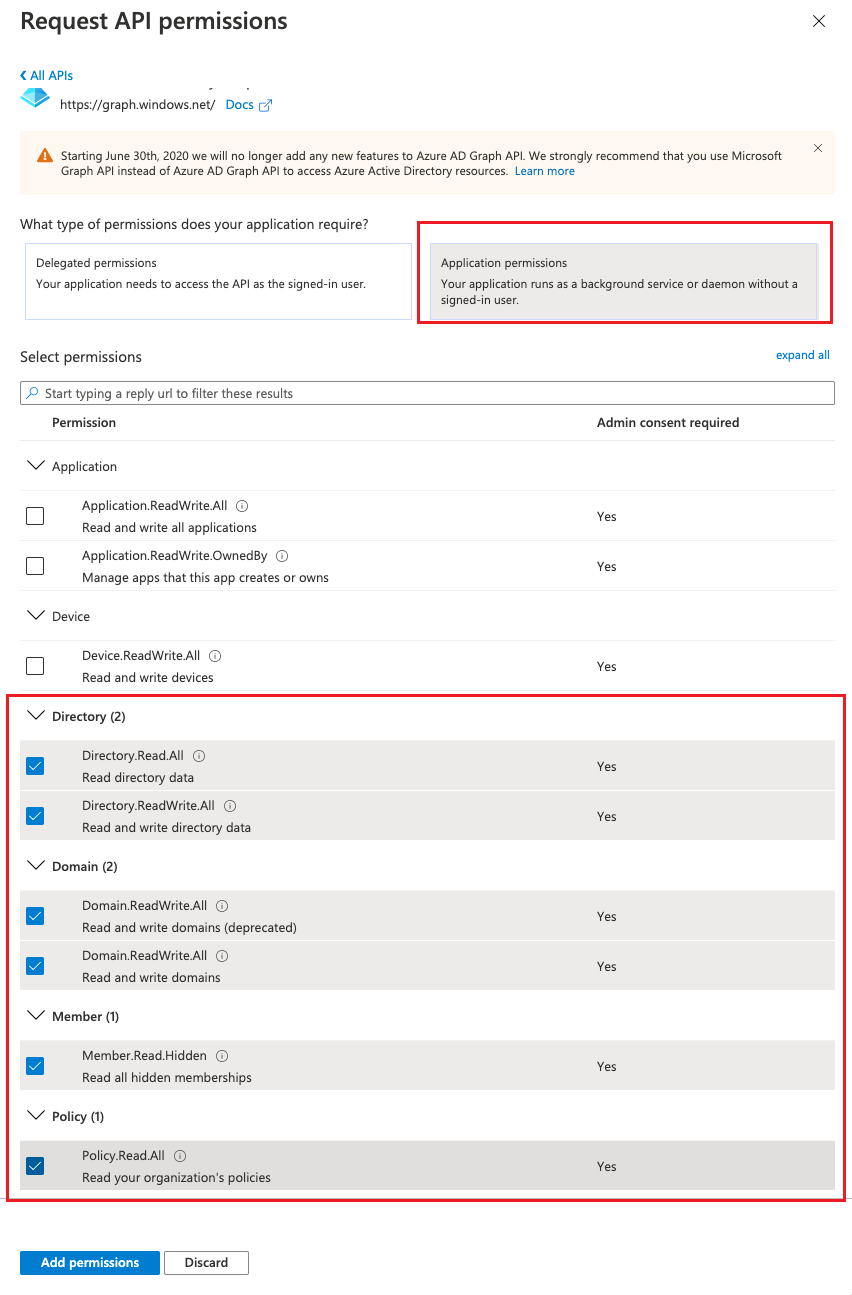
-
Select “Azure Active Directory”, select “Application Permissions” for the application, and check all permissions under Dictionary and Domian, click “Add Permissions” button to complete the configuration.
Azure account permission requirements
| Feature | Read-only permissions | Read-write permissions |
|---|---|---|
| All Features | Reader | Owner |
| VM Instance, Disks, Security Groups, Images, Snapshot, LB Instance | - | Virtual Machine Contributor Classic Virtual Machine Contributor |
| Project | - | - |
| Vpc, Vpc Peering, Routing Table, NAT, Elastic NIC,EIP, NAT, WAF | - | Network Contributor, Classic Network Contributor |
| OSS | Storage Blob Data Reader | Storage Blob Data Owner |
| RDS | Cloud SQL Viewer | Cloud SQL Admin |
| Redis | Redis Enterprise Cloud Viewer | Redis Enterprise Cloud Admin |
| NAS | Storage File Data SMB Share Reader | Storage File Data SMB Share Contributor |
| WAF | - | - |
| IAM | - | Graph Owner Resource Policy Contributor |
| DNS | - | DNS Zone Contributor Private DNS Zone Contributor |
| Billing | Billing Reader Cost Management Reader |
Cost Management Contributor |
| Monitoring | Monitoring Reader | Monitoring Contributor |
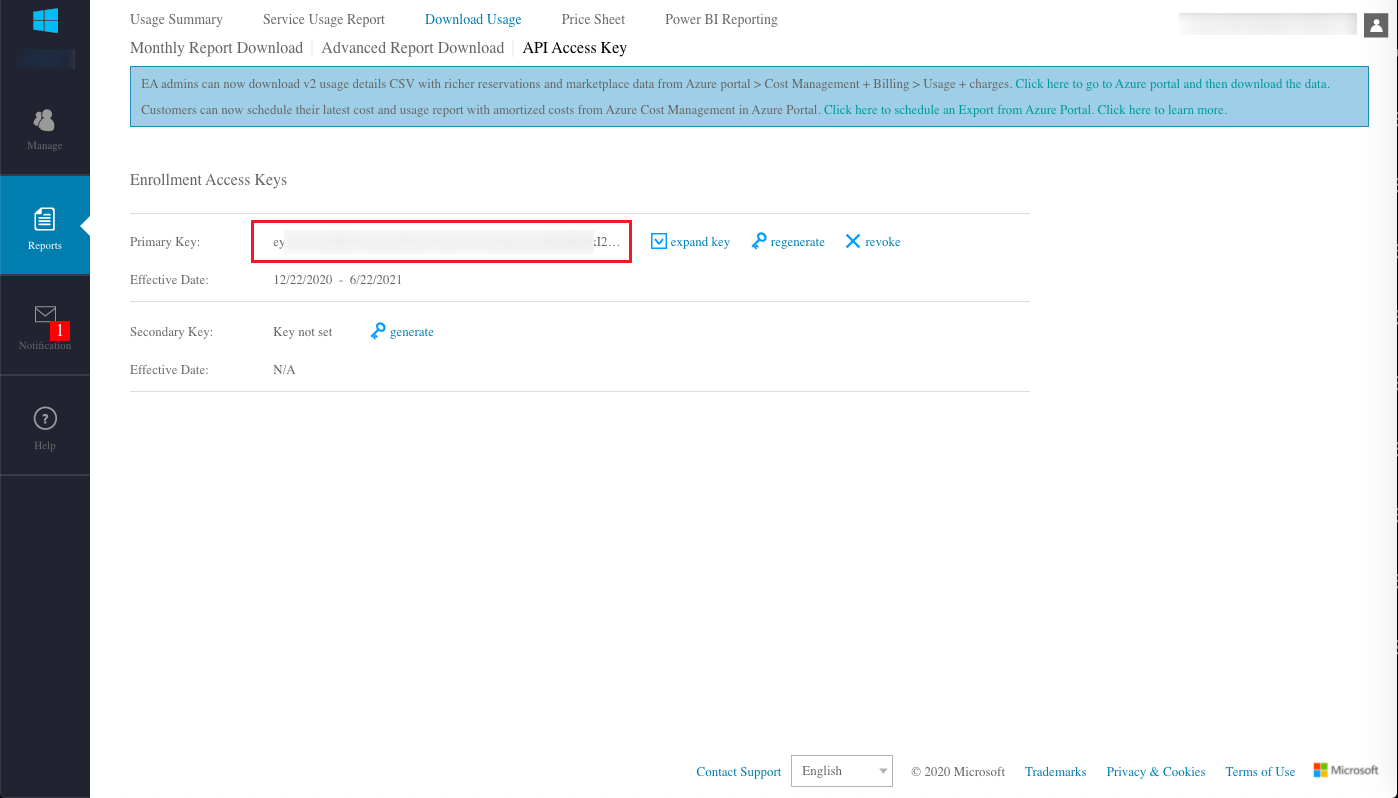
How to get Azure contract ID and key?
-
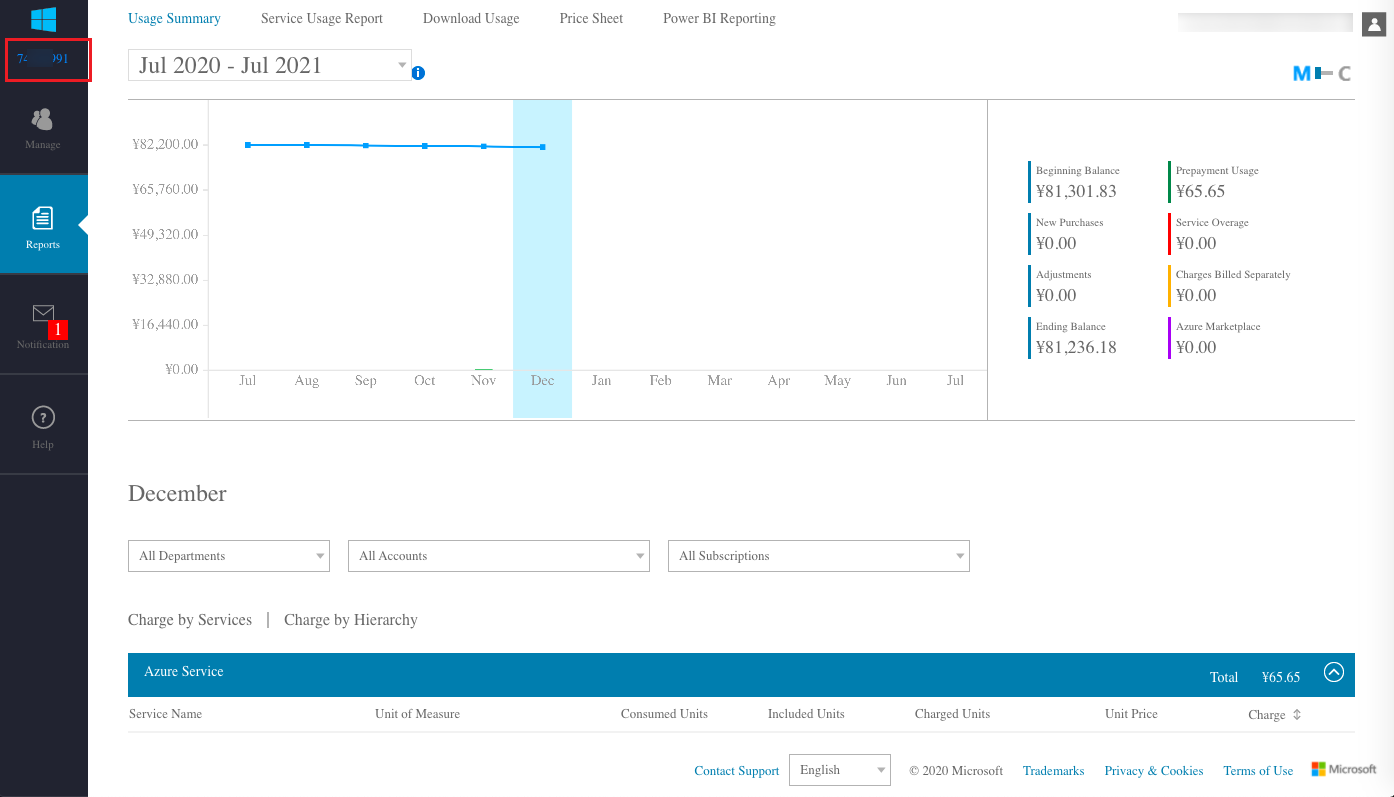
Login to Azure EA Portal China or EA Portal, after signing in the system, the number in the top left corner is the contract ID.
-
Click the menu item “Reports” on the left navigation bar, and select the “Download Usage > API Access Keys” tab, the master key on this page is the key.