Cron Jobs
CronJobs can run job tasks periodically according to a set policy. For details of CronJobs, please see [kubernets official documentation - CronJobs](https://kubernetes.io/docs/concepts/workloads/ controllers/cron-jobs/)
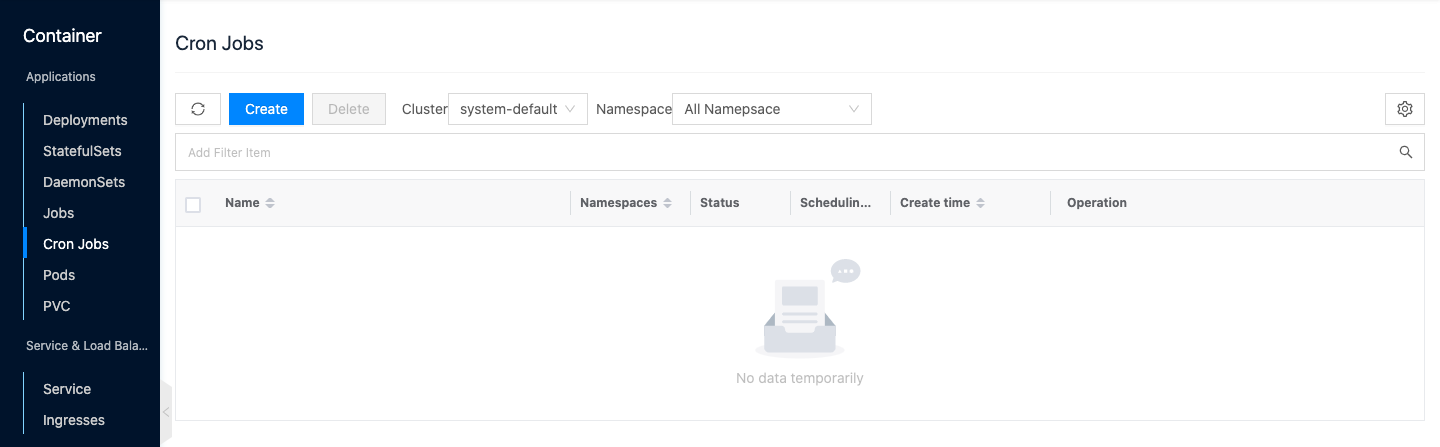
Entry: In the cloud management platform click the top left corner of  navigation menu, and click “Containers/Applications/Cron Jobs” menu item in the left menu bar that pops up to enter the Cron Jobs page.
Timing instructions
Please see Cron
# Timing example
*/1 * * * * # Indicates that a job task is created every minute.
*/30 00-08 * * * * # means create a job task every 30 minutes from 0:00 to 8:00
00 06 * * * * # Indicates that a job task is created every day at 6:00

## It should be noted that the above time is UTC time. If you need to set it according to Beijing time, you need to convert Beijing time to UTC time before configuring. Conversion formula: UTC time = Beijing time - 8, e.g. 6:00 Beijing time, the corresponding UTC time is 22:00.

# ┌──minutes (0 - 59)
# │ ┌──hour (0 - 23)
# | │ ┌─Day (1 - 31)
# | | | ┌─Month (1 - 12)
# | | | | | ┌─ Week (0 - 6, Sunday = 0)
# | | | | | |
# * * * * *
View CronJob
This function is used to filter cron job information based on clusters, namespaces.
-
In the CronJob page, by default, you can view the cron job information of all namespaces under a cluster.
-
When there are multiple clusters in the environment, click the input box on the right side of the cluster above the list, and select other clusters to view the cron job information of all the namespaces under other clusters.
-
When there are multiple namespaces under the cluster, click the input box on the right side of the namespace above the list, select the namespace, and view the cron job information under the specified namespace.

Create cron jobs
This function is used to create a cron job CronJob by mirroring.
-
In the CronJob page, click the “Create” button at the top of the list to enter the Create Cron Job page.
-
Set the following parameters.
- Name: the name of the cron job.
- Cluster: Select the cluster to which the cron job belongs.
- Namespace: Select the namespace to which the cron job belongs. Namespace is used to logically divide the cluster, deployment, pod, service, etc. all belong to a namespace. Kubernetes cluster will generate default, kube-system, and kube-public namespaces by default after the cluster is created.
- Image key: You need to set the key when accessing private repository, support new and select existing key.
- Restart policy: only OnFailure is supported, i.e. if the container exits abnormally, the container will be restarted if the pod is still running.
- Scheduling Strategy: Set the timing time for job tasks, please see Cron. A job task will be created when the required time is met, and by default there are at most 3 successfully created jobs.
- Advanced configuration: Configure tags and notes according to requirements.
- Tag: Customize the tag of the cron job.
- Notes: Customize the notes information of the cron job.
- Containers: You can set one or more different containers for a pod in deployment according to the requirements.
-
Name: customize the container name.
-
Container image: If you only enter the image name, the image on dockerhub will be used by default, if you need to use private repository image, you need to set the repository/image.
-
CPU/Memory: set the CPU and memory size occupied by the container.
-
Container commands, command parameters: set the container commands and parameters. The container naming corresponds to spec.containers.command, and the parameters correspond to spec.containers.args. e.g. command: [“perl”, “-Mbignum=bpi”, “-wle”, “print bpi(2000)"] in the yaml file, you need to enter the following information in form container command to enter the following information.
$ perl -Mbignum=bpi -wle print bpi(2000) -
Data volume: Set the storage declaration and mount point for the container in Pod by key-value pair, you need to create the storage volume declaration in the namespace under the cluster in advance.
-
Environment variables: Configure environment variables for Pods in the form of key-value pairs. Used to add environment flags to Pods or pass configuration, etc.
-
Privileged mode: Privileged mode has the same privileges for processes inside the container as for processes outside the container.
-
-
Click the “Deploy” button to complete the operation.
View/Edit
This function is used to view or edit the yaml file of a cron job.
- In the cron job page, click the “More” button on the right action bar of the cron job, select the drop-down menu “View/Edit” menu item to pop up the View/Update dialog box.
- Support viewing and editing yaml file information of cron jobs.
- After editing the yaml file, click “OK” button to take effect.
Delete Cron Job
This function is used to delete cron jobs, as well as tasks and container groups created by cron jobs.
Delete
- On the CronJob page, click the “Delete” button in the action column on the right side of the cron job, and the action confirmation dialog box will pop up.
- Click the “OK” button to delete the cron jobs and related resources.
Batch Delete
- Select one or more cron jobs in the list of cron jobs, click the “Delete” button at the top of the list, and the operation confirmation dialog box will be popped up.
- Click “OK” button to delete the cron jobs and related resources.
View Cron Job Details
This function is used to view the details of a cron job.
- On the CronJob page, click the Cron Job Name item to enter the Cron Job Details page.
- View the following information: Cloud ID, ID, name, status, cluster, namespace, container group, image, initialized image, tag, created at, etc.
View container group
This function is used to view the container groups created by the cron jobs and supports managing container groups.
View/Edit
This function is used to view the yaml file of a container group.
- In the cron job page, click the cron job name item to enter the cron job details page.
- Click the “Container Group” tab to enter the container group page.
- Click “View/Edit” button on the right column of the container group to bring up the View/Update dialog box.
- Support viewing and editing the yaml file information of the cron jobs.
- After editing the yaml file, click the “OK” button to take effect.
Delete
This function is used to delete a container group. After the container group is deleted, a new container group will be redeployed according to the yaml file settings.
- On the Cron Job page, click the Cron Job Name item to enter the Cron Job Details page.
- Click the Container Groups tab to enter the Container Groups page.
- Click the “Delete” button on the right action bar of the container group to bring up the action confirmation dialog box.
- Click the “OK” button to complete the operation.
View Events
This function is used to record the record of the occurrence of resource object events, including the content, source, cause, and created at, for troubleshooting.
- On the Cron Job page, click the Cron Job Name item to enter the Cron Job Details page.
- Click the Events tab to enter the Events page. View the content, source, reason, and created at of the event.
View source information
This function is used to view and edit the yaml information of the cron job.
- In the cron job page, click the cron job name item to enter the cron job details page.
- Click the “Source Information” tab to enter the source information page.
- Click the “Copy Content” button to copy the yaml file information of the node.
- After updating the yaml file, click the “Update” button.
View Operation Log
This function is used to view the operation log related to the cron job.
- On the cron job page, click the cron job name item to enter the cron job details page.
- Click “Operation Log” tab to enter the Operation Log page.
- Load more logs: In the Operation Log page, the list shows 20 operation logs by default, if you want to view more operation logs, please click “Load more” button to get more logs.
- View Log Details: Click the “View” button on the right column of the operation log to view the log details. Copy details are supported.
- View logs of specified time period: If you want to view the operation logs of a certain time period, set the specific date in the start date and end date at the top right of the list to query the log information of the specified time period.
- Export logs: Currently, only the logs displayed on this page are supported to be exported. Click the upper-right corner of
 icon, set the export data column in the pop-up export data dialog, and click the “OK” button to export the logs.