Images
Imagess are divided into two main categories in terms of format, including server images and ISO images, as shown in the following table.
| Image Format | Format | Features | Usage |
|---|---|---|---|
| Virtual machine images | QCOW2, VMDK, RAW, VHD | Used to create servers and baremetal, etc. A single image has multiple formats to ensure that the image can be adapted to multiple platforms, is ready to use on boot, does not require an operating system to be installed, etc. | When the image is a public image, you need to select it in the public image when creating a server, and when the image is a custom image, you need to select it in the custom image when creating a server. |
| ISO image | ISO | is only used to create servers for the OneCloud platform. After the server is installed, you need to log in remotely to the server to install the operating system, etc. | Regardless of the image type of the ISO image, select the ISO image from the ISO boot when creating the server. |
Imagess can be divided into public images and custom images by type, as shown in the following table.
| Image Type | Description | Source |
|---|---|---|
| Public images | The share range defaults to the system share and does not allow changes to the share range. | The administrator imports images from the Image Market; the administrator sets the custom image of the project as the public image. |
| Custom images | The sharing scope is private by default, and you can set the sharing scope. | Image uploaded by any user; image generated by saving system image; administrator set the public image of the project as a custom image. |
Cloud Management Platform Image Usage Rules.
- When servers are created in private clouds and local IDCs using images on the cloud management platform, the images will be saved to the local storage of the corresponding hosts in the form of a image cache.
- When the public cloud uses the image on the cloud management platform, the image will be cached to the public cloud platform, and the cached image can be viewed with the cached flag when the image is selected during the creation of the server.
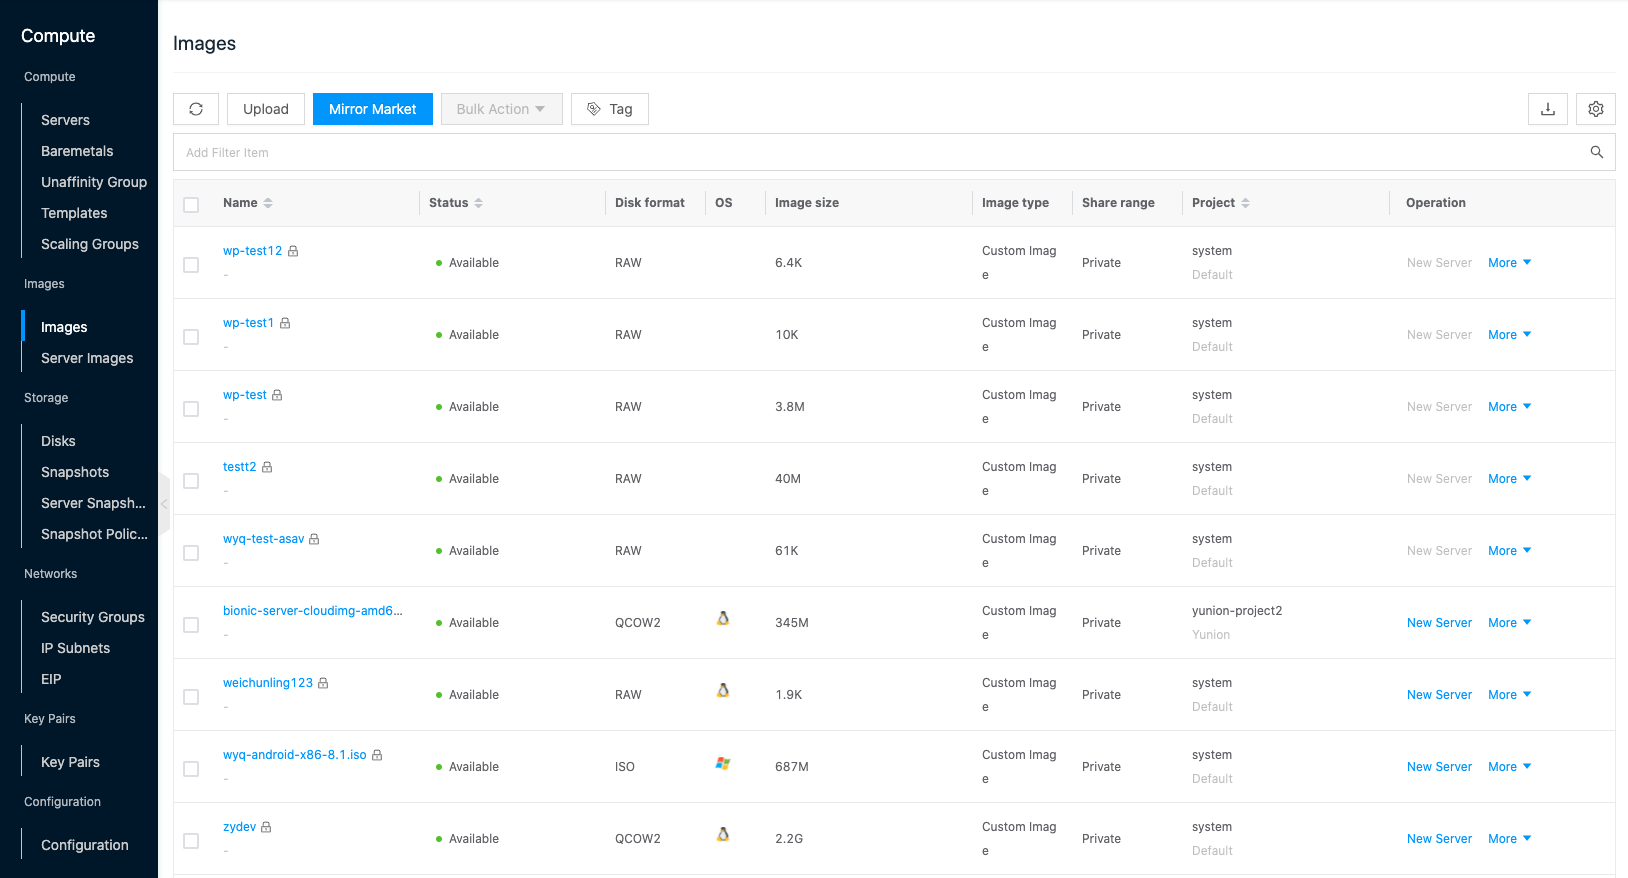
Entry: In the cloud management platform click the top left corner navigation menu, and click “Compute/Images/Images” menu item in the left menu bar that pops up to enter the Images page.
Upload system image
This function is used to upload system image files, and the default image file uploaded by users is a custom image.
- In the system image page, click “Upload” button to enter the upload image page.
- Set the following parameters.
- Specify the project: Select the project to which the system image belongs.
- Image name: set the name of the image, it is recommended that the name is related to the release version of the image.
- Release version, version number: the release version of the image.
- CPU architecture: support x86 and ARM architecture.
- System bit: support 32bit and 64bit. please select CPU architecture and system bit according to the actual situation.
- Upload method: Support uploading image file and inputting image URL in two ways. The server image list supports uploading images with QCOW2, VMDK, RAW, VHD format suffixes.
- Upload image file: means select the image accessible by current browser to upload directly.
- Enter the image URL: add the image by the URL path. Currently, only url links starting with http, https are supported. The format is http://path/file or https://path/file.
Image Market
The Image Market is a pre-made image provided by OneCloud and cannot be changed by the user.
The image market provides server images and ISO images that can be imported into the system image list by admin users. The images imported from the image market are public images by default.
- On the Images page, click the “Image Market” button to enter the Image Market page.

- Servers: Importing server images is supported. Virtual machine images include both unimported and imported pages.
- Unimported: Displays information about unimported images provided by OneCloud . Each image includes information about operating system, image format, image size, distribution, release version, system architecture, file size, update date, etc.
- Imported images: This function is used to import the images from the unimported page to the cloud management platform and display them on the imported page. The type of images imported from Image Square is public images by default.
- Imported: Show all the images imported from the image market to the image list.
- Cancellation of import: The image market currently does not support the function of canceling the import of images, but users can delete images imported from the image market in the image list, the image will switch from the imported page to the unimported page.
- ISO: supports importing ISO images, ISO images also include both unimported and imported pages, displaying the same content and importing the same way as server images
- Servers: Importing server images is supported. Virtual machine images include both unimported and imported pages.
Create Servers
This function is used to create a server based on a system image.
In the system image page, click the “Create Server” button on the right side of the image to bring up the Create Server dialog box. 2. Select the platform as Local IDC, Private Cloud, Public Cloud, and click the “OK” button to jump to the Create Server page. 3. Configure other parameters and click the “Create” button to create the server.
Modify Properties
This function is used to modify the property information of the system image.
- In the System Image page, click the “More” button on the right column of the image, and select the “Modify Properties” menu item to bring up the Modify Properties dialog box.
- Support modifying the following parameters.
- Name: set the name of the image, it is recommended that the name is related to the release version of the image.
- CPU architecture: Including x86 and ARM.
- OS: Including Linux, Windows, macOS, VMware and other operating systems.
- Distribution: select the distribution version of the image.
- Minimum disk requirements: requires the minimum configuration requirements of the host device created using the image.
- Disk driver: Including system automatic selection, virtio, scsi, pvscsi, ide, sata. choose the corresponding driver according to the type of disk, it is recommended to choose “system automatic selection”.
- NIC driver: Including system auto-select, virtio, e1000, vmxnet3. it is recommended to select “system auto-select”. Click “OK” button to finish the modification.
Set as public image/custom image
Only the system administrator can set the custom image of the administrator’s project as the public image or the public image of the project as the custom image.
- Public Image: The public image is shared by default, and the scope of sharing cannot be changed.
- Custom image: Custom image is private by default, and you can set the sharing range.
- On the Images page, click the “More” button on the right side of the image of the “Custom Image” type, and select the “Set as Public Image” menu item to set the custom image as a public image.
- On the system image page, click the “More” button on the right column of the image of the “Public Image” type, and select the “Set as Custom” menu item to set the public image as a custom image.
Set up sharing
This function is used to set the sharing range of the system image. Only custom images support setting sharing.
There are five types of sharing scopes for project resources.
- No sharing (private): that is, project resources can only be used by users of this project.
- Project sharing - partial (shared by multiple projects in this domain): I.e. project resources can be shared to specified projects (one or more) under the same domain, and only users under this project and the shared project can use the project resources.
- Project Sharing-All (shared by this domain): I.e. project resources can be shared to all projects under the domain, i.e. all users of the project’s domain can use the project resources.
- Domain sharing-part (Multiple Domains sharing): I.e. project resources can be shared to the specified domain (one or more), and only users under the domain where the project resources are located and the shared domain can use the project resources.
- Domain Share-All (Global share): I.e. project resources can be shared to all domains, i.e. all users in the system can use project resources.
Description
To set the conditions for domain sharing.
- Three-level Resource Hierarchy have been turned on in the OneCloud platform.
- The user is in the administrative backend.
To set up project sharing.
- The user is in the admin backend or domain admin backend.
system image set up sharing
- On the system image page, click the “More” button in the action bar on the right side of the image, and select the “Set up sharing” menu item to bring up the Set up sharing dialog box.
- Configure the following parameters.
- When “No Sharing” is selected as the sharing scope, the sharing scope of project resources is private and only users of this project can use them.
- When the sharing scope is selected as “Project Sharing”, you need to select the projects that can be shared under this domain.
- When the project selects one or more projects under the same domain, the shared scope of the project resources is Project Shared - Part, and only the users under the project where the project resources are located and the shared project can use the project resources.
- When All is selected for the project, the shared scope of the project resource is Project Shared - All, and all users under the project’s domain can use the project resource.
- When the sharing scope is “Domain Sharing”, you need to select the shared domains.
- When one or more of the domains are selected, the sharing scope of the project resources is Domain Sharing - Partial, and only the users under the domain where the project resources are located and the shared domain can use the domain resources.
- When All is selected for the domain, the sharing scope of the project resource is Domain Shared-All, and all users in the system can use the project resource.
- Click the “OK” button to complete the operation.
Batch set up sharing
- Select one or more system images in the System Image list, click the**_“Batch Action”_** button at the top of the list, and select the drop-down menu **_“Set up sharing”_** menu item to bring up the Set up sharing dialog box.
- Configure the following parameters.
- When “No Sharing” is selected as the sharing scope, the sharing scope of project resources is private and only users of this project can use them.
- When the sharing scope is selected as “Project Sharing”, you need to select the projects that can be shared under this domain.
- When the project selects one or more projects under the same domain, the shared scope of the project resources is Project Shared - Part, and only the users under the project where the project resources are located and the shared project can use the project resources.
- When All is selected for the project, the shared scope of the project resource is Project Shared - All, and all users under the project’s domain can use the project resource.
- When the sharing scope is “Domain Sharing”, you need to select the shared domains.
- When one or more of the domains are selected, the sharing scope of the project resources is Domain Sharing - Partial, and only the users under the domain where the project resources are located and the shared domain can use the domain resources.
- When All is selected for the domain, the sharing scope of the project resource is Domain Shared-All, and all users in the system can use the project resource.
- Click the “OK” button to complete the operation.
Change Project
This function is used to change the project to which the system image belongs.
system image change project
- On the system image page, click the “More” button in the action bar on the right side of the image, and select the “Change Project” menu item to bring up the Change Project dialog box.
- Select the domain and the items under the domain, click “OK” button to finish the operation.
Change multiple Projects.
- Select one or more system images in the system image list, click the “Batch Action” button at the top of the list, and select the drop-down menu “Change Project” menu item to bring up the Change Project dialog box.
- Select the domain and the items under the domain, click “OK” button to finish the operation.
Set deletion protection
This function is used to set the deletion protection of the system image. When delete protection is enabled for the system image, the system image cannot be deleted; when delete protection is disabled for the system image, the system image can only be deleted.
Set delete protection
- Disable delete protection.
- Click the system image name with
 icon to the right of the system image, click the “More” button in the action bar to the right of the system image, select the drop-down menu “Delete-Lock Setting” menu item to bring up the Delete-Lock Setting dialog box.
 - Select “Disable” delete protection and click “OK” button.
- Click the system image name with
- Enable delete protection.
- When the right side of the system image name is not marked with icon, click the “More” button in the action bar on the right side of the system image, select the drop-down menu “Delete-Lock Setting” menu item to bring up the Delete-Lock Setting dialog box.
- Select “Enable” delete protection, and click “OK” button.
- When the right side of the system image name is not marked with
Set up batch delete protection
- Disable delete protection.
- Check one or more system images in the system image list, click the “Batch Action” button at the top of the list, and select the drop-down menu “Delete-Lock Setting” menu item to bring up the Delete-Lock Setting dialog box.
- Select “Disable” delete protection, click “OK” button to disable delete protection for system image in batch.
- Enable Delete Protection.
- Check one or more system images in the system image list, click the “Batch Action” button at the top of the list, select the drop-down menu “Delete-Lock Setting” menu item, and the Delete-Lock Setting dialog box pops up.
- Select “Enable” delete protection and click “OK” button to enable delete protection for the system image in batch.
Delete
This function is used to delete a system image when the system image name item has icon to the right of the system image name, it means that the system image is enabled to delete protection, and the system image cannot be deleted. If you want to delete the system image, you need to disable the deletion protection first. The system image imported from the image market will revert to the unimported page after deletion.
Description
- Administrators can delete all system images.
- Domain administrators can only delete system images for this domain.
- Project users can only delete system images for this project.
Delete
- On the System Image page, click the “More” button in the action bar on the right side of the image, and select the drop-down menu “Delete” menu item to bring up the action confirmation dialog.
- Click the “OK” button to complete the operation.
Batch delete
- Select one or more images in the system image list, click the**_“Batch Action”_** button at the top of the list, select the drop-down menu **_“Delete”_** menu item, and the operation confirmation dialog box pops up.
- Click the “OK” button to complete the operation.
View System Image Details
This function is used to view the details of the system image.
- On the system image page, click the image name item to enter the system image details page.
- The menu item at the top of the details page supports the image image management operation.
- View the information of the image.
- Basic Information: Including Cloud ID, ID, name, status, domain, project, share range, type, size, created at, updated at, and description.
- Image properties: Including disk format, system language, minimum memory requirement, minimum disk requirement, disk driver, network card driver, application platform.
- Multi-cloud image: except for ISO format image, other format image will be converted to 3 different formats when imported to
OneCloud
platform, multi-cloud image can view the checksum, format, size and status of the image.
Description
Images uploaded by users from the Image Market or manually are saved in the /opt/cloud/workspace/data/glance/image directory on the First Node server. 1 to 3 images of different formats are saved with the name of the image ID.
- Additional information: support for turning on or off delete protection.
View image cache
This function is used to view the cache list of images, and supports creating and deleting image caches. Only the administrator view supports viewing and managing the image cache.
- On the System Image page, click the Image Name item to enter the System Image details page.
- Click the Cache List tab to enter the Cache page.
- View the cache location, status, updated at, platform, region, cloud account, and other information of the image in the cache page.
- Cache location: OneCloud platform and private cloud platform cache location corresponds to the host; public cloud platform cache location corresponds to the region on the public cloud platform.
Create image cache
By default, when users create servers on OneCloud or private cloud platforms, the selected images will be cached on the corresponding hosts. When a user creates a server on a public cloud platform, the selected image will be cached to the region of the corresponding platform.
In addition to the above caching methods, the cloud management platform supports targeted caching of images to the corresponding hosts and platform regions in advance, which can improve the speed of creating servers, etc.
Cache to IDC
- On the Cache page page, click the “Create” button at the top of the list, and select the “IDC” menu item to bring up the Create Cache dialog box.
- The list displays information of all cacheable locations, including platform, region, zone, IP, cache location, SN, and other information.
- Support to search for qualified hosts based on IP and SN information in the search box or check the hosts directly in the list.
- Click the “OK” button to complete the operation.
Cache to private cloud
The cache location for the private cloud is specific to the host.
- On the Cache page page, click the “Create” button at the top of the list, and select the “Private Cloud” menu item to bring up the Create Cache dialog box.
- Support filtering out eligible private cloud platforms based on platform, cloud subscription, region, etc. or directly checking the cache location in the list.
- Click the “OK” button to complete the operation.
Cache to public cloud
The public cloud cache location is specific to the region.
- On the Cache page page, click the “Create” button at the top of the list, and select the “Public Cloud” menu item to bring up the Create Cache dialog box.
- Support filtering out eligible private cloud platforms based on platform, cloud subscription, region, etc. or directly checking the cache location in the list.
- Click the “OK” button to complete the operation.
View operation log
This function is used to view the log information of the operations related to the system image
- On the System Image details page, click the Operation Log tab to enter the Operation Log page.
- Load more logs: In the operation log page, the list shows 20 operation logs by default, if you want to view more operation logs, please click “Load more” button to get more log information.
- View Log Details: Click the “View” button on the right column of the operation log to view the log details. Copy details are supported.
- View logs of specified time period: If you want to view the operation logs of a certain time period, set the specific date in the start date and end date at the top right of the list to query the log information of the specified time period.
- Export logs: Currently, only the logs displayed on this page are supported to be exported. Click the upper-right corner of
 icon, set the export data column in the pop-up export data dialog, and click the “OK” button to export the logs.