Server Images
The server image is used to create the server.
Source: The server image is saved through the server list save image function.
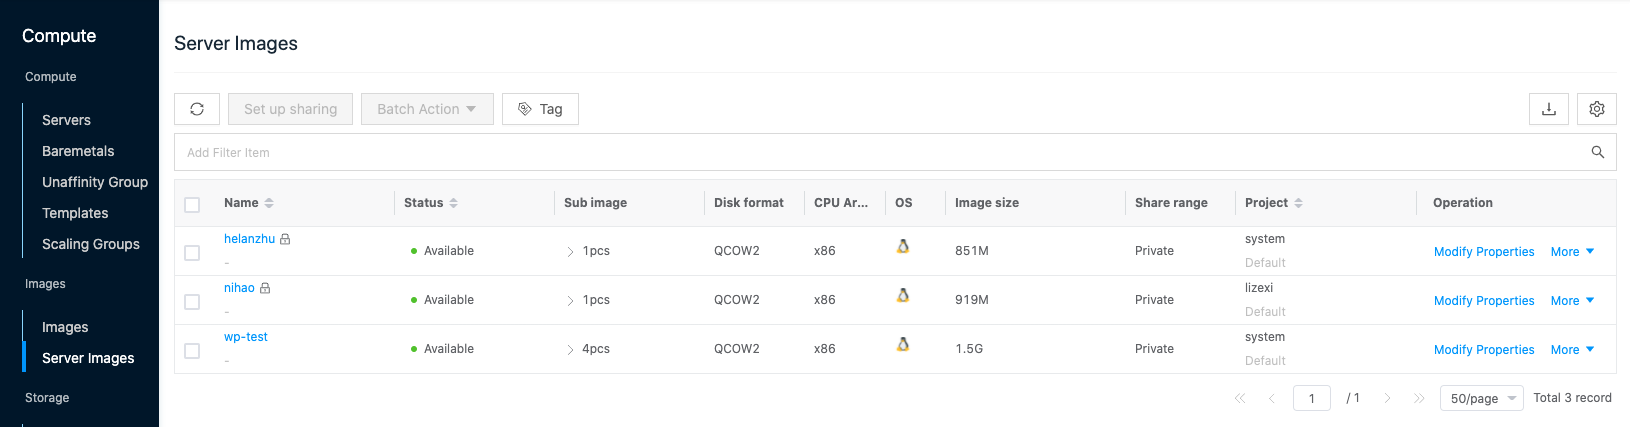
Entry: In the cloud management platform click on the top left corner navigation menu, and click “Compute/Images/Server Images” menu item in the left menu bar that pops up to enter the Server Images page.
Modify Properties
This function is used to modify the properties information of the server image.
-
In the server image page, click the “More” button on the right side of the image, and select the “Modify Properties” menu item to bring up the Modify Properties dialog box.
-
The following parameters are supported to be modified.
- Image name: set the name of the image, it is recommended that the name is related to the release version of the image.
- Delete protection: set whether the image is enabled to delete protection, after disabling the deletion protection, the image can be deleted. When delete protection is enabled, the image cannot be deleted.
- OS: Including Linux, Windows, macOS, VMware, and other operating systems.
- Release version: Select the release version of the image.
- Disk driver: Including system auto-select, virtio, scsi, pvscsi, ide, sata. select the corresponding driver according to the disk type, it is recommended to select “system auto-select”.
- NIC driver: Including system auto-select, virtio, e1000, vmxnet3. it is recommended to select “system auto-select”.
-
Click “OK” button to finish the modification.
Set up sharing
This function is used to set the sharing range of the image.
There are five types of sharing scope for project resources.
- No sharing: I.e. project resources can only be used by users of this project.
- Project Share-Partial (shared by multiple projects in this domain): I.e. project resources can be shared to specified projects (one or more) under the same domain, and only users under this project and the shared project can use the project resources.
- Project Sharing-All (shared by this domain): I.e. project resources can be shared to all projects under the domain, i.e. all users of the project’s domain can use the project resources.
- Domain sharing-part (Multiple Domains sharing): I.e. project resources can be shared to the specified domain (one or more), and only users under the domain where the project resources are located and the shared domain can use the project resources.
- Domain Share-All (Global share): I.e. project resources can be shared to all domains, i.e. all users in the system can use project resources.
Description
To set the conditions for domain sharing.
- Three-level Resource Hierarchy have been turned on in the OneCloud platform.
- The user is in the administrative backend.
To set up project sharing.
- The user is in the admin backend or domain admin backend.
host image set up sharing
- On the host image page, click the “More” button in the action bar on the right side of the image and select the drop-down menu “Set up sharing” menu item to bring up the Set up sharing dialog box.
- Configure the following parameters.
- When “No Sharing” is selected as the sharing scope, the sharing scope of project resources is private and only users of this project can use them.
- When the sharing scope is selected as “Project Sharing”, you need to select the projects that can be shared under this domain.
- When the project selects one or more projects under the same domain, the shared scope of the project resources is Project Shared - Part, and only the users under the project where the project resources are located and the shared project can use the project resources.
- When All is selected for the project, the shared scope of the project resource is Project Shared - All, and all users under the project’s domain can use the project resource.
- When the sharing scope is “Domain Sharing”, you need to select the shared domains.
- When one or more of the domains is selected, the sharing scope of the project resources is Domain Sharing - Partial, and only the users under the domain where the project resources are located and the shared domain can use the domain resources.
- When All is selected for the domain, the sharing scope of the project resource is Domain Shared-All, and all users in the system can use the project resource.
- Click the “OK” button to complete the operation.
Batch set up sharing
- Select one or more server images in the Server Images list and click the “Set up sharing” button at the top of the list to bring up the Set up sharing dialog box.
- Configure the following parameters.
- When the sharing scope is selected as “No Sharing”, the sharing scope of project resources is private and only users of this project can use them.
- When the sharing scope is selected as “Project Sharing”, you need to select the projects that can be shared under this domain.
- When the project selects one or more projects under the same domain, the shared scope of the project resources is Project Shared - Part, and only the users under the project where the project resources are located and the shared project can use the project resources.
- When All is selected for the project, the shared scope of the project resource is Project Shared - All, and all users under the project’s domain can use the project resource.
- When the sharing scope is “Domain Sharing”, you need to select the shared domains.
- When one or more of the domains is selected, the sharing scope of the project resources is Domain Sharing - Partial, and only the users under the domain where the project resources are located and the shared domain can use the domain resources.
- When All is selected for the domain, the sharing scope of the project resource is Domain Shared-All, and all users in the system can use the project resource.
- Click the “OK” button to complete the operation.
Change Project
This function is used to change the project to which the server image belongs.
To change the project for a single server image
- On the server image page, click the “More” button in the action bar on the right side of the image, and select the “Change Project” menu item to bring up the Change Project dialog box.
- Select the domain and the items under the domain, click “OK” button to finish the operation.
Batch Change Projects.
- Select one or more server images in the server image list, click the “Batch Action” button at the top of the list, and select the drop-down menu “Change Project” menu item to bring up the Change Project dialog box.
- Select the domain and the items under the domain, click “OK” button to finish the operation.
Set deletion protection
This function is used to set the deletion protection of the server image. When deletion protection is enabled for a server image, the server image cannot be deleted; when deletion protection is disabled for a server image, the server image can only be deleted.
Setting delete protection for a single server image
- Disable delete protection.
- Click on the server image name with
 icon, click the “More” button in the action bar to the right of the server image, select the drop-down menu “Delete-Lock Setting” menu item to bring up the Delete-Lock Setting dialog box.
 - Select “Disable” delete protection and click “OK” button.
- Click on the server image name with
- Enable delete protection.
- When the right side of the server image name is not marked with icon, click the “More” button in the action bar on the right side of the server image and select the “Delete-Lock Setting” menu item to bring up the Delete-Lock Setting dialog box.
- Select “Enable” delete protection, and click “OK” button.
- When the right side of the server image name is not marked with
Set up batch delete protection
- Disable delete protection.
- Check one or more server images in the server image list, and click the “Delete-Lock Setting” button at the top of the list to bring up the Delete-Lock Setting dialog box.
- Select “Disable” delete protection, click “OK” button to disable delete protection for server images in batch.
- Enable Delete Protection.
- Check one or more server images in the server image list, and click the “Delete-Lock Setting” button at the top of the list to bring up the Delete-Lock Setting dialog box.
- Select “Enable” delete protection, click “OK” button to enable delete protection for server images in batch.
Delete
This function is used to delete a server image when the server image name item has a icon, it means that the server image is enabled for deletion protection, and the server image cannot be deleted, if you want to delete the server image, you need to cancel the deletion protection.
Description
- Administrators can delete all server images.
- Domain administrators can only delete server images for this domain.
- Project users can only delete server images for this project.
Delete
- On the host image page, click the “More” button in the action bar on the right side of the image, and select the drop-down menu “Delete” menu item to bring up the action confirmation dialog.
- Click the “OK” button to complete the operation.
Batch Delete
- Select one or more images in the image list, and click the “Delete” button at the top of the list to bring up the operation confirmation dialog box.
- Click the “OK” button to complete the operation.
View Server Images Details
This function is used to view the details of the server image.
- On the host image page, click the host image name item to enter the host image details page.
- The menu item at the top of the details page supports the image image management operations.
- View the information of the image.
- Basic Information: Including Cloud ID, ID, name, status, domain, project, share range, type, sub-image, size, created at, updated at notes.
- Image properties: Including disk format, system language, minimum memory requirement, minimum disk requirement, disk driver, network card driver, application platform.
- Multi-cloud image: view information about the image in other formats, including checksum, format, size, and status.
- Additional information: support for turning on or off deletion protection.
View sub-image information
This function is used to view the sub-image information of the server image. Saving a server image for a server is essentially saving each disk of the server as a subimage.
- On the server image details page, click the Submirror tab to enter the Submirror page.
- View the image name, image category, format, created at, and other information of the sub-image.
View operation log
This function is used to view the log information of the operations related to the host image
- In the host image details page, click the Operation Log tab to enter the Operation Log page.
- Load more logs: In the operation log page, the list shows 20 operation logs by default, if you want to view more operation logs, please click “Load more” button to get more log information.
- View Log Details: Click the “View” button on the right column of the operation log to view the log details. Copy details are supported.
- View logs of specified time period: If you want to view the operation logs of a certain time period, set the specific date in the start date and end date at the top right of the list to query the log information of the specified time period.
- Export logs: Currently, only the logs displayed on this page are supported to be exported. Click the upper-right corner of
 icon, set the export data column in the pop-up export data dialog box, and click the “OK” button to export the logs.