Google Cloud
How to get Google Cloud Services account key information?
Managing specified project
-
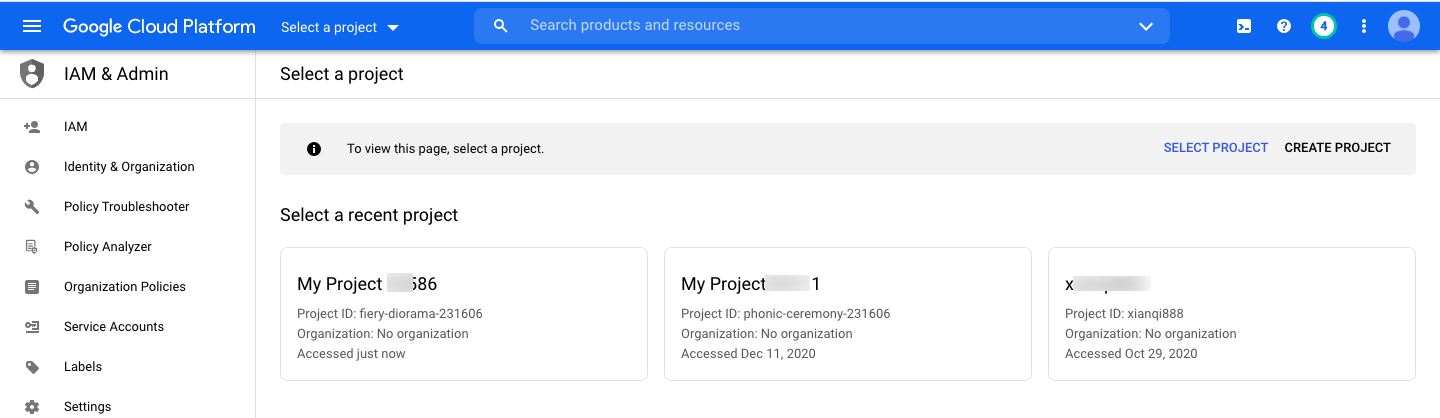
Open the “IAM and Administration in GCP Console - IAM page” page and login.
-
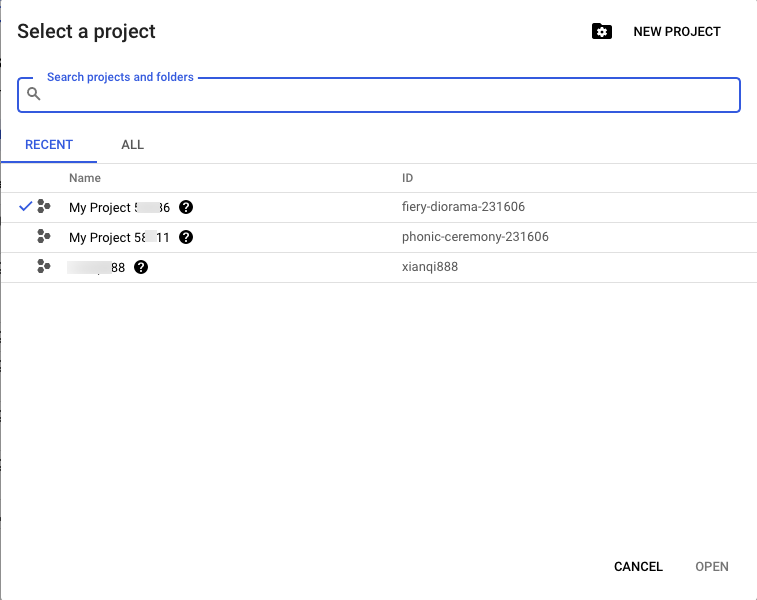
Select a recent project,or click “Select a Project” at the top and select the project you want to license.
-
Select “Service Accounts” in the left navigation bar to enter the service account page of the specified project.
-
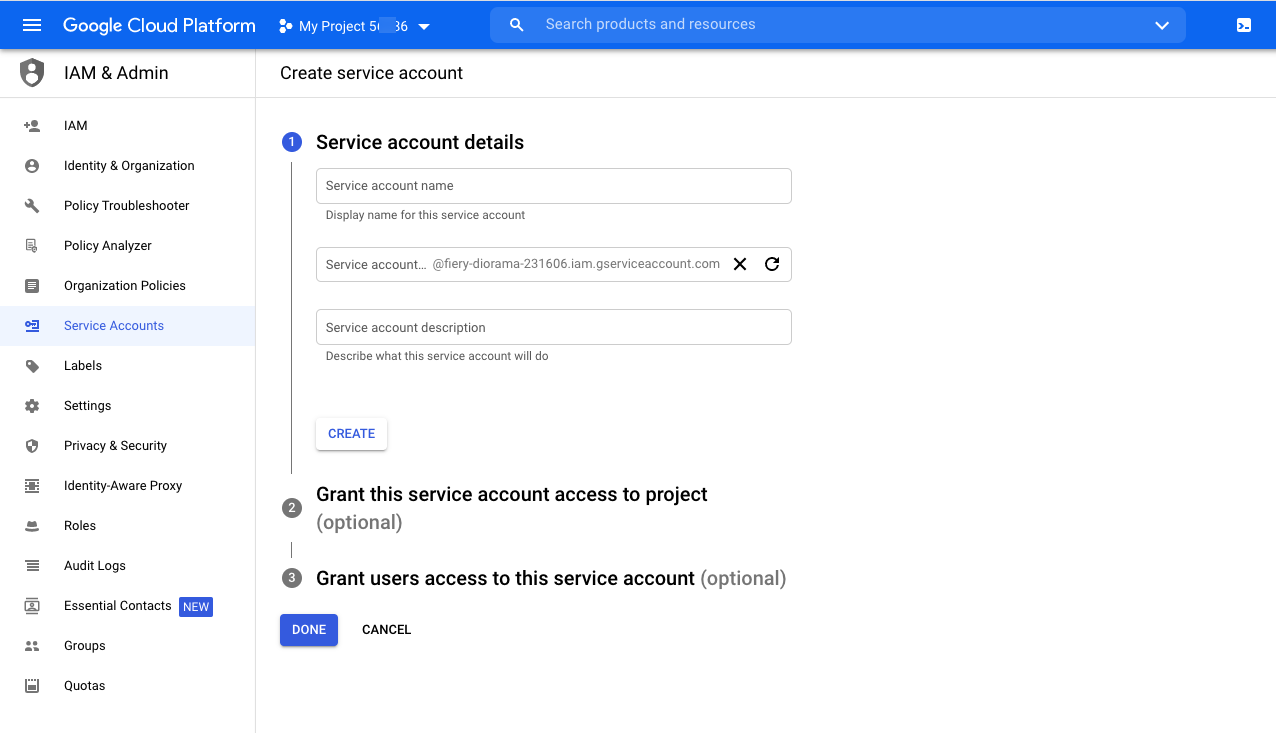
Click the “Create Service Account” button to enter the Create Service Account page.
-
Configure the service account name, service account ID, service account description, etc. Click the “Create” button to create a service account and grant access to the project to this service account.
-
Select the Project-Owner or Project-Viewer role, Owner represents the administrative rights to the project, Viewer represents the read-only rights to the project, if you need the cloud management platform to manage the Google Cloud account resources, please select the Project-Owner role, click “Continue” button.

-
Grant the user access to this service account (optional) step has no effect on the cloud management platform, please set the user according to the requirements, after the configuration is complete, click the “Continue” button.
-
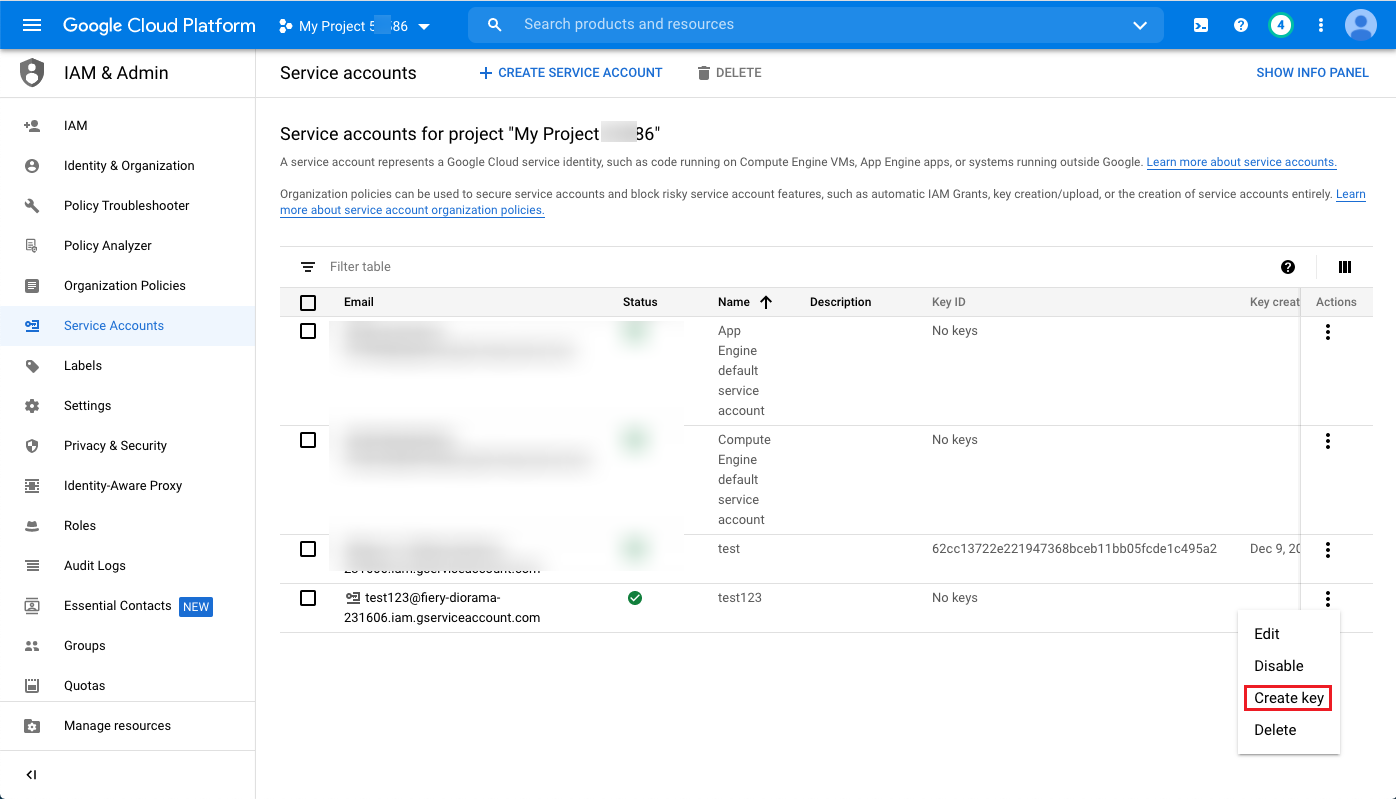
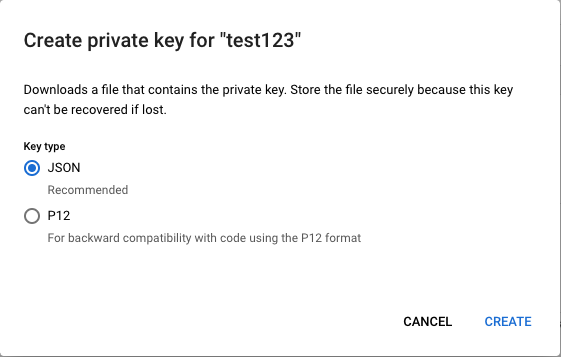
In the service account page, click the action column to the right of the newly created service account! colum button and click on the “Create key” menu item.
-
Select the key type as “JSON”, click “Create” button, and download the key file in json format with the following contents: project_id, private_key_id, private_key, client_email, etc. email, etc.
{
 "type": "service_account",
 "project_id": "[PROJECT-ID]",
 "private_key_id": "[KEY-ID]",
 "private_key": "-----BEGIN PRIVATE KEY-----\n[PRIVATE-KEY]\n-----END PRIVATE KEY-----\n",
 "client_email": "[SERVICE-ACCOUNT-EMAIL]",
 "client_id": "[CLIENT-ID]",
 "auth_uri": "https://accounts.google.com/o/oauth2/auth",
 "token_uri": "https://accounts.google.com/o/oauth2/token",
 "auth_provider_x509_cert_url": "https://www.googleapis.com/oauth2/v1/certs",
 "client_x509_cert_url": "https://www.googleapis.com/robot/v1/metadata/x509/[SERVICE-ACCOUNT-EMAIL]"
 }
Managing Multiple projects
If you need to use the key of the service account obtained above to manage multiple projects, you can follow the steps below to set it up.
-
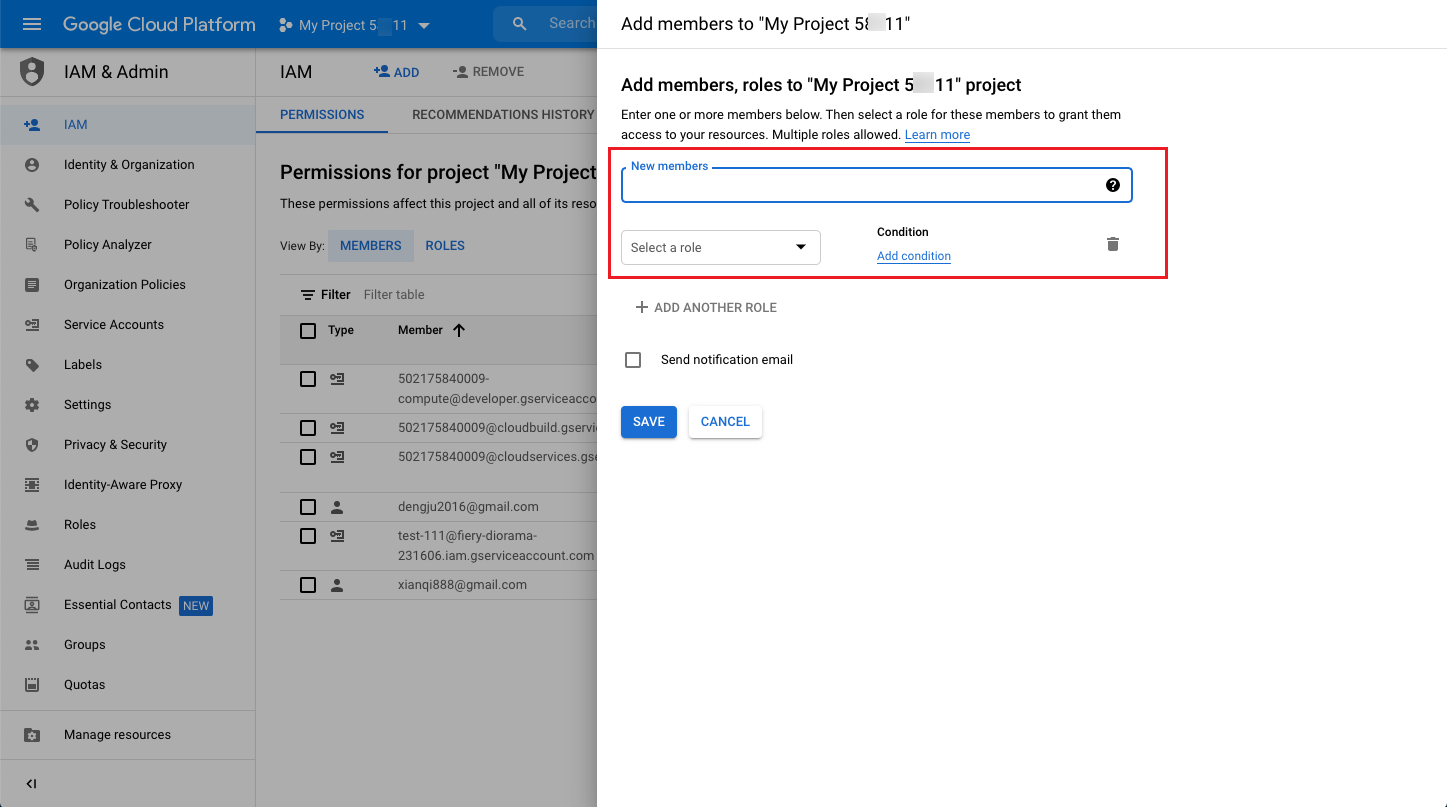
Open the “IAM and Administration in GCP Console - IAM Page” page and select other items to be managed.
-
Click “Add” button at the top, add the service account created in the above steps to the new members, and set the role as Project-Owner or Project-Viewer, Owner represents the administrative rights to the project, Viewer represents the read-only rights to the project, if you need the cloud management platform to Google Cloud account resources for If you need the cloud management platform to manage Google Cloud account resources, please select the Project-Owner role and click the “Save” button.
-
Repeat the above steps to nano manage more projects.
Enable related APIs
Description
The Google Cloud API has a project attribute, so when you need to manage multiple projects on Google Cloud, you need to enable the related APIs in each project separately.
OneCloud to manage Google Cloud you need to enable the API.
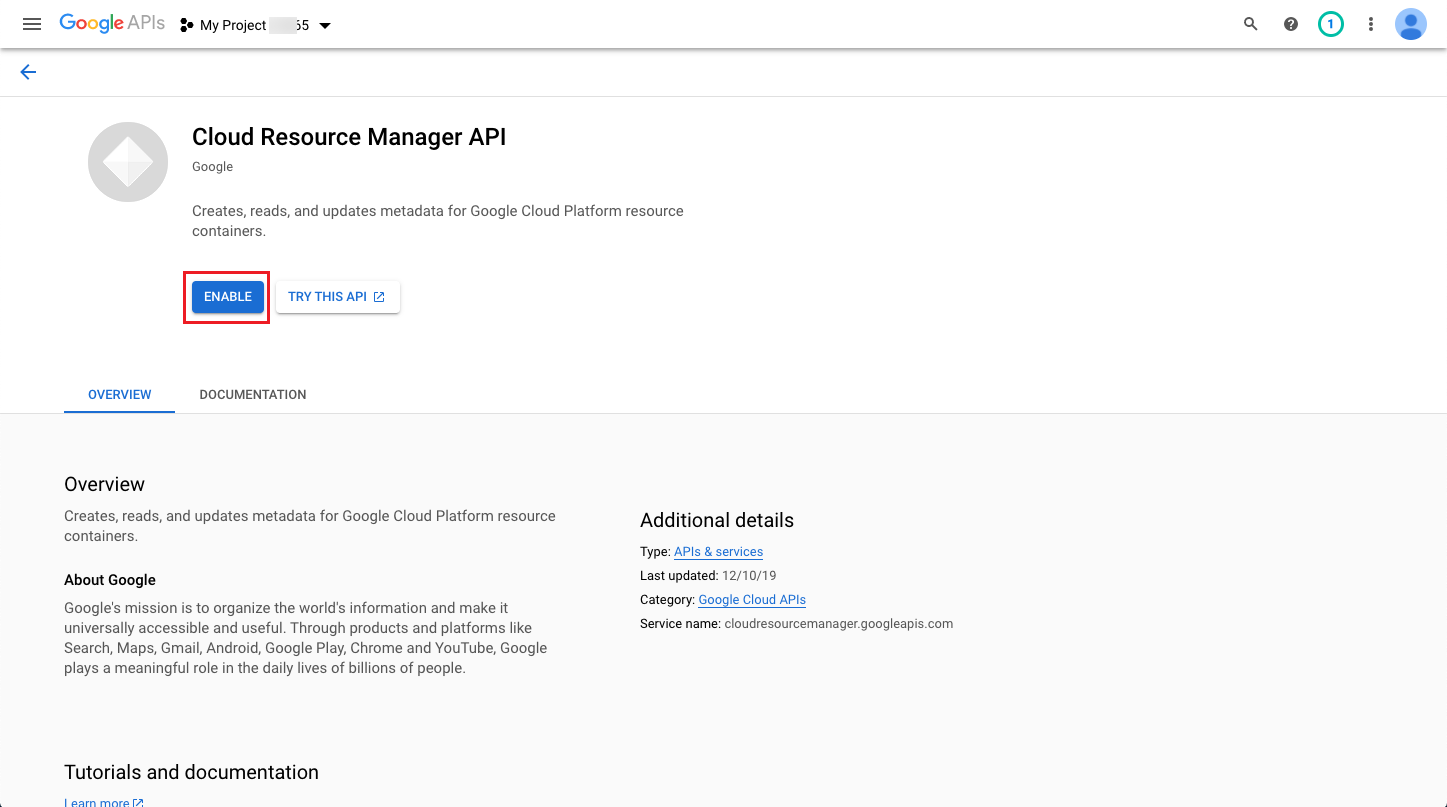
After obtaining the key file, you also need to enable the Project Resource Manager API (Cloud Resource Manager API) and Custom Image Builder API (Cloud Build API) in the Google API repository for licensed projects. After enabling the APIs, users can manage the use of Google Cloud in the OneCloud platform.
-
Enable the Cloud Resource Manager API in the Cloud Resource Manager API page of the API library Cloud Resource Manager API for authorized items. You can switch authorized items from the top.
-
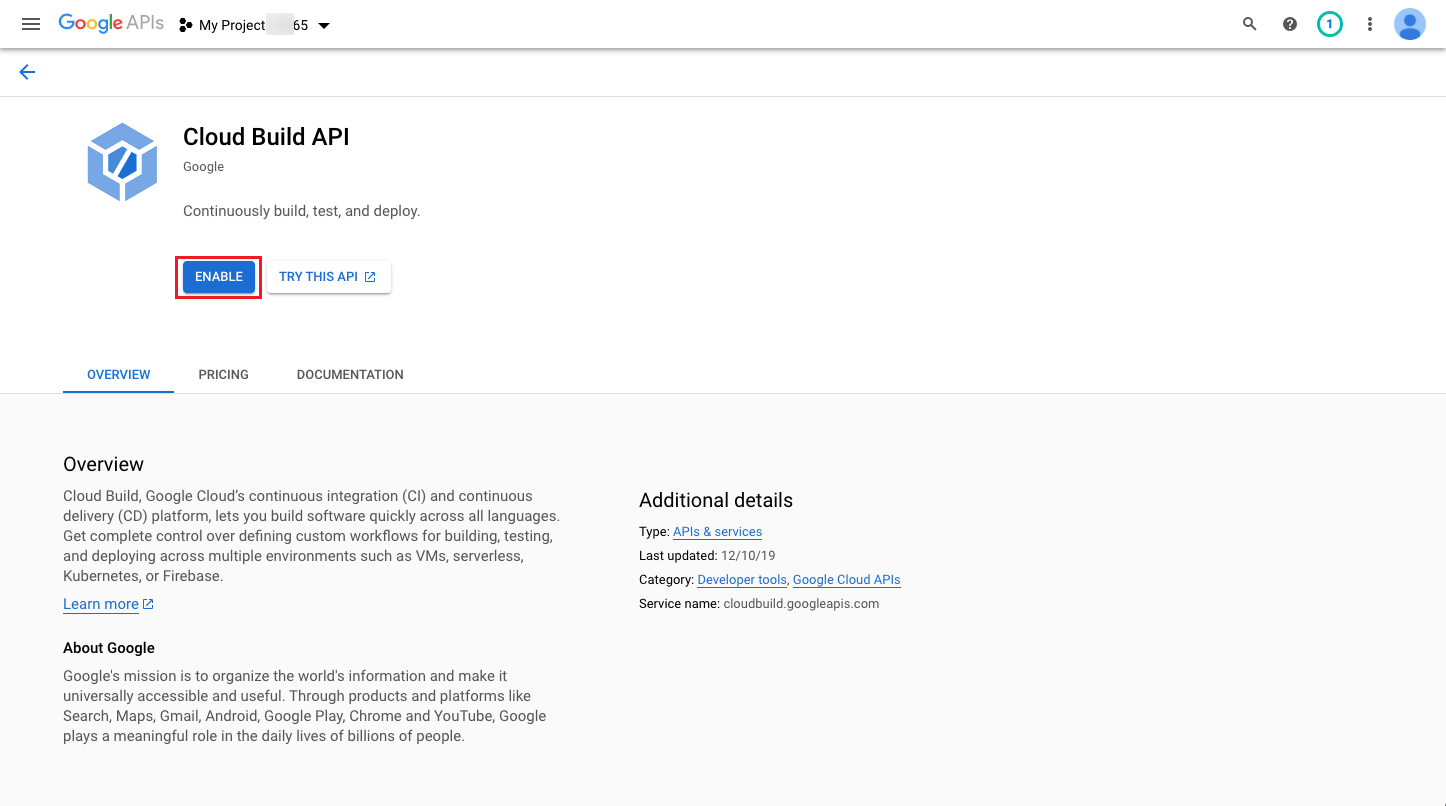
Enable the Cloud Build API for the license item in the Cloud Build API page of the API library. You can toggle the license items from the top.
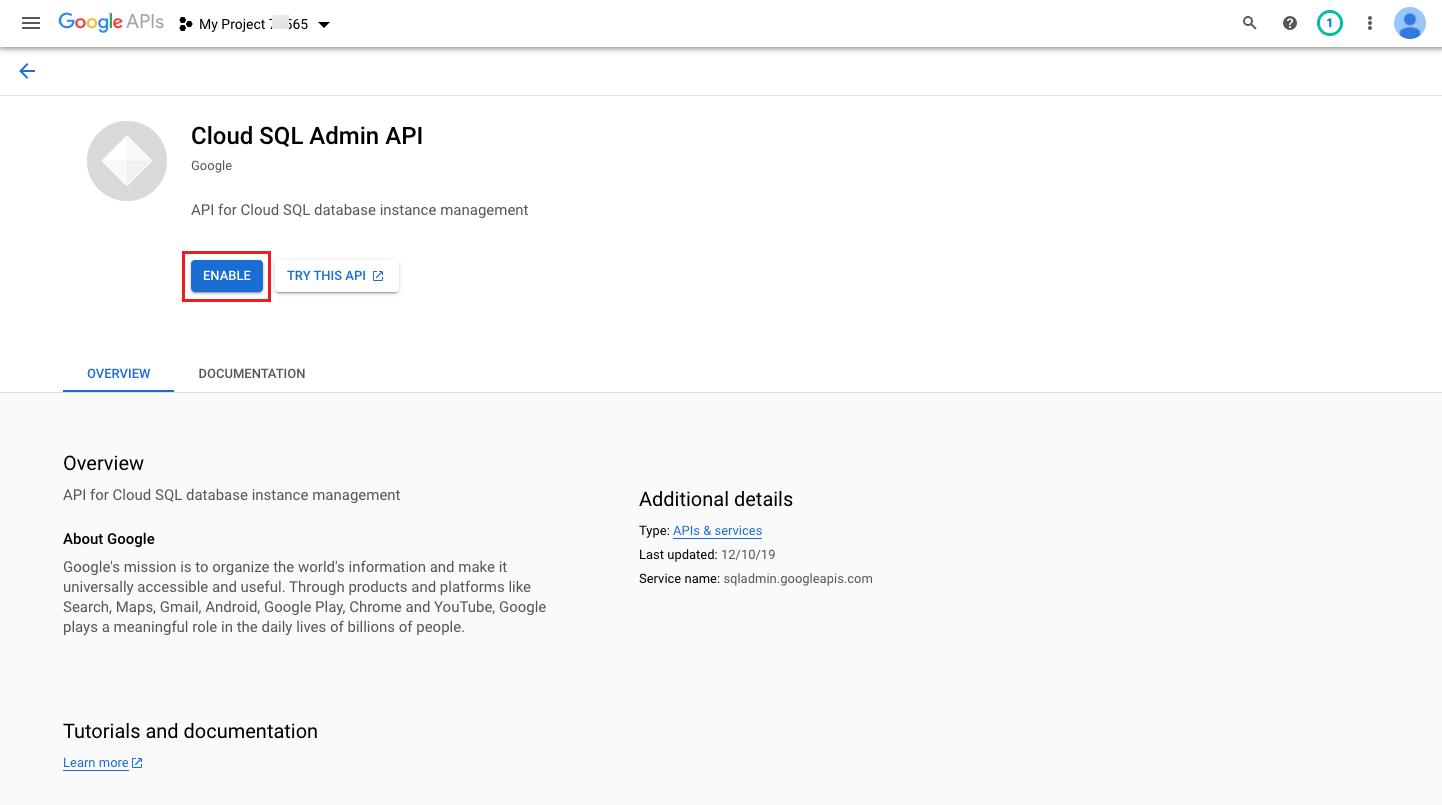
OneCloud is required to manage Google Cloud RDS with API enabled.
- To manage Google Cloud RDS on
OneCloud
, you need to enable the API in the [Cloud SQL Admin API] of the API library (https://console.developers.google.com/apis/library/sqladmin. The Cloud SQL Admin API is enabled in the [Cloud SQL Admin API](. googleapis.com) page of the API library. You can toggle the authorization items from the top.
Google Cloud account permission requirements
| Feature | ead-only permissions | Read-write permissions |
|---|---|---|
| All Features | Viewer | Editor |
| VM Instance, Disks, Security Group, Images, Snapshots, LB Instance | Compute Viewer | Compute Editor |
| Project | - | - |
| VPC, VPC Peering, Routing table, NAT, Elastic NIC,EIP, NAT | Compute Network Viewer | Compute Network Admin |
| OSS | Storage Legacy Bucket Reader Storage Object Viewer |
Storage Admin |
| RDS | Cloud SQL Viewer | Cloud SQL Admin |
| Redis | Redis Enterprise Cloud Viewer | Redis Enterprise Cloud Admin |
| log | Logs Viewer | Logging Admin |
| NAS | Cloud Filestore Viewer | Cloud Filestore Editor |
| WAF | - | - |
| IAM | Role Viewer | Role Administrator |
| DNS | DNS Reader | DNS Administrator |
| Billing | Billing Account Viewer | Billing Account Administrator |
| Monitoring | Monitoring Viewer | Monitoring Admin |
How to configure and get Bigquery configuration information in Google Cloud Platform.
-
Login to Google Cloud Console, click the left menu “Billing” menu item to enter the Billing page.
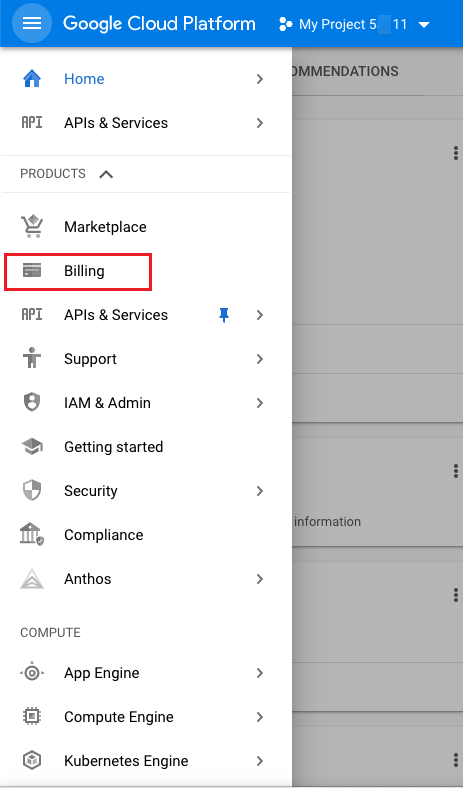
-
Click the [Billing Export] menu item on the left, under the BIGQUERY EXPORT tab, enable detailed usage fees and configure the project and dataset names.

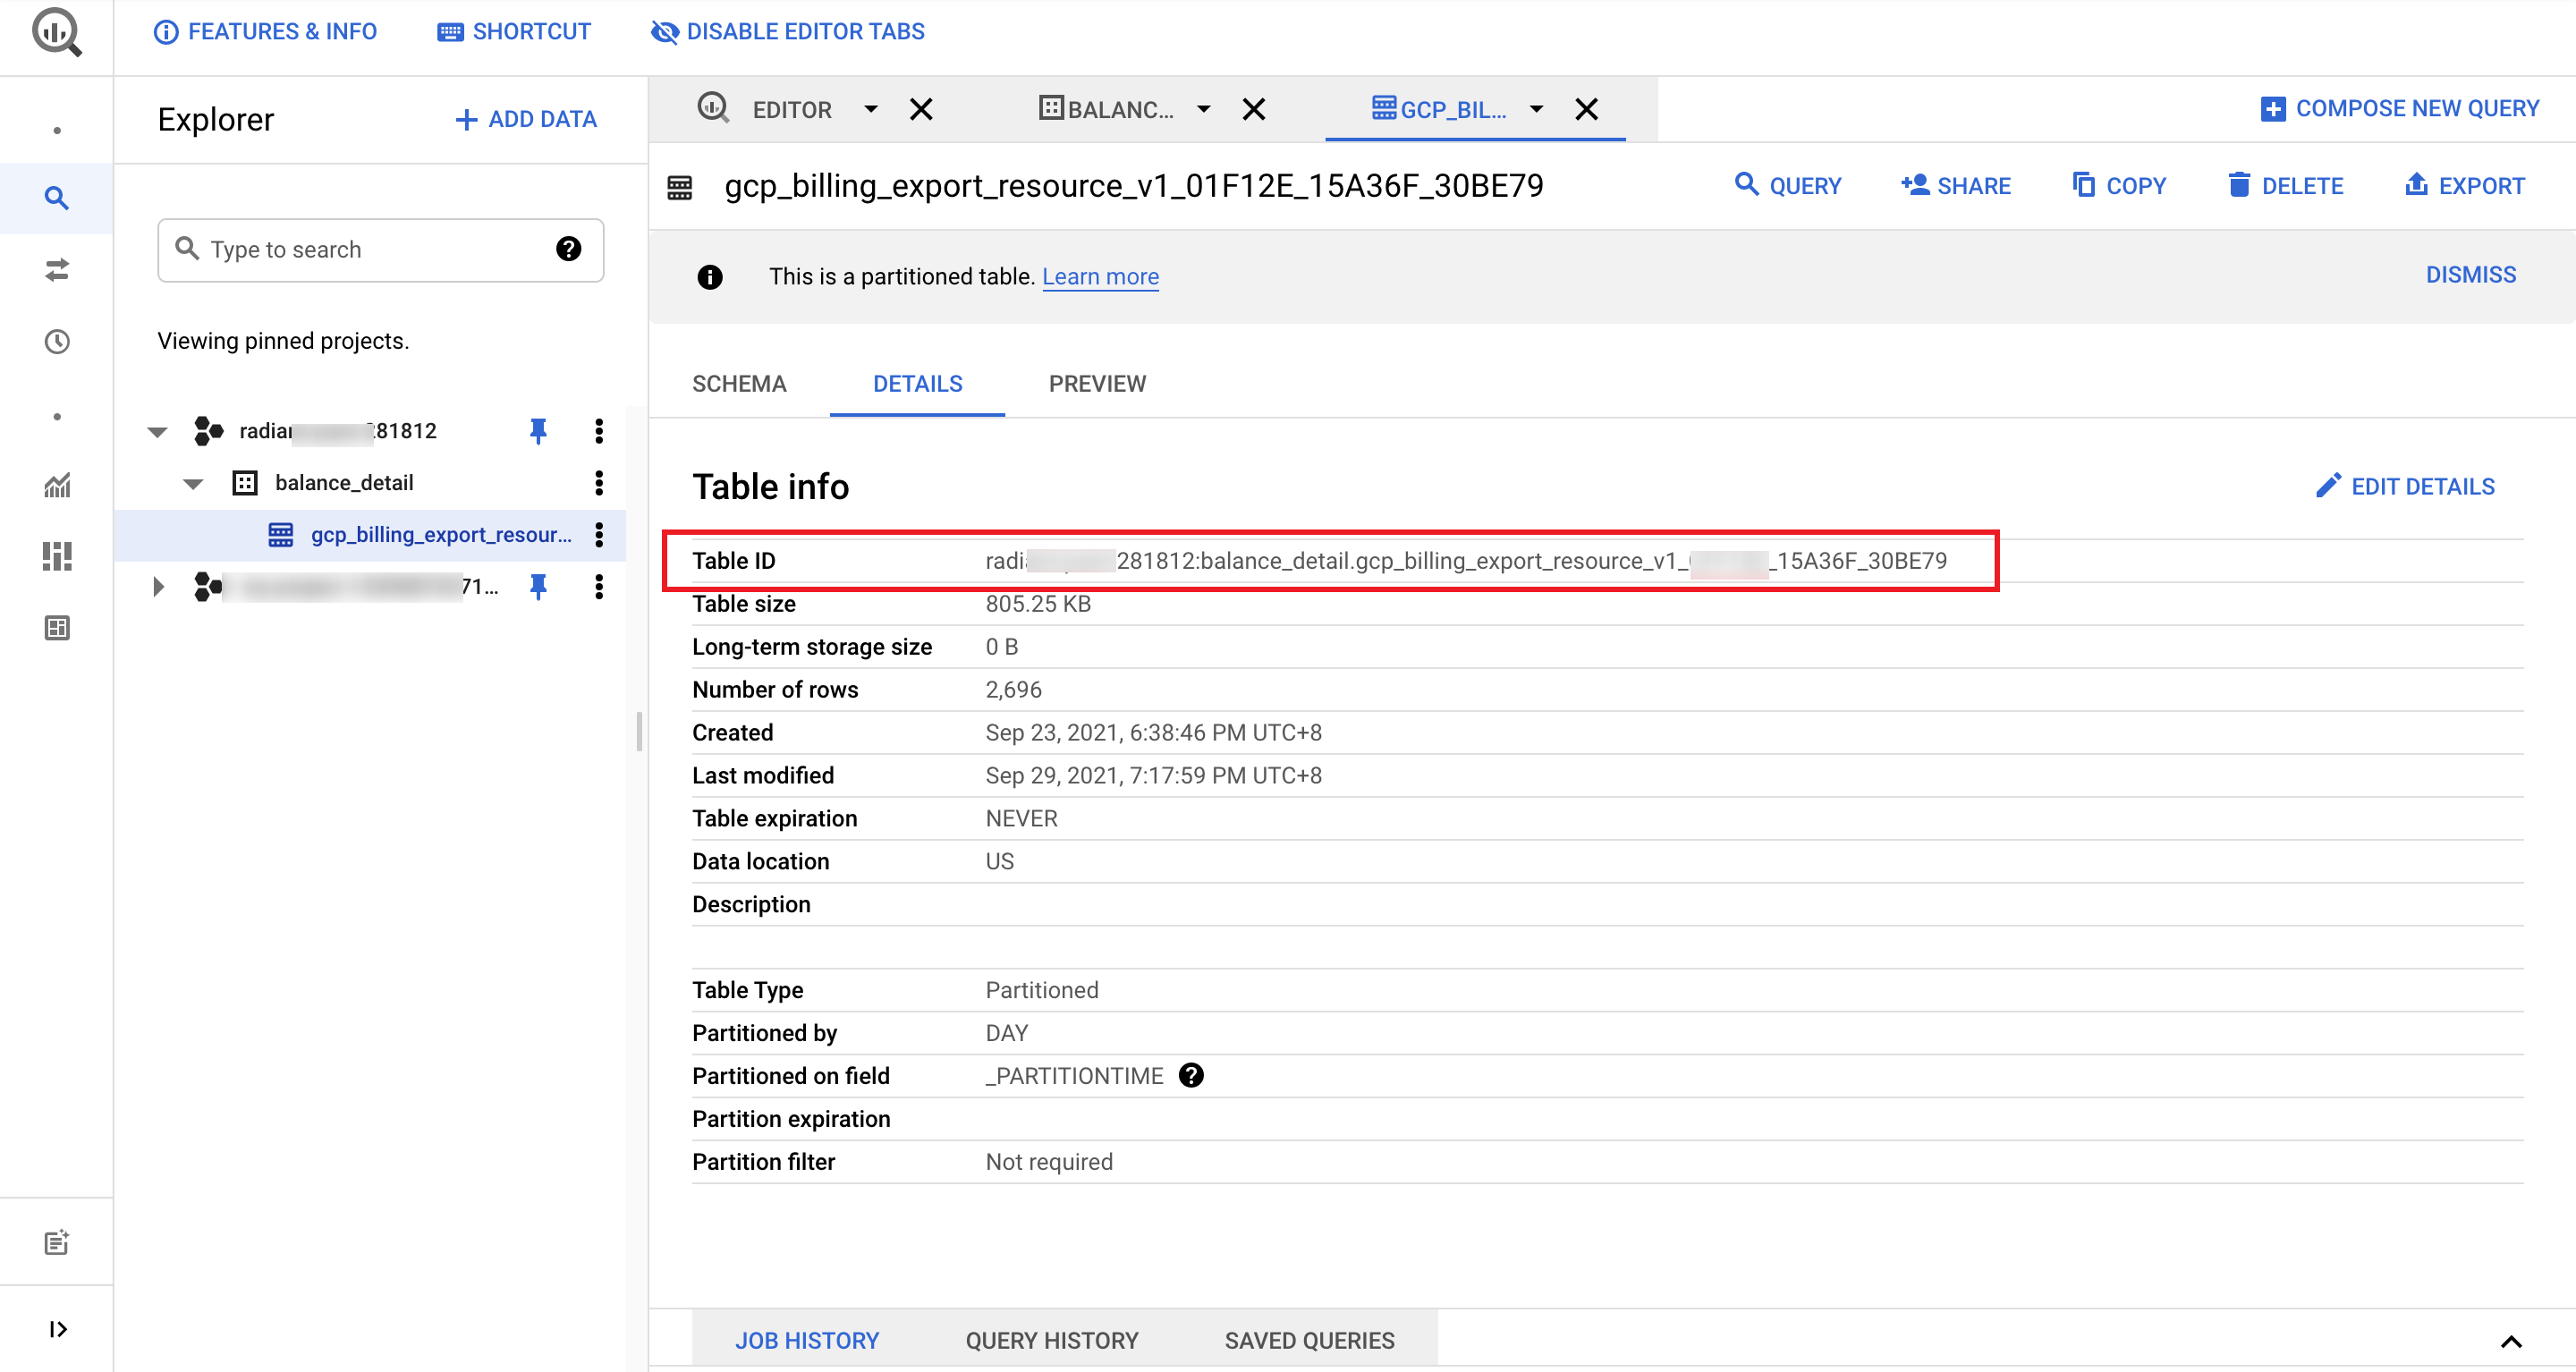
-
Click the dataset name, jump to Bigquery, expand the right node, select the partition table under the dataset name, and click the “Details” tab at the top of the entered page to get the table ID information.
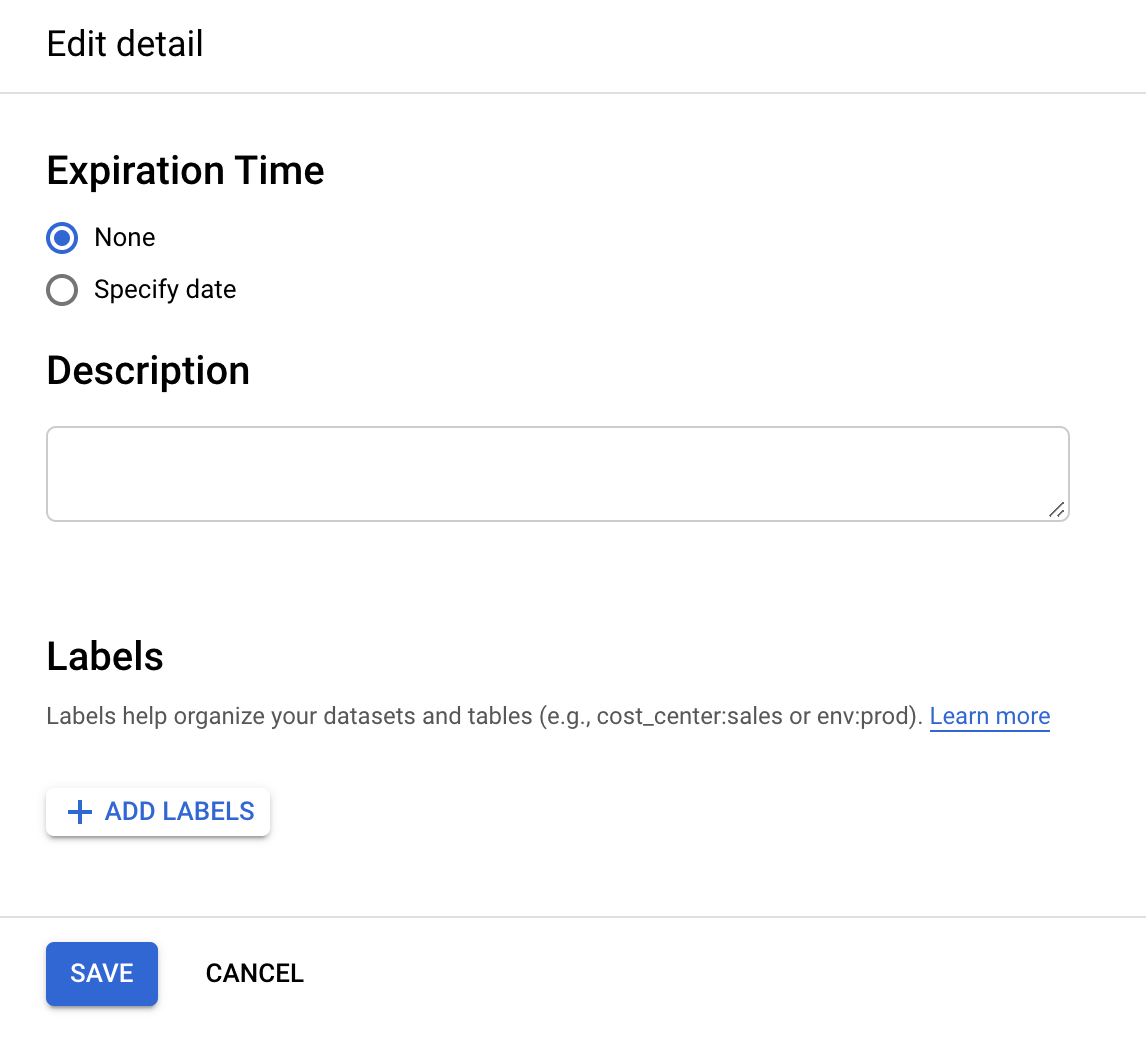
-
In the table details page, click the “Edit Details” button in the upper right corner and set the expiration time to None. if you set the expiration time, the expired time will be cleared from the bigquery, so please set it carefully.
How to get the Expense OSS Bucket URL and the expense file prefix as well as the usage file in Google Cloud?
How to get the Expense OSS Bucket URL and the expense file prefix?
-
Login to Google Cloud Console, click the left menu “Billing” menu item to enter the billing page.
-
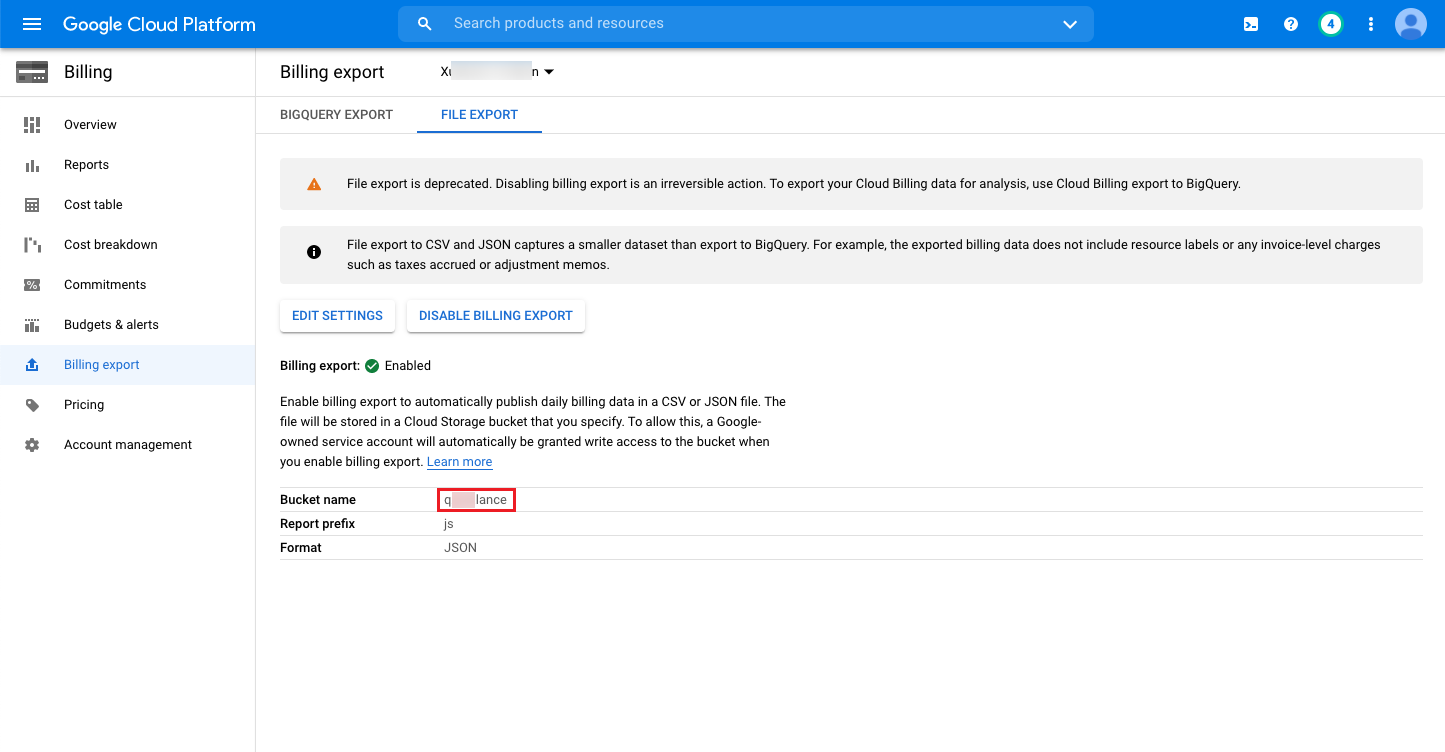
Click “Billing Export” on the left menu, and click the “File Export” tab on the billing page to view and record the storage partition name and report prefix information. The report prefix is the file prefix. If it is not set, you need to configure the storage partition name and report prefix information in this page, after the setting is completed, the daily incremental billing data will be stored to the corresponding storage. It is recommended that only billing files are stored in this bucket.
-
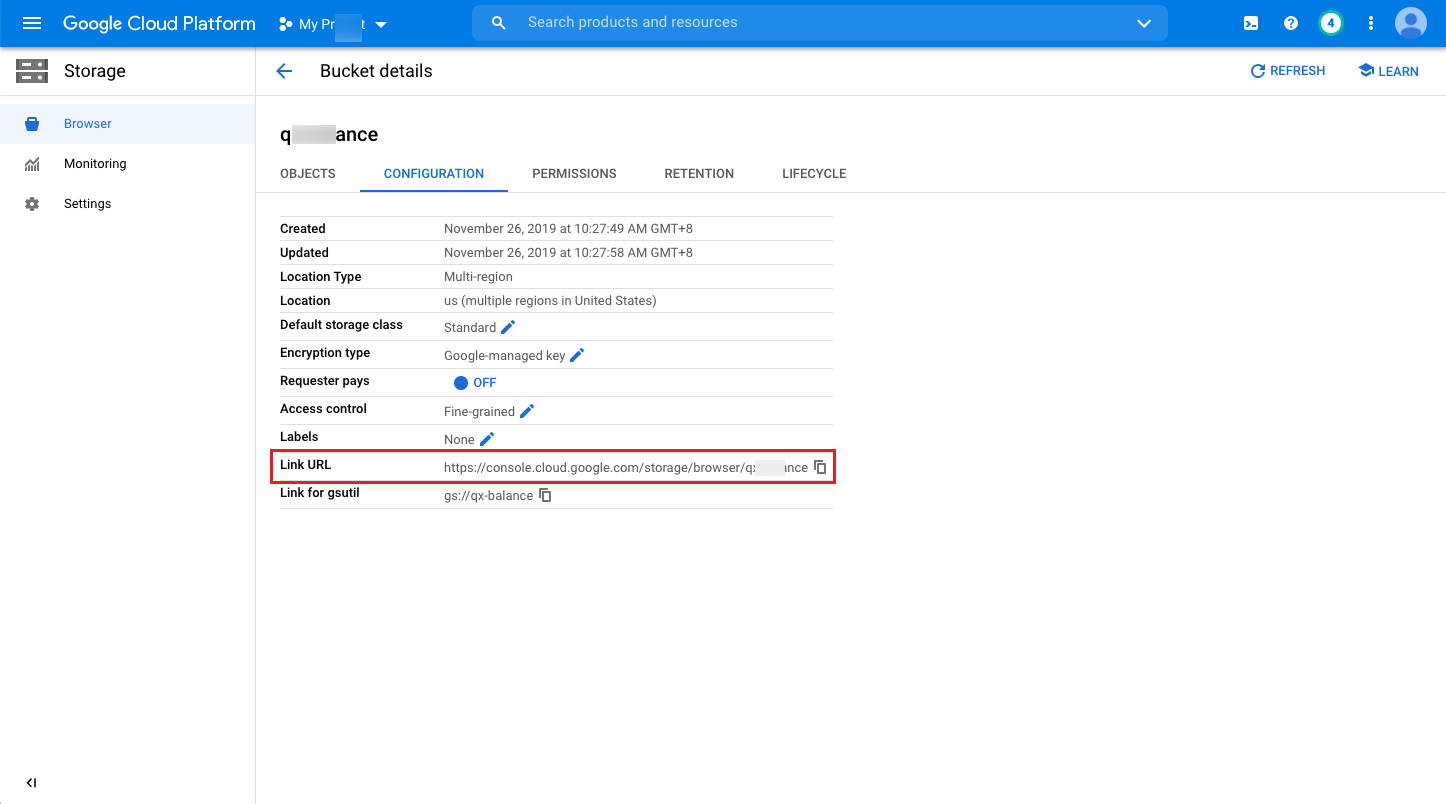
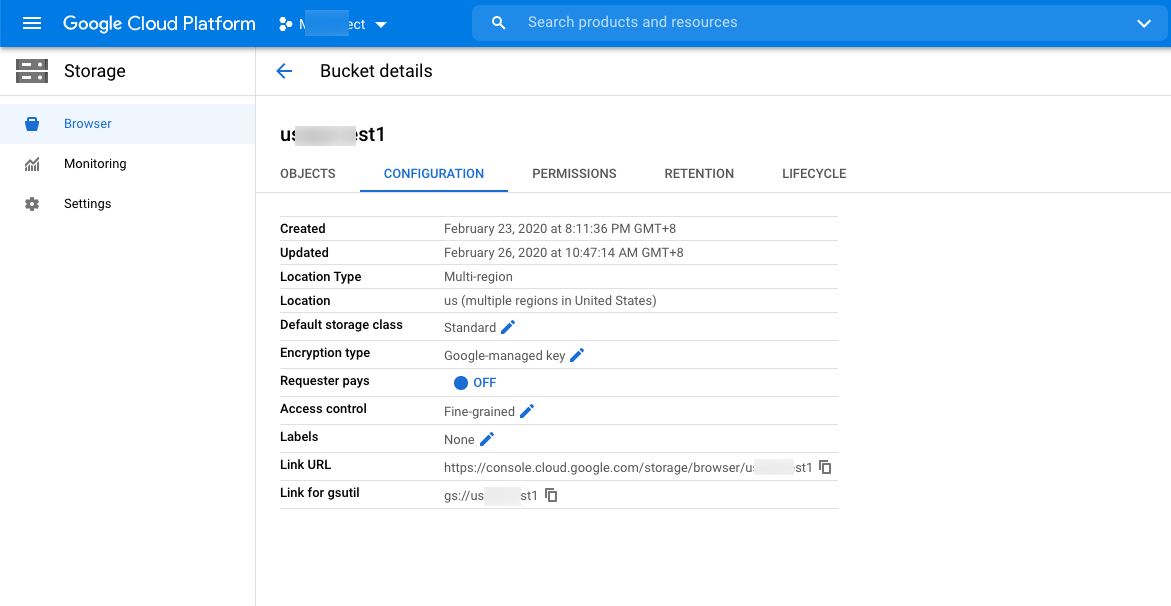
Click “Storage/Browser” on the left menu, click the name of the corresponding storage partition in the storage page, and click the “CONFIGURATION” tab to view the overview information of the storage partition, where the link URL is the oss bucket URL.
-
When other files are stored in the Expense OSS Bucket in addition to the billing files, the configuration file prefix is needed to get only the billing files in the bucket, etc.
How to get the usage file oss bucket URL and file prefix?
-
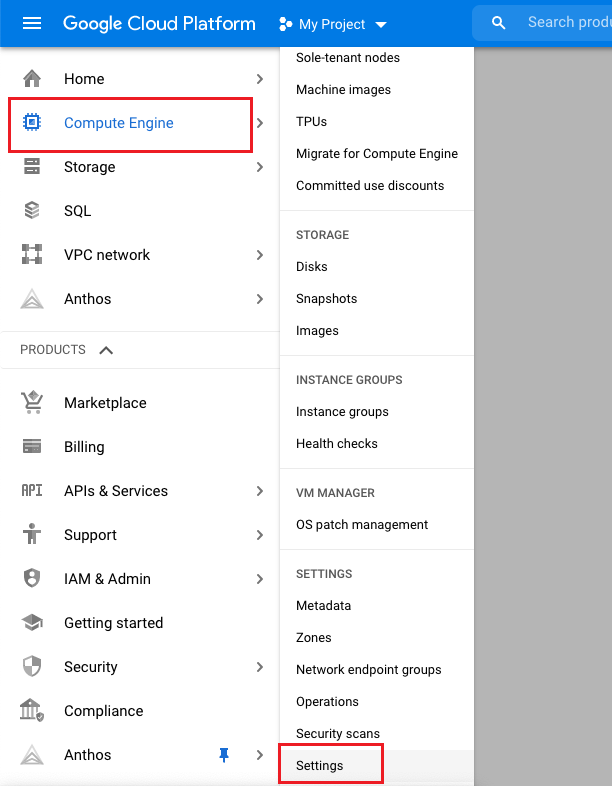
Click “Compute Engine/Settings” on the left menu in Google Cloud Console to enter the settings page.
-
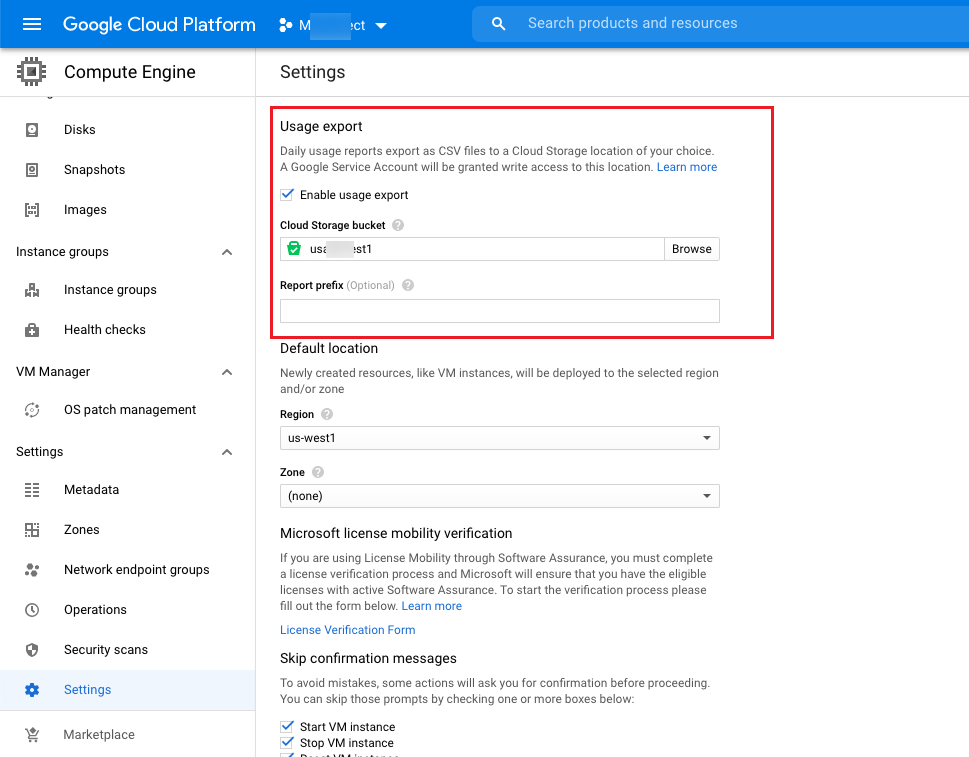
Make sure “Enable Usage Export” is checked and record the storage partition name and report prefix information, where report prefix is the file prefix. If not, you need to check “Enable Usage Export” and configure the storage partition, etc.
-
Click “Storage/Browser” on the left menu, click the name of the corresponding storage partition in the storage page, and click the “CONFIGURATION” tab to view the overview information of the storage partition, where the link URL is the oss bucket URL.
-
When there are other files stored in the usage bucket in addition to the usage files, you need to prefix the configuration file to get only the usage files in the bucket, etc.