Block Storage
Block storage is used to store disk files for system and data disks such as servers and baremetal. Block storage belongs to domain resources.
Block storage can be divided into two main categories.
- Local storage: Local storage on servers such as physical machines and hosts.
- Network storage: Support network attached storage, shared storage, distributed storage, etc.
- NFS: Network File System.
- Ceph: Distributed storage system.
- GPFS: General Parallel File System, shared file system
- Sheepdog: Distributed Storage System
- NAS: Network Attached Storage, Network Attached Storage
- vSAN: Distributed storage for use in vSphere clusters.
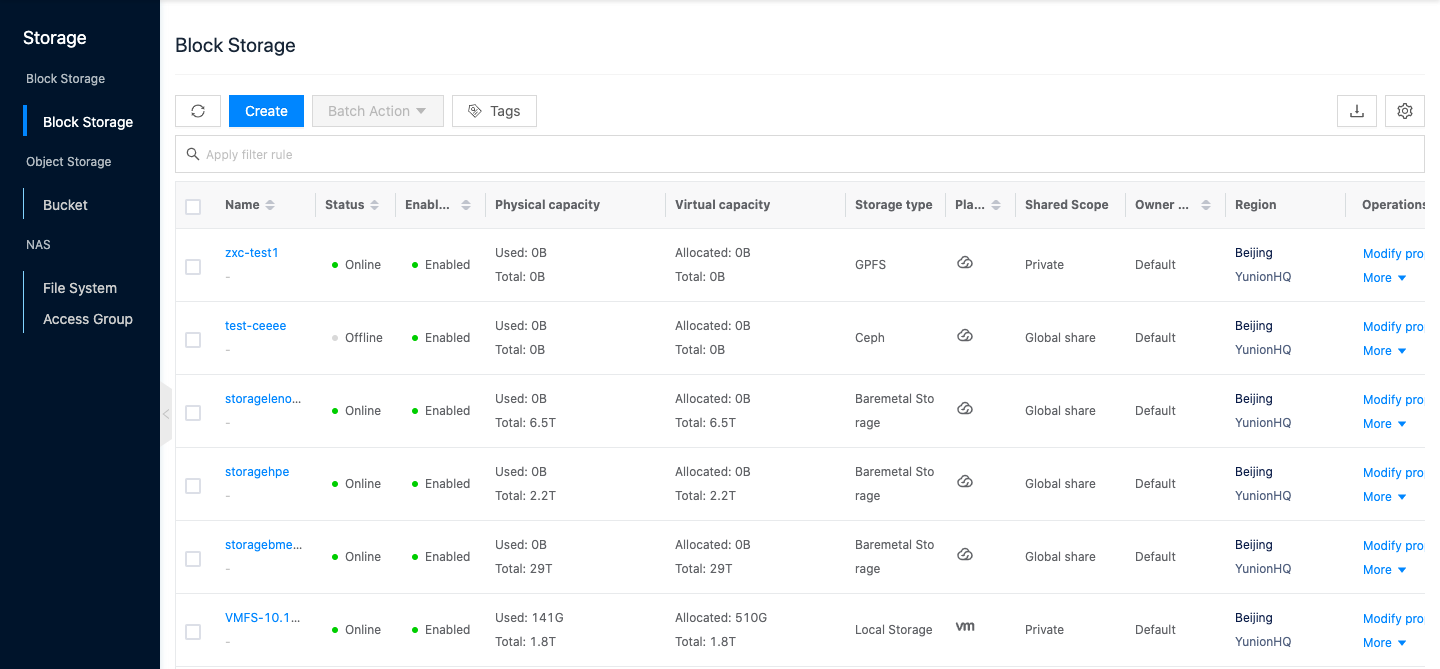
Entry: In the cloud management platform click on the top left corner navigation menu, and click “Storage/Block Storage/Block Storage” menu item in the left menu bar that pops up to enter the Block Storage page.
Create Storage
This function is used to connect Ceph distributed storage, NFS network file system and GPFS shared storage. After the storage is created, it still needs to be attached with the host operation before it can be used by users.
- Click the “Create” button at the top of the list to bring up the Create Storage dialog box.
- Configure the following parameters.
- Specify Domain: Select the domain to which the storage belongs.
- Region: Set the area and zones.
- Name: The name of the storage.
- Media Type: The media type of the storage device, including mechanical disk, solid-state disk and hybrid disk. Performance Solid State Disk>Hybrid Disk>Mechanical Disk.
- Storage type: Including Ceph, NFS, GPFS.
- Ceph type storage requires the existence of a Ceph storage cluster in the local data center.
-
Ceph Mon Host: The IP address of the monitoring node of Ceph storage.
-
Ceph Key: The Ceph storage cluster enables key authentication by default, and the Ceph Key is the user’s key in the format of “AQDsBh5b1CtoHxAA9atFhYn1cPBJvPCpoRVo/g==”. You can get the user key stored in Ceph with the following command.
$ ceph.client.admin.keyring | grep key -
Ceph Pool: The storage pool for the Ceph storage.
-
- When selecting the storage type “NFS”, configure the following parameters: NFS type storage requires local data center storage NFS network storage server.
- NFS Host: The IP address of the NFS server.
- NFS Shared Dir: The shared directory set by the NFS server.
- GPFS type storage requires that shared storage exists in the local datacenter and that the host to which the storage is to be mounted is attached with the storage. Click the “OK” button to complete the operation.
- Ceph type storage requires the existence of a Ceph storage cluster in the local data center.
Enable
This feature is used to enable block storage in the “disabled” state, where storage services are not available.
Enable
- On the Block Storage page, click the “Enable” button in the action bar to the right of the block storage in the “Disabled” state to bring up the action confirmation dialog.
- Click the “OK” button to enable storage.
Batch Enable
- Check one or more “disabled” stores in the list of stores, and click the “Enable” button at the top of the list to bring up the Action Confirmation dialog box.
- Click the “OK” button to enable the storage.
Disable
This function is used to disable block storage in the “enabled” state.
Disable
- On the Block Storage page, click the “Disable” button in the action bar to the right of the enabled block storage to disable the storage.
Batch Disable
- Check one or more “Enabled” state stores in the list of stores, and click the “Disable” button above the list to disable the stores.
Management Host
This function is used to associate or dissociate hosts with Ceph, GPFS, and NFS type storage.
Attached Hosts
This function is used to associate Ceph, GPFS, NFS type storage to the host for use by the host.
Description
- When Ceph storage is attached with a host, no mount point is required, and multiple hosts are attached in batch.
- When associating hosts with NFS storage, multiple hosts can be attached in batch if they have the same mount points, and no mount points can exist on the hosts.
- When GPFS storage is attached with a host, GPFS storage is already attached with the actual host, and the association operation on the platform is only for the purpose of creating servers that can use GPFS storage, and does not affect the actual mounting operation. The mount point of the GPFS storage attached with the host must be the same as the actual mount point, which needs to be provided by the Ops staff of the user environment.
- On the Block Storage page, click the “More” button in the action bar to the right of the specified block storage, and select the “Management Host” menu item to enter the Details - Hosts page.
- Click the “Attached Host” button at the top of the list to bring up the Attached Host dialog box.
- Select the host and the mount point on the host, and click the “OK” button to associate the storage for the host.
Detached Host
This function is used to detach block storage to a host.
- On the Block Storage page, click the “More” button on the right action bar of the specified block storage, and select the drop-down menu “Management Host” menu item to enter the Details - Hosts page.
- Click the “Detached Host” button in the Action column on the right side of the host to bring up the action confirmation dialog box.
- Click the “OK” button to complete the operation.
Batch detached hosts
- On the Block Storage page, click the “More” button in the action column on the right of the specified block storage, and select the drop-down menu “Manage Hosts” menu item to enter the Details-Hosts page.
- Select one or more hosts in the list, and click the “Detached Host” button at the top of the list to bring up the operation confirmation dialog box.
- Click the “OK” button to complete the operation.
Adjust Oversell Ratio
This function is used to set the oversell ratio of the storage. Overselling means that the storage provides more than the size of the capacity it owns. The actual resources available for the storage are the actual resources * oversell ratio.
Description
Storage on the ZStack platform does not support adjusting the oversell ratio at this time.
To adjust the oversell ratio for single-block storage
- On the block storage page, click the “More” button on the right action bar of the block storage, and select the “Adjust Oversell Ratio” menu item to bring up the Modify Properties dialog box.
- Set the oversell ratio and click the “OK” button.
Batch Adjust Oversell Ratio
- Check one or more block stores in the list, click the**_“Batch Action”_** button at the top of the list, and select the drop-down menu **_“Adjust Oversell Ratio”_** menu item to bring up the Modify Properties dialog box.
- Set the CPU oversell ratio and memory oversell ratio respectively, and click the “OK” button.
Adjust Capacity
Only OpenStack platform supports this. Since the cloud management platform does not get the real capacity of storage on OpenStack platform, the cloud management platform supports setting the OpenStack storage capacity. Please try to set the storage capacity to the real capacity of the storage to use the storage as much as possible and avoid the disk creation failure due to the set capacity exceeding the real capacity of the storage.
- On the Block Storage page, click the “More” button on the right action bar of the specified block storage on OpenStack Platform, and select the drop-down menu “Adjust Capacity” menu item to bring up the Adjust Capacity dialog box.
- Set the capacity size and click the “OK” button.
Modify Properties
This function is used to adjust the parameter information of block storage and the oversell ratio. The oversell ratio is the ratio of the virtual capacity to the actual capacity.
- On the Block Storage page, click the “More” button in the operation column on the right side of the specified block storage, and select the drop-down menu “Modify Properties” menu item to bring up the Modify Properties dialog box.
- The following parameters are supported to be modified.
- When Ceph type storage is selected, modifying Ceph Key (Ceph user’s key), media type is supported.
- When NFS type storage is selected, modifying NFS Host (IP address of NFS server), NFS Shared Dir (shared directory of NFS), and media type are supported.
- When other types of storage are selected, only modifying the media type is supported.
- Click the “OK” button.
Adjust Scheduler Tag
This function is used to bind the scheduler tag for block storage. The block storage with the scheduler tag bound will provide storage for servers according to the scheduler tag.
On the Block Storage page, click the “More” button on the right action bar of the specified block storage, and select the “Adjust Scheduler Tag” menu item to bring up the Adjust Scheduler Tag dialog box. 2. Select the scheduler tag and click the “OK” button.
Change Domain
This function is used to change the domain to which the block is stored.
Description
Conditions for changing the domain: both are required
- The current user is in the system backend.
- Three-level Resource Hierarchy are enabled in OneCloud .
- The shared scope of the storage is private.
- The storage type is not local storage.
block storage change field.
- On the Block Storage page, click the “More” button in the action bar on the right side of the block storage, and select the drop-down menu “Change Domain” menu item to bring up the Change Domain dialog box.
- Select the domain to which the block storage belongs to and click “OK” button.
Change Domains in Batch
- Check one or more block stores in the Block Store page, click the “Batch Action” button at the top of the list, and select the drop-down menu “Change Domain” menu item to bring up the Change Domain dialog box.
- Select the domain to which the block store belongs to, and click “OK” button.
Set up sharing
This function is used to set the sharing scope of the block store.
There are three types of sharing ranges for domain resources.
- No sharing (private): I.e. domain resources can be used only by users of this domain.
- Domain sharing-part (Multiple Domains sharing): I.e. domain resources can be shared to the specified domain (one or more), and only the users under the domain where the domain resources are located and shared can use the domain resources.
- Domain Share-All (Global share): I.e. domain resources can be shared to all domains, i.e. all users in the system can use the domain resources.
Description
Conditions for setting up sharing: need to satisfy both
- The current user is in the system backend.
- Three-level Resource Hierarchy have been enabled in OneCloud
Note
The shared scope of the local storage should always be consistent with the shared scope of the host.
block storage setup share
- On the Block Storage page, click the “More” button on the right action bar of the block storage, and select the drop-down menu “Set up sharing” menu item to bring up the Set up sharing dialog box.
- Configure the following parameters.
- When the sharing range is selected as “No Sharing”, the sharing range of domain resources is private and only users of this domain can use it.
- When Shared Range is selected as “Domain Shared”, you need to select the domain to be shared.
- When the domain is selected as one or more domains, the shared scope of the domain resource is Domain Shared-Partial, and only users in the domain where the domain resource is located and under the shared domain can use the domain resource.
- When the domain selects All, i.e. the sharing scope of the domain resource is Domain Share-All, all users in the system can use the domain resource.
- Click the “OK” button to complete the operation.
Batch set up sharing.
- Select one or more block stores in the Block Store page, click the**_“Batch Action”_** button at the top of the list, and select the drop-down menu **_“Set up sharing”_** menu item to bring up the Set up sharing dialog box.
- Configure the following parameters.
- When the sharing range is selected as “No Sharing”, the sharing range of domain resources is private and only users of this domain can use it.
- When Shared Range is selected as “Domain Shared”, you need to select the domain to be shared.
- When the domain is selected as one or more domains, the shared scope of the domain resource is Domain Shared-Partial, and only users in the domain where the domain resource is located and under the shared domain can use the domain resource.
- When the domain selects All, i.e. the sharing scope of the domain resource is Domain Share-All, all users in the system can use the domain resource.
- Click the “OK” button to complete the operation.
Delete
This function is used to delete a block store. It can be deleted when the block storage is not attached with a host and there are no disk files and cache files under the storage.
Description
- Deletion is not supported for local storage.
- If the block storage is not attached with a host, and there are no disk files and cache files under the storage, but the storage still cannot be deleted, the disk files may not be completely deleted and stored in the trash, please clear the disk in the trash.
- On the Block Storage page, select the deletion method according to the number of block stores to be deleted.
- To delete a single block store: Click the More button in the action column to the right of the specified block store, select the drop-down menu “Delete” menu item, and click the “OK” button in the pop-up action confirmation dialog box.
- Delete multiple block stores: check one or more stores in the store list, click the Delete button at the top of the list, and click the “OK” button in the pop-up operation confirmation dialog.
View Block Storage Details
This function is used to view block storage details.
- On the Block Storage page, click the specified block storage name item to enter the Block Storage Details page.
- The menu item at the top of the details page supports enabling, disabling, associating hosts, adjusting capacity, modifying attributes, adjusting tags, and deleting operations for the block storage.
- View the following information.
- Basic Information: View the Cloud ID, ID, name, status, domain, project, share range, platform, enable status, storage type, media type, region, available area, cloud account, created at, updated at, and notes of the block storage.
- Usage statistics: View the physical capacity (allocated/total), oversell ratio, virtual capacity (virtual capacity = actual capacity * oversell ratio), allocation ratio, allocated, reserved, and wasted capacity of the block storage.
View block storage mounted host information
This function is used to view information about the hosts managed by the block storage, and supports attached hosts and unattached hosts operations.
Description
- Dissociated hosts are not supported for local storage.
- On the block storage details page, click the “Hosts” tab to enter the hosts page.
- View the host name, enable, status, IP, service, #VM (number of Servers), CPU (number and utilization), memory (number and utilization), storage, and SN (serial number) information.
- Select the detach host method according to the number of hosts that need to be unattached with block storage.
- To detach individual hosts: Click the detach_hosts button in the operation column to the right of the specified hosts, and click the “OK” button in the pop-up operation confirmation dialog box.
- Batch detach hosts: Select one or more hosts in the list of hosts, click the detach_hosts button at the top of the list, and click the “OK” button in the pop-up operation confirmation dialog box.
- In addition to the unassociation operation, the baremetal server management operation is supported, please see Hosts.
View disk information
This function is used to view the disk information of the server created with block storage, and supports deleting the disk.
- On the Block Storage details page, click the Hard Disk tab to enter the Hard Disk page.
- View the disk information, including name, capacity, format, disk type, server, mounted or unmounted, status information, etc.
- Support managing disk operations, please see Disk for details..
View trash information
This function is used to view the information of the server disk created with block storage that is currently in the trash. It also supports clear and restore operations.
- On the Block Storage details page, click the Trash tab to enter the Trash page.
- View the information of the disk currently in the Trash, including name, type, server, status, etc.
- Support clearing and restoring disks in the Trash, please see Trash-Disk .
View Image Cache
The image cache, that is, the image cache information used by the servers created on the storage, can be released when the server attached with the image is deleted to clean up the storage space.
- On the Block Storage details page, click the Image Cache tab to enter the Image Cache page.
- View the image cache information, including name, file size, status, path, reference (the number of servers using the image cache), etc.
- Release the cache: Click the Release_Cache button in the specified operation column of the image cache, and click the “OK” button in the pop-up operation confirmation dialog box.
View Operation Log
This function is used to view the log information of block storage-related operations
- On the Block Storage details page, click the Operation Log tab to enter the Operation Log page.
- Load More Logs: In the Operation Logs page, the list shows 20 operation logs by default. To view more operation logs, please click the “Load More” button to get more logs.
- View Log Details: Click the “View” button on the right column of the operation log to view the log details. Copy details are supported.
- View logs of specified time period: If you want to view the operation logs of a certain time period, set the specific date in the start date and end date at the top right of the list to query the log information of the specified time period.
- Export logs: Currently, only the logs displayed on this page are supported to be exported. Click the upper-right corner of
 icon, set the export data column in the pop-up Export Data dialog box, and click the “OK” button to export the logs.