Disks
Disks is a storage file for a server. Disks can be classified into local disks and cloud disks based on their location, where the local disk is required to be in the same host as the server. Local disks do not support new, mount and unmount in the disklist. The cloud disk is required to be in the same zone as the server, and the cloud disk supports new, mount, unmount, expand, and delete operations.
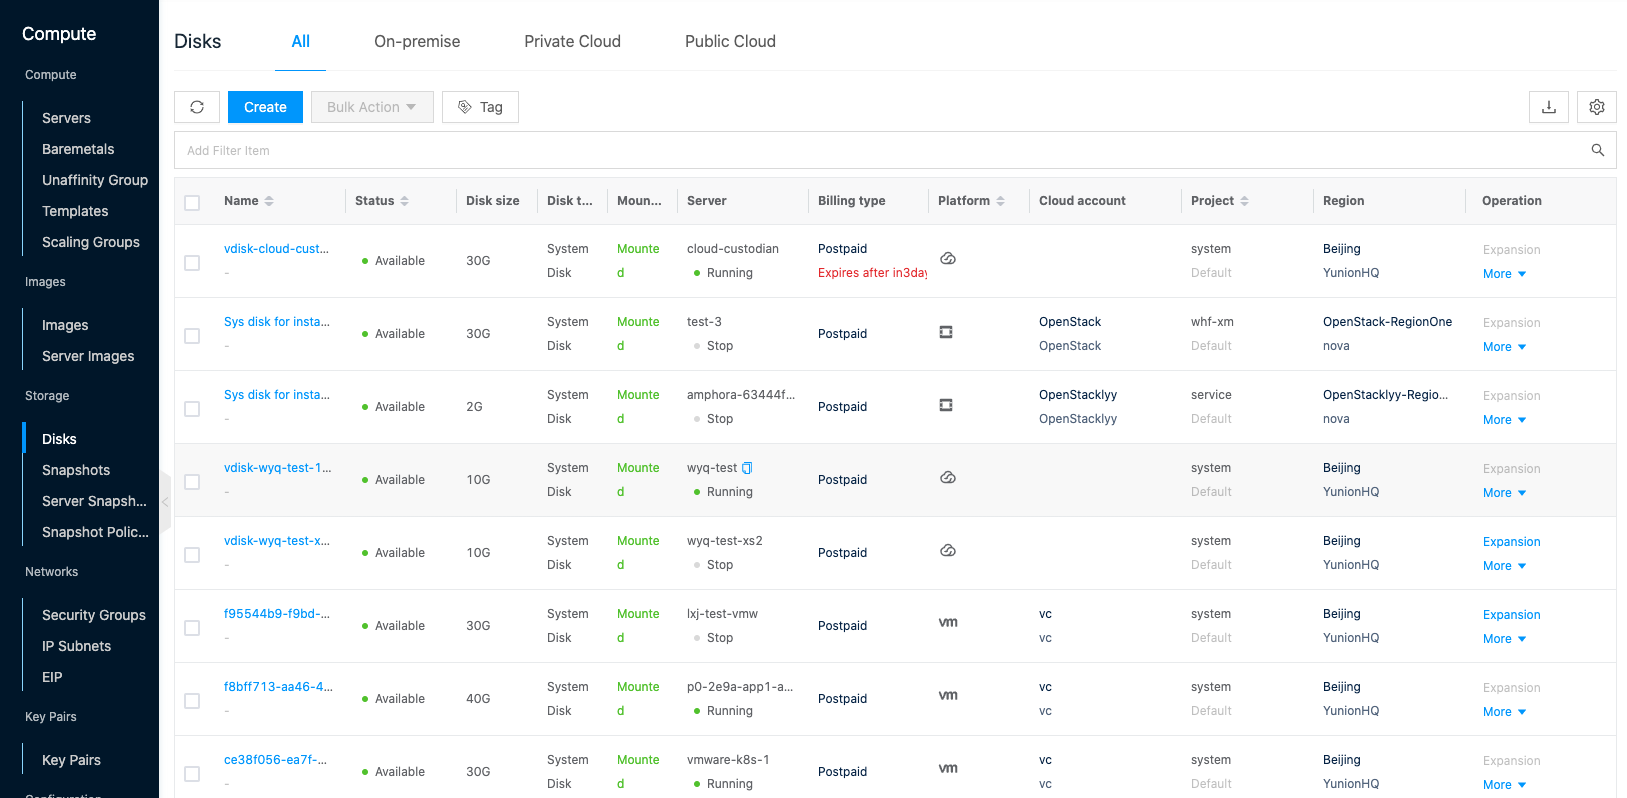
Entry: In the cloud management platform click on the top left corner navigation menu, and click “Compute/Storage/Disk” menu item in the left menu bar that pops up to enter the disk page.
Create disk
This function is used to create a disk. The newly created disk needs to be mounted on the server to be used properly.
Description
On the Create Diskpage, you can click the “On-premise”, “Private Cloud”, and “Public Cloud” tabs at the top to switch between creating disks on different platforms.
Create On-premise disks
Please configure Ceph, NFS, GPFS, and other shared storage before creating a new disk in your On-premise.
- On the disks page, click the “All” or “On-premise” tab at the top, and click the “Create” button at the top of the list to enter the Create disks page.
- Configure the following parameters.
- Specify Project: Specify the project to which the diskbelongs when creating a new disk.
- Region: Select the region and zones.
- Name: Set the name of the disk.
- Disks: Select the disk type and set the capacity size of the disk.
- Click the “OK” button to complete the operation.
Create private cloud platform disks
Before creating a new private cloud platform disk, please make sure you have a cloud account for the corresponding platform.
- On the disks page, click the “Private Cloud” tab at the top, and click the “Create” button at the top of the list to bring up the Create disks dialog.
- Configure the following parameters.
- Specify Project: Specify the project to which the diskbelongs when creating a new disk.
- Region: Select the region and zone. You can use the region to determine the platform to which the private cloud belongs and the private cloud cloud account to use for creating the disk.
- Name: Set the name of the disk.
- Disks: Select the disk type and set the capacity size of the disk.
- Click the “OK” button to complete the operation.
Create public cloud platform disk
Before creating a new public cloud platform disk, please make sure you have a cloud account for the corresponding platform.
- On the disks page, click the “Public Cloud” tab at the top, click the “Create” button at the top of the list to bring up the Create disks dialog.
- Configure the following parameters.
- Specify Project: Specify the project to which the diskbelongs when creating a new disk.
- Region: You can determine the platform and zone to which the diskbelongs by locale, platform, region, and zone.
- Name: Set the name of the disk.
- Disks: Select the disk type and set the capacity size of the disk.
- Specify cloud subscription: Specify the cloud subscription for creating the disk.
- Click the “OK” button to complete the operation.
Note
When creating a disk in Tencent Cloud Platform, the disk capacity size must be a multiple of 10. Otherwise, the creation will fail.
Disks expansion
This function is used to expand the size of the system or data disk to meet the data growth requirements. The following table lists the conditions for disk expansion for different platforms. Disks expansion does not support reducing the capacity of a disk.
- On the disks page, click the “Expand Capacity” button in the right-hand column of the disks to bring up the Expand Capacity dialog box.
- Adjust the disk capacity and click the “OK” button.
| Platform | Capacity Expansion Limit |
|---|---|
| OneCloud | No requirement |
| VMware | System disks are only supported for shutdown expansion, data disks are not required, If the drive already has a server snapshot, expansion is not allowed |
| ZStack | The server mounted on the disk is running or shutdown; |
| OpenStack | Only data disks are supported; |
| Alibaba Cloud | Only data disks are supported; disk-mounted servers are running or shutdown |
| AWS | No requirement |
| Azure | Virtual machines mounted on disks are not in a running state |
| Tencent Cloud | Only supports data disk expansion |
| Huawei Cloud | Virtual machines mounted on disks are running or shut down |
| UCloud | The server mounted on the disk is in shutdown state |
Mounted
This function is used to mount a disk in the pending mount state to a server for use by the server.
- On the disks page, click the “More” button on the right column of the disks and select the drop-down menu “Mount” menu item to bring up the Mount dialog box.
- After selecting the server, click “OK” button.
- After the disk is successfully mounted, you need to log in to the server to format the partition and mount the new partition.
Unmount
This function is to disassociate the data disk mounted to the server from the server, and the unmounted disk can be mounted to other servers. Only unmounted data disks are supported. If the server is a Linux system, please wait for the umount command to execute successfully before unmounting the disk in the server.
- On the disk page, click the “More” button on the right action bar of the disk, select the drop-down menu “Uninstall” menu item to bring up the uninstall confirmation dialog. Click the “OK” button to complete the operation.
Create Create Snapshot
This function is used to back up data for a disk, and a disk created with a snapshot can be restored to its pre-snapshot state when it fails.
Note
- VMware platform and UCloud platform disks do not support snapshot creation.
- Snapshot creation is not supported when the state of the server to which the diskbelongs is abnormal or the diskis not mounted to a server
- On the disks page, click the “More” button on the right-hand column of the disks, and select the “Create Snapshot” menu item to bring up the Create Snapshot dialog box.
- Set the snapshot name and click the “OK” button to create a snapshot.
Set Auto Snapshot
This function is used to set Snapshot Policies for the disk. After setting, the diskwill periodically create an automatic snapshot at the time point specified in the Snapshot Policies.
- On the disks page, click the “More” button on the right action bar of the disks and select the drop-down menu “Set Auto Snapshot” menu item to bring up the Set Auto Snapshot dialog box.
- To turn on automatic snapshot. If there is no Snapshot Policies that meets your needs, click the “Create Custom Snapshot Policy” hyperlink on the right, configure the relevant parameters in the new policy pop-up, and click the “OK” button to create Snapshot Policies. Click the “OK” button when the Snapshot Policies is selected.
- Close the automatic snapshot: Check the box to close the automatic snapshot and click the “OK” button.
Modify driver
This function is used to modify the disk drive, and it needs to restart the virtual machine to take effect after modification.
- On the disk page, click the “More” button on the right operation bar of the disk, select the drop-down menu “Modify Drive” menu item to bring up the Modify Disk Drive dialog box.
- Modify the following parameters.
- Cache mode: Set the cache mode of the disk, including none, writethrough, writeback, etc.
- none: i.e. direct access to the host disk.
- writethrough: without using any cache, operate the disk write directly, and only the data is written to the disk will return success. Although data consistency is maintained, the write speed is slow in this mode because the disk is slow to write, but the read speed is high. There is no need to swipe the disk.
- writeback: Writing data to the host page cache returns write success. The page cache then merges the data to write the disk. The virtual machine disk controller is also aware that back cache is used, so to keep the data consistent (new data on the virtual machine side, old data on the disk side), the virtual machine sends a writeback (forcing the data in the cache to persist to disk.) when needed. command.
- Disk driver: Set the disk driver, including vitro, ide, scsi, pvscsi.
- Cache mode: Set the cache mode of the disk, including none, writethrough, writeback, etc.
- Click the “OK” button to complete the operation.
Change Project
This function is used to change the entries of unmounted discs.
- On the disk page, click the “More” button on the right action bar of the disk and select the drop-down menu “Change project” menu item to bring up the Change project dialog.
- Select the domain and project, and click the “OK” button.
Sync Status
This function is used to get the current status of the disk.
Sync Status.
- On the disks page, click the “More” button on the right action bar of the disks and select the drop-down menu “Sync Status” menu item to synchronize the disks status.
Batch Sync Status
- Select one or more disks in the disklist, click the “Batch Action” button at the top of the list, and select the drop-down menu “Sync Status” menu item to synchronize the diskstatus.
Delete
Supports individual and batch deletion of disks, when the disk is not mounted.
Note
- Deletion is not allowed for drives on the OpenStack platform and when snapshots exist for Ceph disks.
- Deletion is not supported for prepaid package type drives.
- AliCloud, Tencent Cloud, Huawei Cloud, AWS, Azure, Google, Zstack, Dstack, OpenStack, {{oem_name>}} and other platforms support deleting snapshots when deleting disks at the same time.
- Huawei Cloud deletes snapshots of disks when they are deleted.
OneCloud platform deletes the snapshot of a disk when deleting a Ceph disk.
delete
- On the disk page, click the “More” button in the action bar on the right side of the disk, select the drop-down menu “Delete” menu item to bring up the action confirmation dialog.
- Support to check Delete Snapshot, click “OK” button to finish the operation.
Batch delete
- Select one or more disks in the list of disks, click the “Delete” button at the top of the list to bring up the operation confirmation dialog.
- Support to check Delete Snapshot, click “OK” button to finish the operation.
View disk details
This function is used to view the details of the disk, the snapshot information created by the disk, and the log information.
- Click the diskname item to enter the diskdetails page.
- The menu item at the top of the details page supports managing disks.
- View the Cloud ID, ID, name, status, domain, project, platform, billing method, capacity, disk type, whether to mount, format, media type, server (name and status), storage, snapshot policy, region, zone, cloud account, created at, updated at, notes, etc. of the disk.
Snapshot Management
This feature is used to manage snapshot information on the disk, etc.
Rollback of disks
This feature is used to roll back a server’s disk to the state it was in when the snapshot was created. Before rolling back a disk, you need to make sure that the server associated with the disk is shut down.
- Click the diskname item to enter the diskdetails page.
- Click the Snapshot tab to go to the Snapshot page.
- Click the “Rollback Drive” button in the action bar on the right side of the snapshot to bring up the Rollback Diskdialog box.
- Click the “OK” button to roll back the diskto the snapshot moment.
Sync Status
This function is used to get the current status of the disksnapshot.
Sync Status.
- Click the diskname item to enter the diskdetails page.
- Click the Snapshot tab to enter the Snapshot page.
- Click the “Sync Status” button on the right column of the disksnapshot to synchronize the status of the disksnapshot.
Batch Sync Status
- Click the diskname item to enter the diskdetails page.
- Click the Snapshot tab to enter the Snapshot page.
- Select one or more disk snapshots in the Snapshot list and click the “Sync Status” button at the top of the list to synchronize the status in batch.
Delete
This function is used to delete a disk snapshot.
Delete
- Click the diskname item to enter the diskdetails page.
- Click the Snapshot tab to enter the Snapshot page.
- Click the “Delete” button in the action bar on the right side of the snapshot to bring up the action confirmation dialog.
- Click the “OK” button to complete the operation.
Batch Delete
- Click the diskname item to enter the diskdetails page.
- Click the Snapshot tab to enter the Snapshot page.
- Select one or more snapshots in the Snapshot list, and click the “Delete” button at the top of the list to bring up the operation confirmation dialog.
- Click the “OK” button to complete the operation.
View Operation Log
This function is used to view the operation log information related to the disk.
- On the disks details page, click the Operation Log tab to enter the Operation Log page.
- Load More Logs: In the Operation Log page, the list shows 20 operation logs by default, if you want to view more operation logs, please click “Load More” button to get more log information.
- View Log Details: Click the “View” button on the right column of the operation log to view the log details. Copy details are supported.
- View logs of specified time period: If you want to view the operation logs of a certain time period, set the specific date in the start date and end date at the top right of the list to query the log information of the specified time period.
- Export logs: Currently, only the logs displayed on this page are supported to be exported. Click the upper-right corner of
 icon, set the export data column in the pop-up export data dialog, and click the “OK” button to export the logs.