Service components
Service components are used to extend the functionality of a Kubernetes cluster.
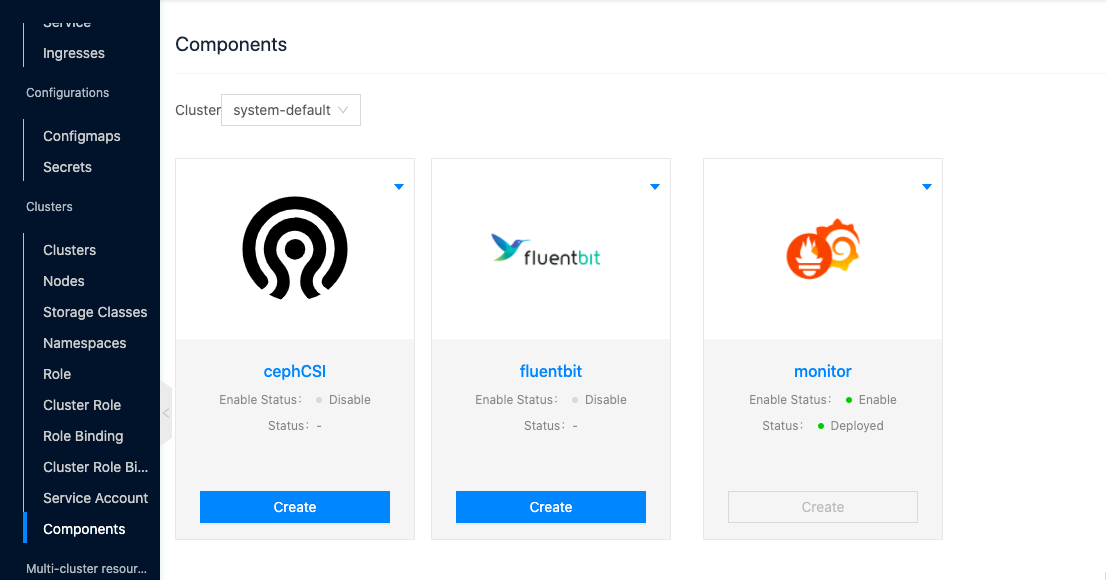
Only the following three components are currently supported.
- Ceph CSI: CSI (Container Storage Interface) is a storage interface that Kubernetes opens to the public. The CSI plugin enables the integration of Ceph storage into a Kubernetes cluster, enabling the persistence of container storage volumes.
- Fluentbit: Fluentbit is a lightweight log collection tool that collects log information of Kubernetes clusters through the Fluentbit plugin, etc.
- Monitor: Monitor is used to monitor the information of Kubernetes cluster, currently supports Grafana, Loki, Promethes, etc. to collect the monitoring information of Kubernetes cluster.
Entry: In the cloud management platform click the top left corner navigation menu, and click “Containers/Clusters/Service Components” menu item in the left menu bar that pops up to enter the Service Components page.
Create Service Component
Create Ceph CSI
This function is used to interface to Ceph storage via the Ceph CSI component. It can later be used to create ceph storage classes.
- On the Service Components page, click the “Create” button of the Ceph CSI module to enter the Create Ceph CSI page.
- Configure the following parameters: To support adding multiple Ceph clusters, click the “Add” button to configure multiple ceph clusters.
- Cluster Name: The name of the Ceph cluster.
- Mon Hosts: Set the ceph storage monitor address in the format of “IP address:6789”. Specify to add multiple Mon Hosts, click “Add Mon Host Address” button to add multiple addresses.
- Click the “Create” button to complete the operation.
Create Fluentbit
This feature is used to collect Kubernetes cluster log information through the Fluentbit plugin.
- On the Service Components page, click the “Create” button of the Fluentbit module to enter the Create Fluentbit page.
- Configure the following parameters.
- Enable Elasticsearch: Select whether to collect logs to Elasticsearch. the following parameters need to be configured after enabling.
- Elasticsearch index name: Elasticsearch index name. The act of storing data in Elasticsearch is called indexing (indexing).
- Elasticsearch cluster connection address: Set the connection address of Elasticsearch cluster.
- Port: Set the port of the Elasticsearch cluster.
- Type: the type of Document, default is flb_type.
- Enable kafka: choose whether to collect logs to kafka or not, after enabling, you need to configure the following parameters.
- kafka broker address: set the address of kafka broker
- topics: different categories of feeds of messages (feeds of messages) for Kafka processing resources.
- Enable Elasticsearch: Select whether to collect logs to Elasticsearch. the following parameters need to be configured after enabling.
- Click the “OK” button to complete the operation.
Create Monitor
This feature is used to monitor Kubernetes cluster resources through the Monitor plugin.
- On the Service Components page, click the “Create” button of the Monitor module to enter the Create Monitor page.
- Configure the following parameters.
- Grafana login user name: The Grafana login user name.
- Grafana login password: Grafana’s user login password.
- Grafana-Whether to enable persistent storage: Whether to enable persistent storage to save Grafana data. When enabled, configure the following parameters.
- Storage Size: Set the size of the storage capacity.
- Storageclass name: Set the storage class to be used.
- Loki - enable or disable persistent storage: enable or disable persistent storage to save Loki data, configure the following parameters when enabled.
- Storage size: set the size of the storage capacity.
- Storageclass name: Set the storage class to be used.
- Prometheus - whether to enable persistent storage: whether to enable persistent storage to save Prometheus data, configure the following parameters when enabled.
- Storage size: Set the size of the storage capacity.
- Storageclass name: Set the storage class to be used.
- Click the “OK” button to complete the operation.
Update the component configuration
When the component configuration is completed, you can update the configuration information through the Update function.
- On the Service Components page, click the top right corner of the deployed component module
 button and select the drop-down menu “Update” menu item to enter the update page.
 - Update the component configuration information and click the “OK” button.
Enabling Components
This function is used to enable the deployed components.
- On the Service Components page, click on the top right corner of the deployed component module with the “Disabled” status button and select the drop-down menu “Enable” menu item to enable the component.
Disable Components
This function is used to disable deployed components.
On the Service Components page, click the top right corner of the component module that is “deployed” and “enabled” button and select the drop-down menu “Disable” menu item to disable the component.
Delete Component
This function is used to delete the component configuration information.
- On the Service Components page, click on the top right corner of the component module in the “Deployed” status button and select the drop-down menu “Delete” menu item to bring up the action confirmation dialog.
- Click the “OK” button to delete the configuration information.